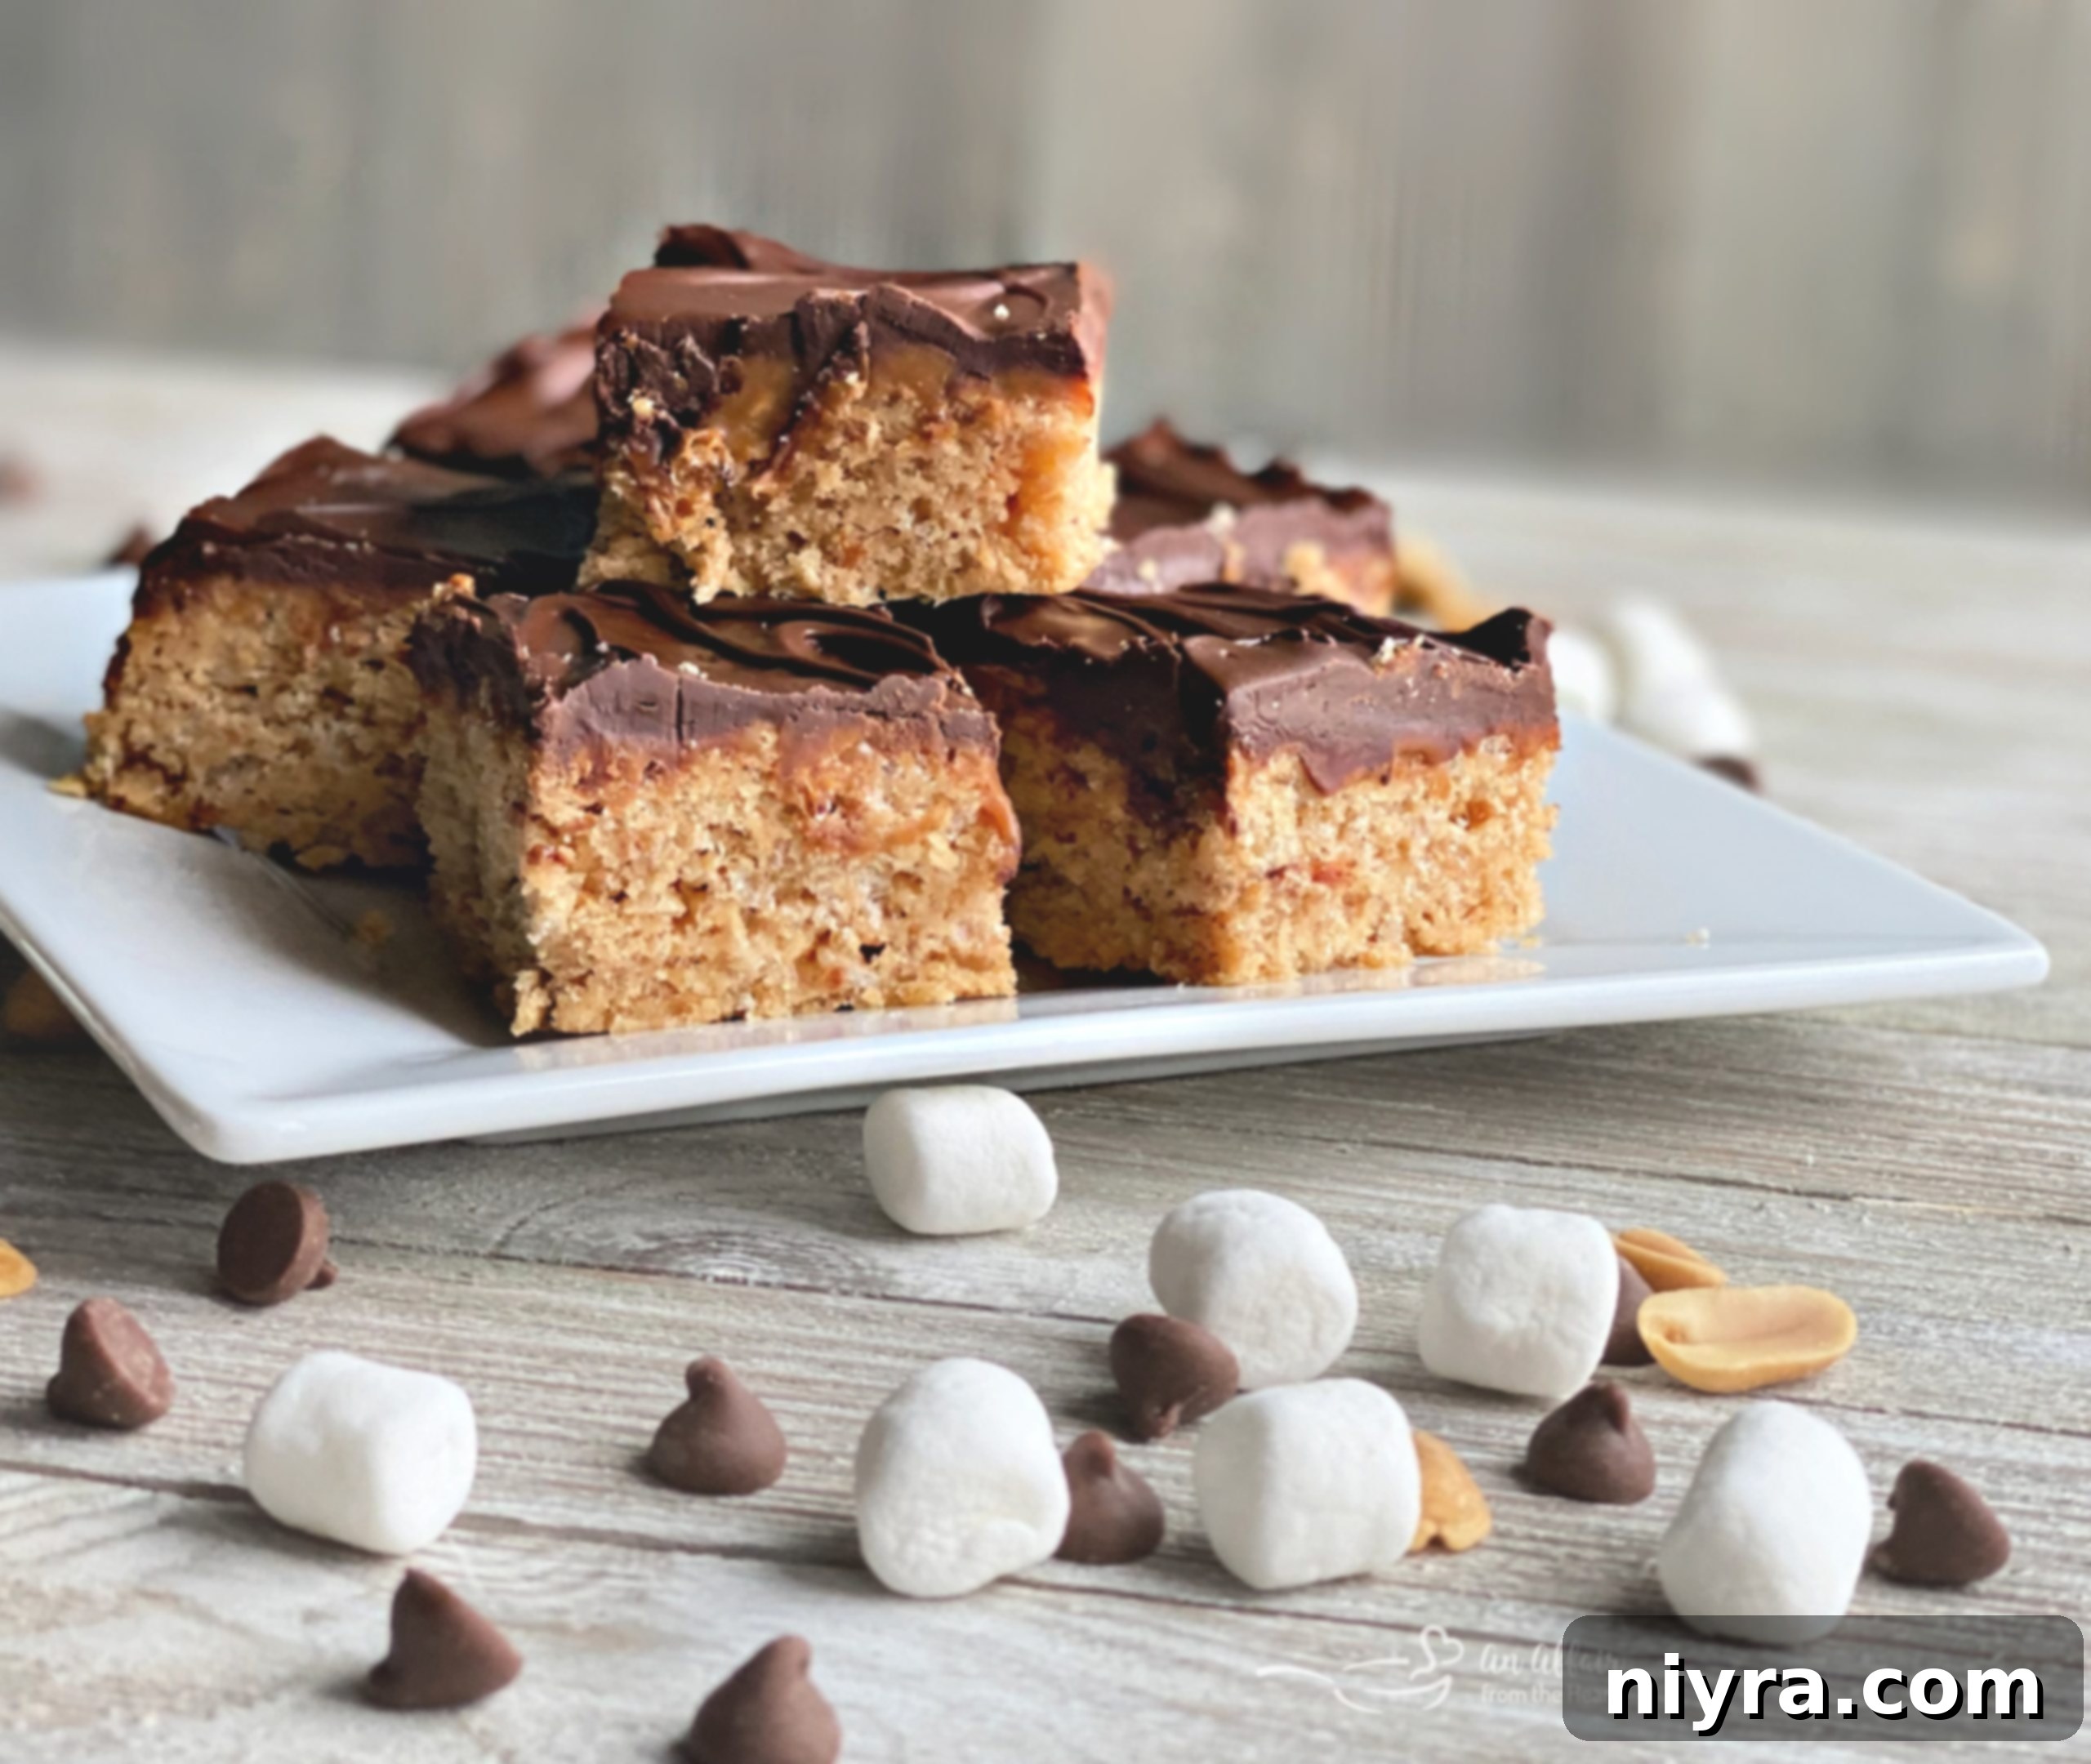
Prepare to be amazed by these Homemade Whatchamacallit Bars! Featuring a delightful marshmallow peanut butter Rice Krispy base, generously topped with a rich caramel layer, and finished with a smooth blanket of melted chocolate chips. This irresistible treat is so good, you’ll want to hide a batch just for yourself before they vanish!
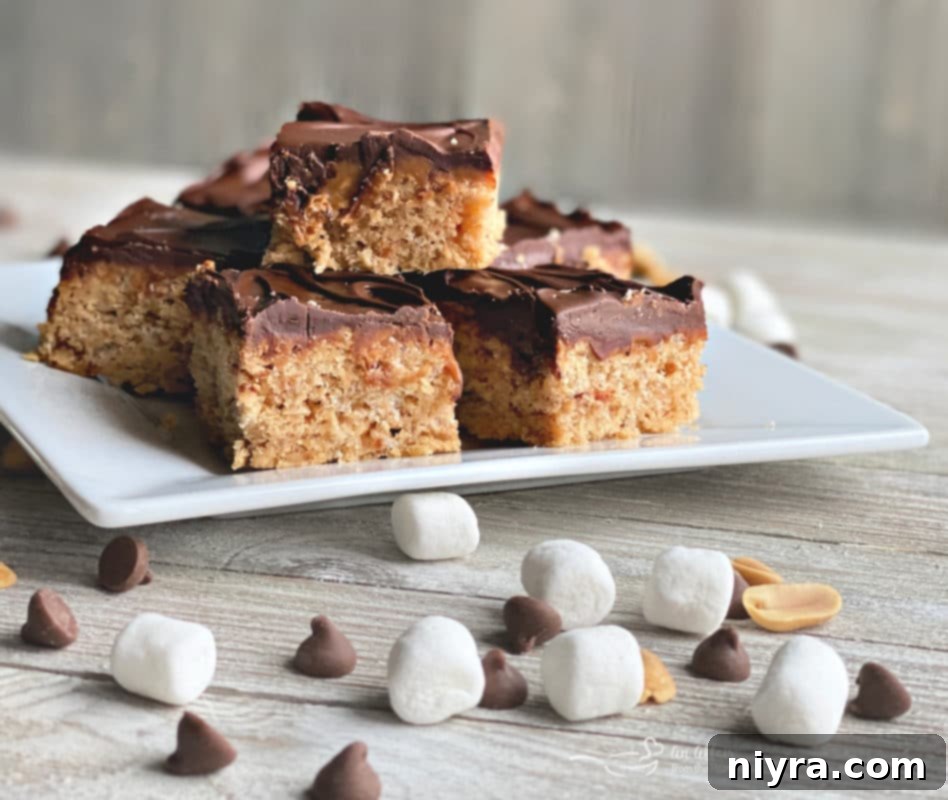
Unraveling the Mystery: The Whatchamacallit Candy Bar Story
The Whatchamacallit candy bar has a fascinating origin story. Originally launched by the iconic American chocolatiers, Hershey’s, in 1978, it quickly carved out a niche in the candy world. Its initial composition featured a unique combination of crispy peanut-flavored crisps and a layer of chocolate. The distinct name itself, “Whatchamacallit,” is quite memorable, hinting at a playful approach to branding that has undoubtedly contributed to its lasting appeal.
One can only imagine the brainstorming sessions that led to such an unconventional name. Perhaps the creative team was searching for a moniker that evoked a sense of mystery or simply embraced the colloquial charm of calling something a “whatchamacallit” when its exact name escapes you. Regardless of its exact inspiration, the name proved to be a stroke of marketing genius, making the bar stand out in a crowded market and ensuring it was a topic of conversation.
My homemade version of this beloved classic aims to capture all the nostalgic flavors and textures, offering an elevated, yet simple-to-make, experience right in your kitchen. It’s a tribute to a candy bar that has delighted generations with its unique blend of crispy, chewy, and chocolatey goodness.
SOME OF THE ITEMS BELOW CONTAIN AFFILIATE LINKS; I AM A PARTICIPANT IN THE AMAZON SERVICES LLC ASSOCIATES PROGRAM, AN AFFILIATE ADVERTISING PROGRAM DESIGNED TO PROVIDE A MEANS FOR US TO EARN FEES BY LINKING TO AMAZON.COM AND AFFILIATED SITES. I AM ALSO AN AFFILIATE FOR OTHER BRANDS. HOWEVER, I ONLY PROMOTE THINGS THAT I LOVE AND THINK YOU WILL LOVE, TOO. FOR MY ENTIRE DISCLOSURE POLICY PLEASE CLICK HERE.
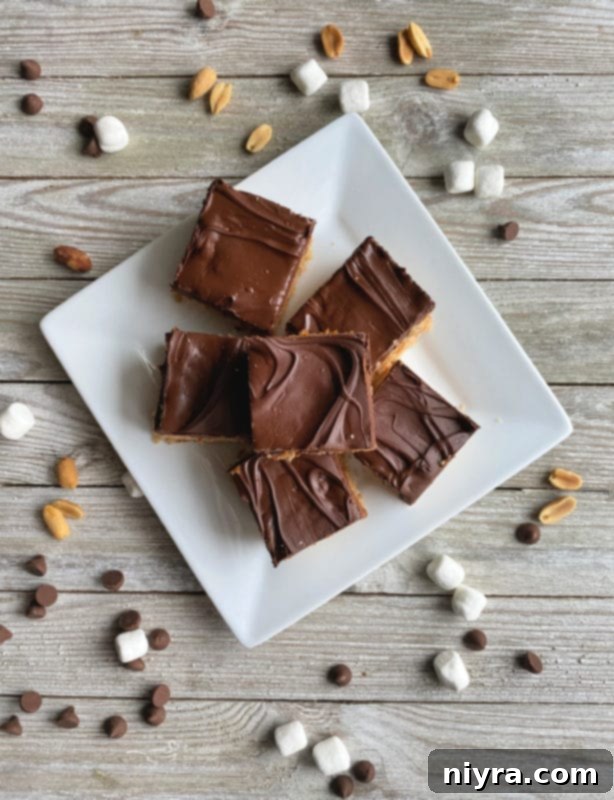
Crafting the Ultimate Homemade Whatchamacallit Bars
The original Whatchamacallit candy bar, when it first appeared in 1978, was simpler than the version we know today. It lacked the smooth, chewy caramel layer that has become a signature element. Hershey’s thoughtfully added this delightful caramel in 1987, enhancing the bar’s texture and flavor profile significantly. It was a change that transformed the candy bar from good to utterly extraordinary, adding a layer of sophisticated sweetness and chewiness that perfectly complements the crispy base.
My homemade Whatchamacallit bars pay homage to this evolution, taking the beloved, timeless classic – the Rice Krispy Treat – and elevating it with the addition of that crucial caramel layer. We start with a rich, marshmallow-infused peanut butter Rice Krispy base, building a foundation of crispy, gooey goodness. Over this, a generous layer of luscious caramel is spread, followed by a smooth, glossy topping of melted chocolate. The waiting period as everything cools and sets is arguably the hardest part, as the temptation to dive in immediately is immense! Each bite delivers a symphony of textures and flavors: the crunch of the cereal, the creamy peanut butter, the chewy caramel, and the decadent chocolate, all harmonizing beautifully.
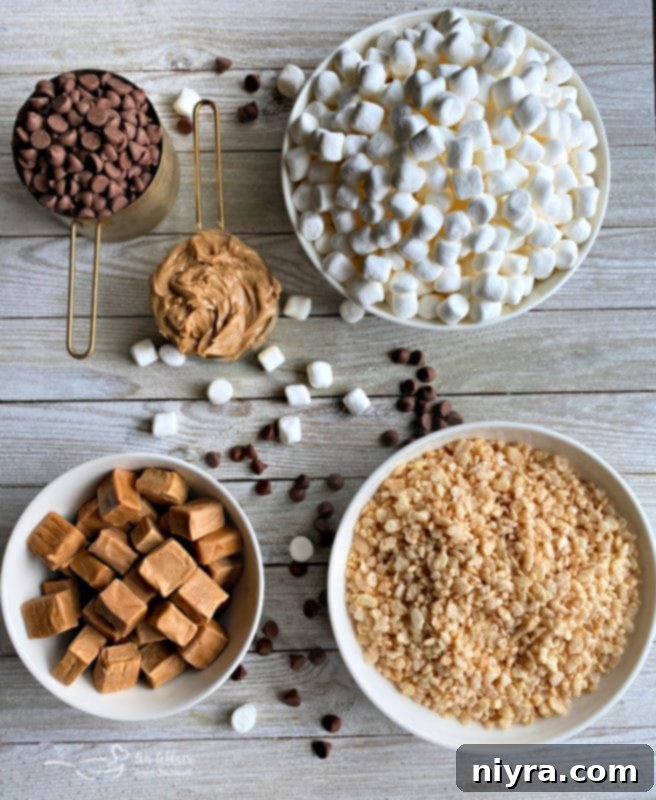
The Enduring Appeal of Rice Krispies
When it comes to puffed rice cereal, Rice Krispies by Kellogg’s remains the gold standard. While generic brands offer alternatives, Kellogg’s original creation, dating back to the 1920s, set the benchmark. The process of making Rice Krispies is quite ingenious: a paste of rice and sugar is formed, then rolled into small, rice-shaped kernels. These kernels are then meticulously dried and toasted, causing them to puff up and become delightfully porous. This unique structure is what gives them their iconic “snap, crackle, and pop” sound when milk is added, creating a playful and engaging breakfast experience that has charmed generations.
However, the story of Rice Krispies doesn’t end at the breakfast table. Its versatility was truly unlocked with the invention of Rice Krispy Treats. This simple yet brilliant combination transformed the cereal into a foundational ingredient for countless desserts, making it a staple in pantries worldwide for more than just morning meals. The transition from cereal bowl to dessert bar cemented Rice Krispies’ place in culinary history, proving that sometimes, the simplest ingredients can lead to the most extraordinary creations.
The Magic of Rice Krispy Treats
The person who first combined melted marshmallows with puffed rice created a true masterpiece of snacking innovation. Rice Krispy Treats are more than just a dessert; they are a cherished memory for many, evoking images of childhood kitchens, sticky fingers, and joyful baking sessions. It’s a rare parent who hasn’t, at some point, enjoyed the simple pleasure of making these delightful bars with their children. The process is incredibly easy, making it an ideal activity for aspiring young bakers and a fun way to spend quality time together.
What makes Rice Krispy Treats so special is their endless potential for creativity. From adding sprinkles and food coloring to incorporating different candies or flavorings, there are virtually limitless ways to customize them. If you’ve yet to experience the joy of making these at home, perhaps crafting a batch of these Whatchamacallit-inspired treats is the perfect introduction to the wonderful world of homemade Rice Krispy desserts. It’s a guaranteed crowd-pleaser and a fantastic way to unleash your inner baker.
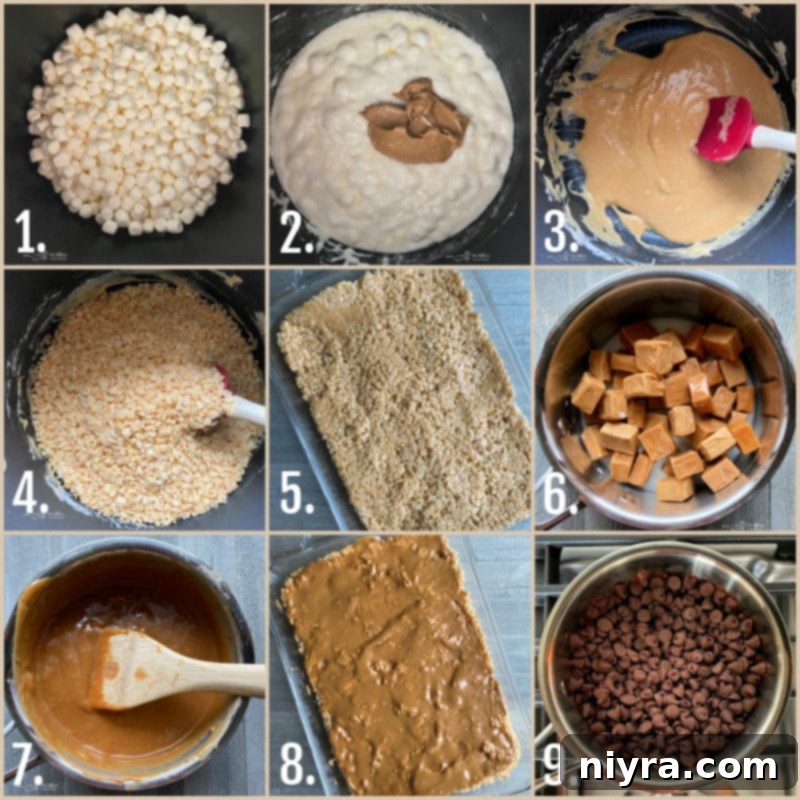
Easy Steps to Making Irresistible Whatchamacallit Bars at Home
Creating these delectable Whatchamacallit Bars is a straightforward process that yields incredibly rewarding results. Follow these steps for a homemade treat that rivals any store-bought candy bar:
- First, prepare your baking dish. Lightly butter a 9×13 baking dish or spray it thoroughly with non-stick cooking spray to ensure your bars don’t stick. Set it aside.
- In a large saucepan, melt 1/4 cup of butter over medium heat. Once fully melted, add the entire 10-ounce package of marshmallows. Stir continuously until the marshmallows are completely melted and smooth, forming a gooey mixture.
- Reduce the heat to low, then incorporate 1/2 cup of creamy peanut butter into the melted marshmallow mixture. Continue to stir constantly for 3 minutes to ensure the peanut butter is thoroughly combined and cooked into the marshmallows, enhancing the flavor and texture of your base.
- Remove the saucepan from the heat. Gently fold in 6 cups of Rice Krispies cereal. Stir until the cereal is evenly coated with the marshmallow-peanut butter mixture. Immediately press this mixture evenly into the bottom of your prepared 9×13 baking dish, forming a firm, uniform base.
- For the caramel layer, in a separate saucepan over medium heat, combine 11 ounces of caramels (either unwrapped candies or caramel bits) with 2 tablespoons of milk. Stir frequently until the caramels are completely melted and the mixture is smooth and creamy.
- Carefully pour the warm, melted caramel over the Rice Krispy base, using an offset spatula or the back of a spoon to spread it evenly from edge to edge.
- Next, prepare your chocolate topping. In a clean saucepan over low heat, melt 1 1/4 cups of chocolate chips (milk chocolate or semi-sweet work beautifully). Stir constantly until the chocolate is smooth and glossy.
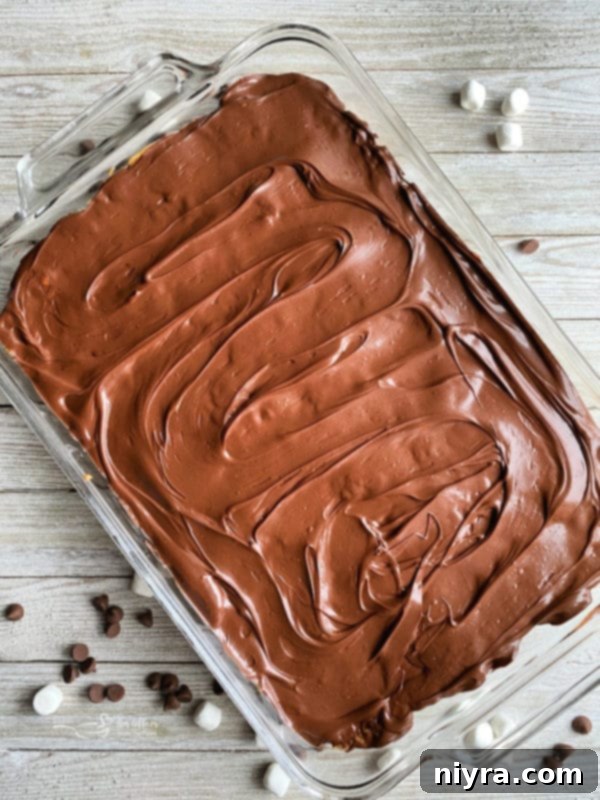
Finally, “frost” the bars by spreading the melted chocolate evenly over the caramel layer. Once the chocolate is applied, place the entire dish in the refrigerator for about 30 minutes to allow the chocolate to firm up and set properly. This chilling step is crucial for clean, easy slicing. Once set, retrieve the bars from the fridge, cut them into squares, and prepare to enjoy your incredible homemade Whatchamacallit Bars!

Adore These Bars? Pin This Recipe for Later!
If you’ve fallen in love with the idea of making these irresistible Whatchamacallit Bars, don’t let this recipe slip away! Make sure to pin it to your favorite Pinterest board. That way, you’ll always have quick access to this fantastic homemade Whatchamacallit Bar recipe whenever a craving strikes or you want to impress friends and family. It would truly be a shame to lose such a delightful creation!
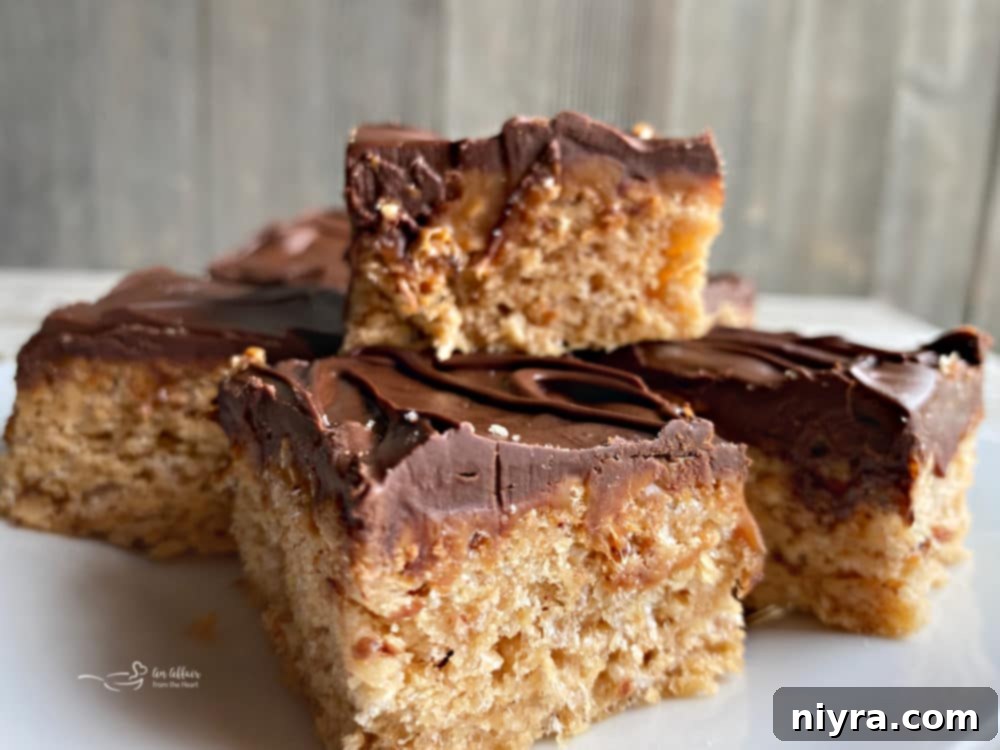
Choosing the Best Chocolate for Your Whatchamacallit Bars
The choice of chocolate morsels for your Whatchamacallit Bar topping is entirely up to your personal preference, as each type offers a unique flavor profile. Whether you lean towards the intense richness of bittersweet, the balanced sweetness of dark chocolate, or the creamy comfort of milk chocolate, any variety can work wonderfully to crown these bars. The key is to select a quality chocolate that melts smoothly and sets nicely.
For those aiming to replicate the authentic taste of a Hershey’s Whatchamacallit bar, opting for Hershey’s Chocolate Chips is an excellent choice. Their distinct flavor brings a familiar touch to the homemade version. While typically readily available in most baking aisles, recent times have highlighted how quickly popular baking ingredients can disappear from shelves. I personally used what I had on hand for my bars, which happened to be semi-sweet chocolate chips, and I must confess, semi-sweet remains my favorite for its ideal balance of sweetness and cocoa intensity!
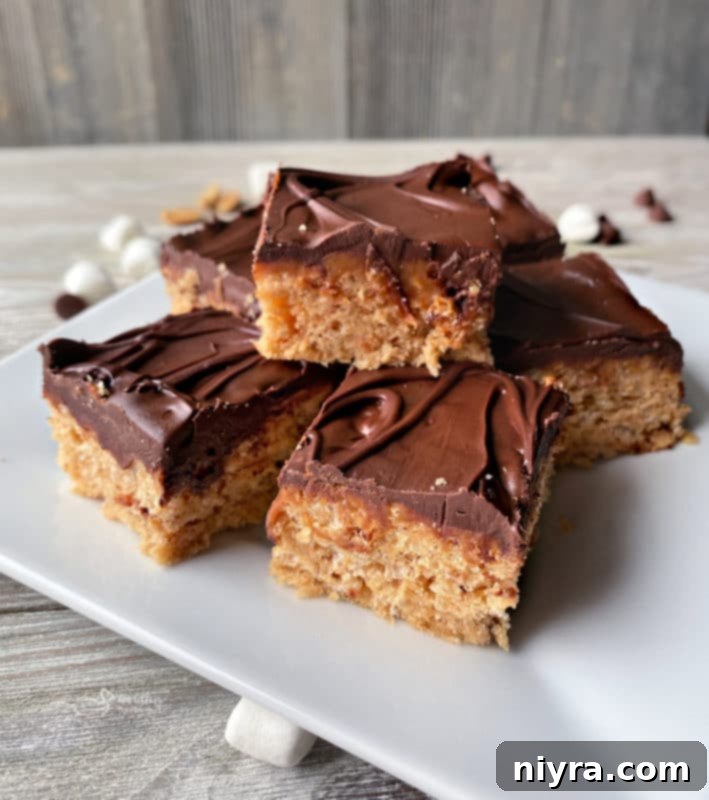
Understanding the Differences in Chocolate Types
The world of chocolate is rich and varied, offering an array of flavors and textures depending on its composition. You’ll find dark, semi-sweet, bittersweet, milk, and even white chocolate. But what exactly distinguishes them?
Semi-sweet and bittersweet chocolate are both categories of dark chocolate, with their primary difference lying in the ratio of cacao solids to sugar. Bittersweet chocolate contains a higher percentage of cacao solids and less sugar, resulting in a more intense, less sweet flavor. Semi-sweet chocolate, on the other hand, has a slightly lower cacao content and a bit more sugar, offering a balanced taste that’s widely popular in baking. While often associated solely with cacao, all dark chocolates contain some milk, though not in quantities sufficient to classify them as milk chocolate.
Milk chocolate is characterized by its lower cacao content, higher sugar levels, and a significantly larger proportion of milk solids, which give it its signature creamy texture and sweeter, milder flavor. It’s often the preferred choice for those who enjoy a less intense chocolate experience.
White chocolate, interestingly, is not technically considered true chocolate. For a product to be classified as chocolate, it must contain cocoa solids. White chocolate is made from cocoa butter, which is the fat separated from the cacao bean during processing. It contains no cocoa solids, hence why it’s technically a cocoa fat confection rather than “chocolate” in the traditional sense. Despite this technicality, white chocolate offers a unique, creamy, and vanilla-like flavor that is cherished in many desserts.
More Delightful Candy Bar Inspired Recipes to Explore
If you’re a fan of these homemade Whatchamacallit Bars and the magic of transforming classic candy bars into homemade treats, you’re in for a treat! Over the years, I’ve gathered and created a wonderful collection of recipes inspired by, or featuring, beloved candy bars. These recipes bring the joy of your favorite confections right into your kitchen, offering a fun and delicious way to enjoy familiar flavors in new forms. I’m excited to share some of my top picks with you:
- Homemade Twix Bars: Recreate the iconic shortbread, caramel, and chocolate layers from scratch.
- Salted Nutroll Bars: A delightful blend of sweet and salty, reminiscent of a classic candy bar.
- Almond Joy Brownie Bites: Mini brownies topped with the tropical flavors of coconut and almond, enveloped in chocolate.
- Snickers Apple Salad: A surprisingly delicious and refreshing salad that combines crisp apples with the indulgence of Snickers.
- York Peppermint Patty Fudge: A cool and minty chocolate fudge that captures the essence of the classic peppermint patty.
- Kit Kat Cake: A festive cake surrounded by Kit Kat bars, perfect for celebrations.
- Snickers Dip (pictured above): A creamy, sweet dip loaded with Snickers pieces, ideal for fruit or cookies.
- Candy Bar Fudge: A rich fudge base studded with various chopped candy bars, offering a delightful surprise in every bite.
- Almond Joy Cheeseball: A sweet and creamy cheeseball that evokes the flavors of Almond Joy, perfect for dessert spreads.
- Twix Dip: All the flavors of a Twix bar transformed into a dippable, shareable treat.
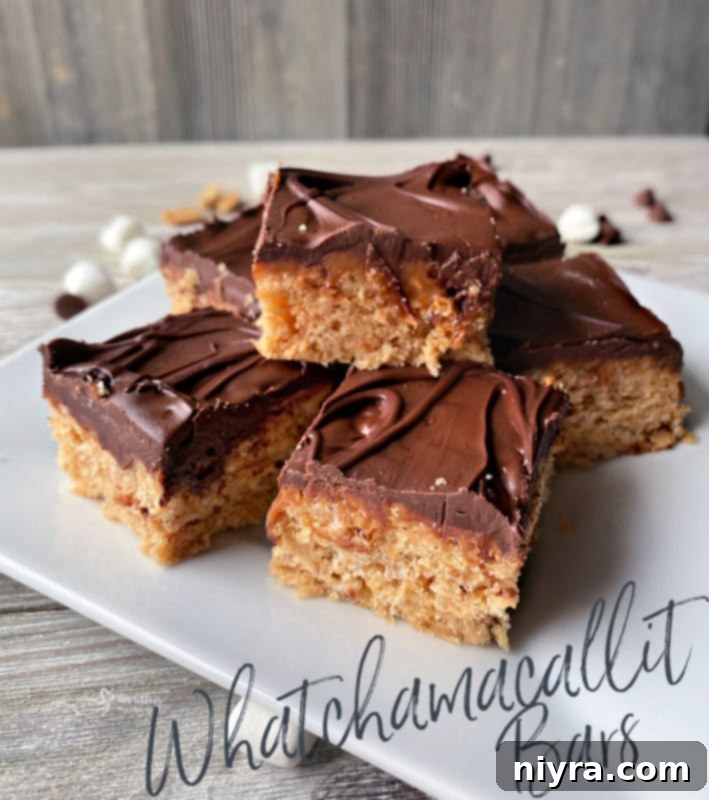
Now that you have all the tips and tricks, it’s time to get to the recipe details so you can sink your teeth into one (or three!) of these phenomenal Whatchamacallit Bars! Happy baking!

LIKE THIS RECIPE?
Don’t forget to give it a ⭐️⭐️⭐️⭐️⭐️ star rating and
leave a comment below the recipe!

Average Rating: 4.61 from 48 votes
Print Recipe
Whatchamacallit Bar Recipe
Prep Time: 20 mins
Additional Time: 30 mins
Total Time: 50 mins
Course: Bars
Cuisine: American
Keyword: bars, candy bar, caramel, chocolate, homemade, homemade whatchamacallit candy bar recipe, how to make whatchamacallits at home, peanut butter, rice krispies, whatchamacallit
Servings: 9×13 pan
Calories: 204kcal
Author: Michaela Kenkel
Equipment
- 9×13 Pyrex Baking Dish with a Lid
Ingredients
- 1/4 cup butter
- 1 10 ounce package of marshmallows
- 1/2 cup creamy peanut butter
- 6 cups Rice Krispies cereal
- 11 ounces caramels
- 2 Tablespoons milk
- 1 1/4 cup chocolate chips (milk chocolate or semi-sweet are fine)
Instructions
- Butter a 9×13 baking dish, or spray with non-stick cooking spray. Set aside.
- In a large saucepan over medium heat, melt butter. Add in marshmallows and stir into butter until melted.
- Reduce heat to low, and stir in peanut butter. Cook for 3 minutes, stirring constantly.
- Remove from heat, stir in Rice Krispies. Once incorporated and cereal is evenly covered, press evenly into the bottom of a prepared 9×13 baking dish.
- In a saucepan over medium heat, melt caramels and milk, stirring frequently, until smooth.
- Remove from heat and pour over Rice Krispy mixture, spreading evenly.
- In a saucepan over low heat, melt chocolate chips, stirring frequently until smooth.
- Spread over the top of the caramel. Refrigerate until chocolate is set. About 30 minutes.
- Cut into squares for serving.
Notes
I prefer to use the caramel bits in the baking aisle, but I didn’t have any this day. So I weighed out the same amount of caramel candies and it worked just fine. You may need to add a little bit more milk with the larger caramel candies while it’s melting.
Nutrition
Serving: 1 | Calories: 204kcal | Carbohydrates: 28g | Protein: 3g | Fat: 10g | Saturated Fat: 4g | Polyunsaturated Fat: 5g | Cholesterol: 7mg | Sodium: 133mg | Fiber: 1g | Sugar: 18g
