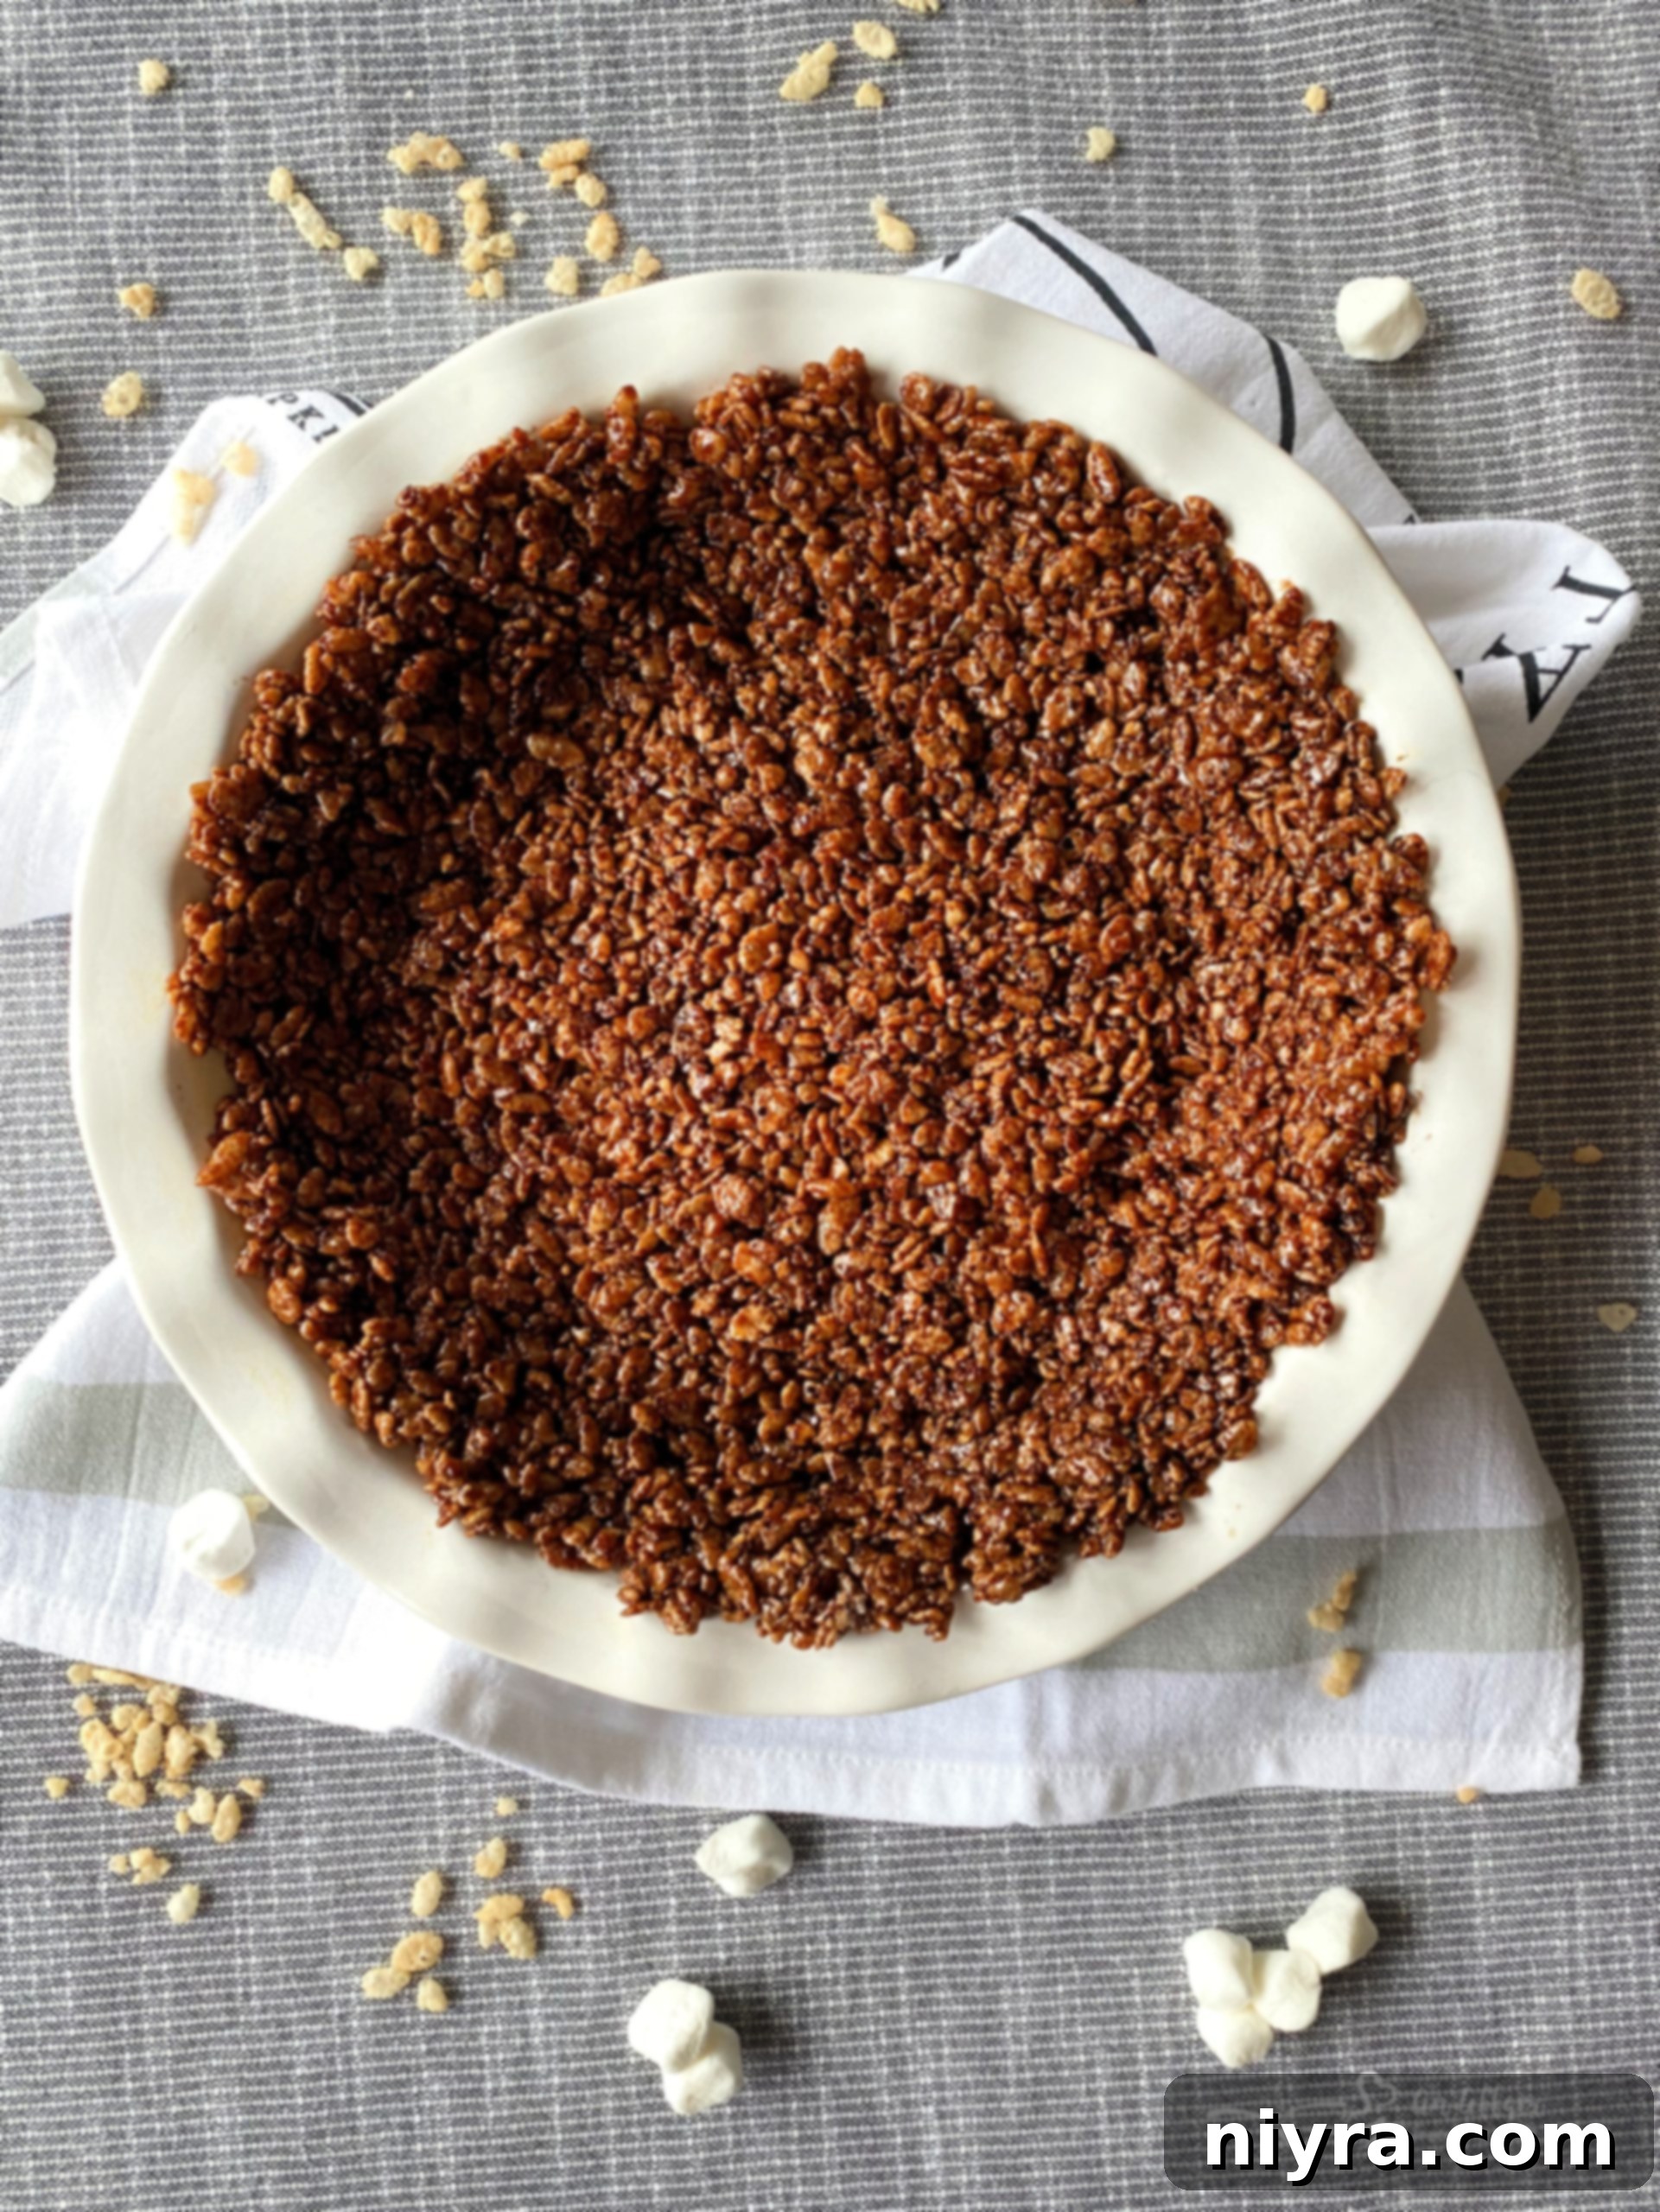
A Culinary Revelation: Effortless Chocolate Marshmallow Pie Crust for Unforgettable Desserts
Transform your dessert game with a recipe that’s as fun to make as it is to eat. This Chocolate Marshmallow Pie Crust is a true culinary gem, crafted from just four simple ingredients and ready in minutes. Its unique texture and rich chocolate flavor make it the perfect foundation for an amazing ice cream pie or any other creative filling you can dream up. Prepare to impress with a dessert that stands out from the crowd!
Discover the Magic of the No-Bake Chocolate Marshmallow Pie Crust
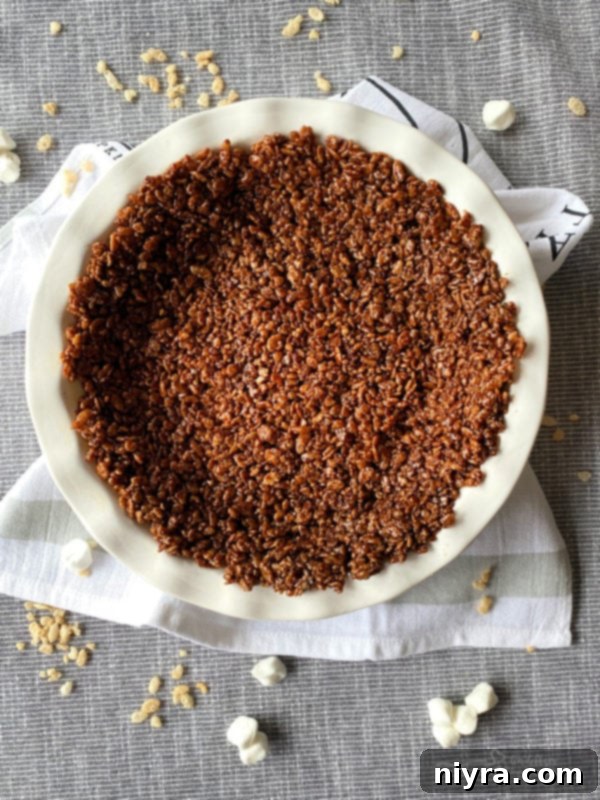
Every now and then, you stumble upon a recipe that feels like a hidden treasure. For me, that discovery came courtesy of a charming, vintage cookbook titled “Cooking with Love & Cereal,” a delightful find my friend Gail generously gifted me from a thrift store. Written in 1981, this book is a nostalgic journey through classic American home cooking, and the moment I laid eyes on the recipe for a Chocolate Marshmallow Pie Crust, I knew it had to be the first one I tried. It promised simplicity and whimsy, two qualities I adore in dessert making.
Upon first glance, many people assume this unique crust gets its chocolate flavor from Cocoa Krispies cereal. It’s a natural assumption, given the familiar combination of chocolate and crispy cereal. However, the true genius of this recipe lies elsewhere, in a beloved pantry staple that delivers an incredibly rich and authentic chocolate taste: Hershey’s Chocolate Syrup. This isn’t just any chocolate; it’s the specific flavor profile of that classic syrup that infuses every bite of this crust with a deep, satisfying cocoa essence.
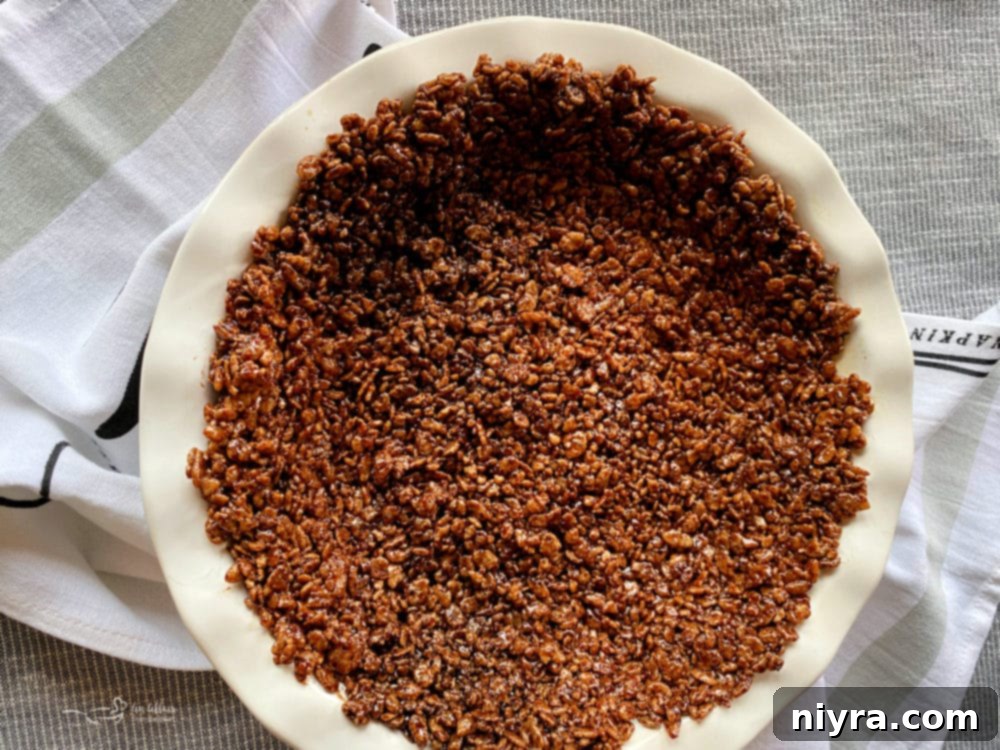
Imagine closing your eyes and savoring the sweet, familiar taste of chocolate syrup—that’s precisely the prominent flavor in this pie crust. Coupled with the delightful crunch and chewiness reminiscent of a homemade Rice Krispy treat, you get a dessert base that is both nostalgically comforting and wonderfully unique. It’s an unexpected twist that elevates a simple cereal crust into something truly special and incredibly addictive.
Why Choose a No-Bake Marshmallow Pie Crust?
In today’s fast-paced world, convenience is key, especially when it comes to preparing delicious treats. A no-bake pie crust offers numerous advantages. Firstly, it saves precious time in the kitchen, eliminating the need for preheating ovens or waiting for cooling down. This makes it an ideal option for busy weeknights, last-minute gatherings, or when you simply crave a quick sweet fix. Secondly, the simplicity of a no-bake crust means less hassle and fewer dishes, streamlining your cooking process. For those new to baking or even seasoned chefs looking for a stress-free option, this marshmallow-based crust is a dream come true. Lastly, the unique combination of melted marshmallows, butter, and cereal creates an incredibly stable and delicious foundation that doesn’t require baking to achieve its perfect texture. It sets beautifully in the freezer, providing a crisp yet chewy base that complements a wide array of fillings, especially cold ones like ice cream or mousse. This method also keeps your kitchen cool, a definite bonus during warmer months when heating up the oven is the last thing you want to do.
SOME OF THE ITEMS BELOW CONTAIN AFFILIATE LINKS; I AM A PARTICIPANT IN THE AMAZON SERVICES LLC ASSOCIATES PROGRAM, AN AFFILIATE ADVERTISING PROGRAM DESIGNED TO PROVIDE A MEANS FOR US TO EARN FEES BY LINKING TO AMAZON.COM AND AFFILIATED SITES. I AM ALSO AN AFFILIATE FOR OTHER BRANDS. HOWEVER, I ONLY PROMOTE THINGS THAT I LOVE AND THINK YOU WILL LOVE, TOO. FOR MY ENTIRE DISCLOSURE POLICY PLEASE CLICK HERE.
Essential Ingredients for Your Easy Chocolate Marshmallow Pie Crust
The beauty of this chocolate pie crust lies in its minimalism. You truly only need four basic ingredients to bring this delightful creation to life. Gather these simple items, and you’ll be well on your way to an extraordinary dessert that tastes far more complex than its ingredient list suggests.
The Power of Four: Simplicity Meets Deliciousness
- Butter: A small amount of butter is crucial for achieving that perfect chewy-yet-crispy texture, as well as preventing sticking and enhancing the overall richness of the crust. It helps the marshmallows melt smoothly and coats the cereal effectively.
- Miniature Marshmallows: These are the magical binder for our crust. When melted, they create a sticky, sweet matrix that holds the cereal together, giving the crust its characteristic chewiness and a hint of classic marshmallow sweetness. Miniature marshmallows melt faster and more evenly than their larger counterparts.
- Rice Krispies Cereal: The iconic crispy cereal provides the foundational crunch for this crust. Its light, airy texture becomes wonderfully chewy when coated in the marshmallow and chocolate mixture, making for an incredibly satisfying mouthfeel.
- Hershey’s Chocolate Syrup: This is the star of the show, delivering that unmistakable, rich chocolate flavor. Unlike cocoa powder or melted chocolate, the syrup integrates seamlessly with the marshmallows, creating a smooth, glossy coating and a distinct, sweet chocolate taste that truly sets this crust apart. Don’t underestimate its power to transform this simple crust into something gourmet!
Basic Kitchen Tools for a Flawless Creation
No special gadgets or elaborate equipment are needed to prepare this easy pie crust. You likely already have everything you need in your kitchen:
- A medium-sized saucepan: Essential for melting the butter, marshmallows, and chocolate syrup together over low heat.
- A 9-inch deep dish pie plate: This is where your crust will take its final form. A deep dish ensures ample space for your delicious fillings.
- A rubber spatula: Perfect for stirring the mixture smoothly and then pressing the warm crust evenly into the pie plate without sticking.
Step-by-Step Guide: Crafting Your Perfect Chocolate Marshmallow Pie Crust
Making this pie crust is incredibly straightforward, almost as easy as making traditional Rice Krispy treats, but with a chocolatey twist. Follow these simple steps for a perfect result every time.
- Prepare Your Pie Plate: First, ensure your 9-inch deep dish pie plate is lightly buttered. This crucial step helps prevent the crust from sticking and makes for easier serving later. Use a small amount of butter and spread it evenly across the bottom and up the sides of the plate.
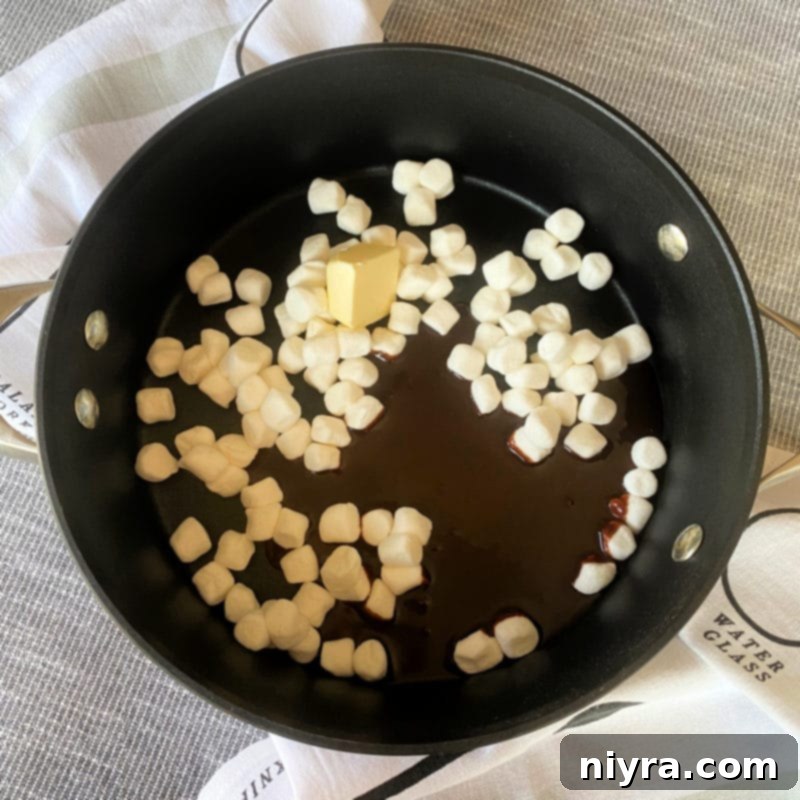
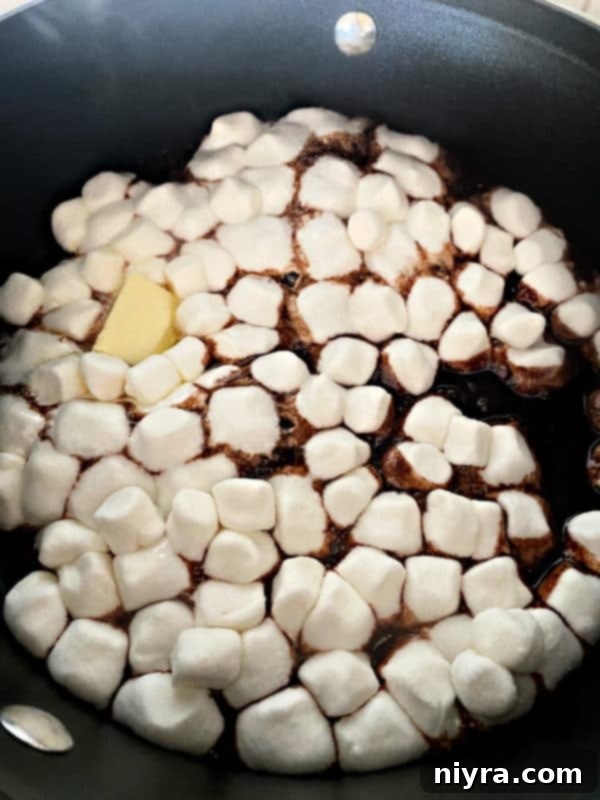
- Melt the Base: In a medium-sized saucepan, combine the miniature marshmallows, butter, and Hershey’s Chocolate Syrup. Place the saucepan over low heat.
- Stir Until Smooth: Continuously stir the mixture with your rubber spatula. The key here is low heat and frequent stirring to prevent scorching the marshmallows and ensure an even melt. Continue until the marshmallows and butter are fully melted and the entire mixture can be stirred smooth and glossy. This usually takes only a few minutes.
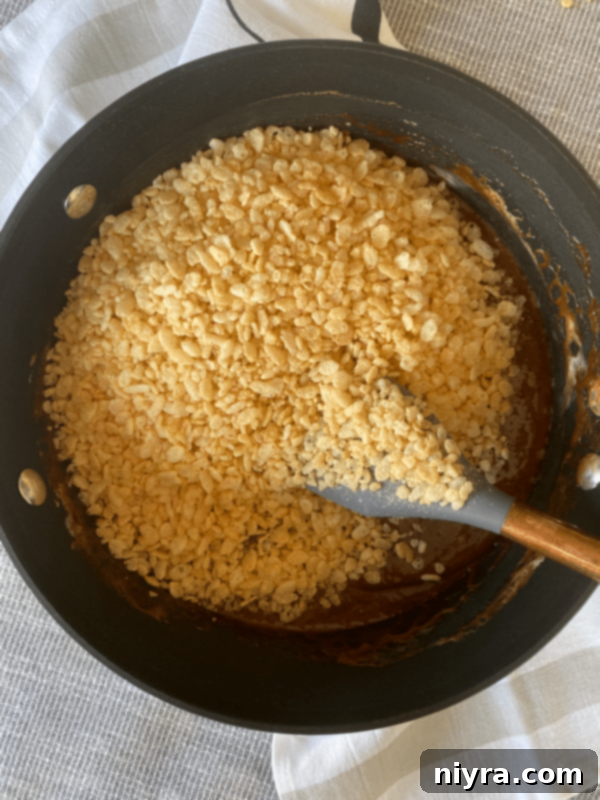
- Combine with Cereal: Once the marshmallow mixture is smooth, remove the saucepan from the heat immediately. Add the Rice Krispies Cereal to the saucepan.
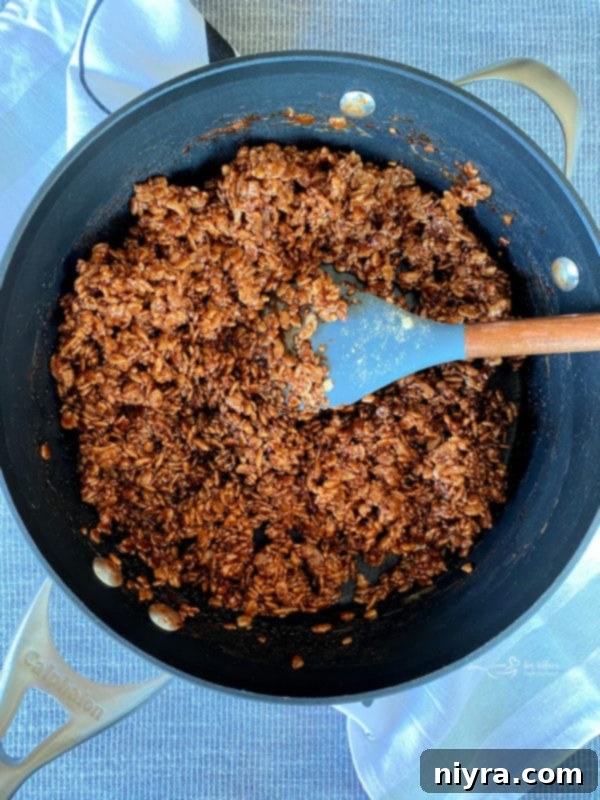
- Mix Thoroughly: Stir vigorously with your spatula until the cereal is completely coated with the chocolate marshmallow mixture. Work quickly but gently to ensure every piece is covered before the mixture starts to set.
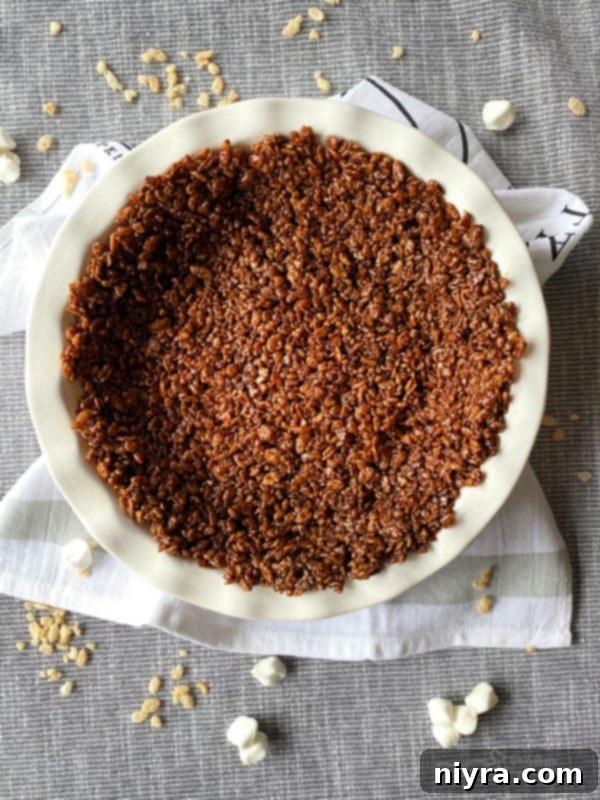
- Press into Pie Plate: Transfer the mixture to your buttered pie plate. If you wish to garnish your finished pie with a little extra crust, reserve about 1/4 cup of the mixture. Using the back of your spatula or your buttered fingertips, firmly and evenly press the remaining mixture into the bottom and up the sides of the pie plate to form the crust. Ensure it’s compact for a stable base.
- Chill to Set: Place the pie crust in the freezer for about 30 minutes. This chilling time is essential for the crust to firm up and become perfectly set, ready to hold your chosen filling.
- Fill and Freeze: Once the crust is firm, fill it with approximately 1 to 1.5 quarts of your favorite ice cream. For an extra touch, sprinkle the reserved crust mixture over the top. Return the filled pie to the freezer for at least 1.5 hours, or until the ice cream is firmly set.
- Serve with Style: Before slicing, let the pie rest on the counter for about 10 minutes. This slightly softens the ice cream, making it much easier to cut into perfect slices. Garnish with a drizzle of extra chocolate syrup, whipped cream, or fresh berries for an irresistible presentation.
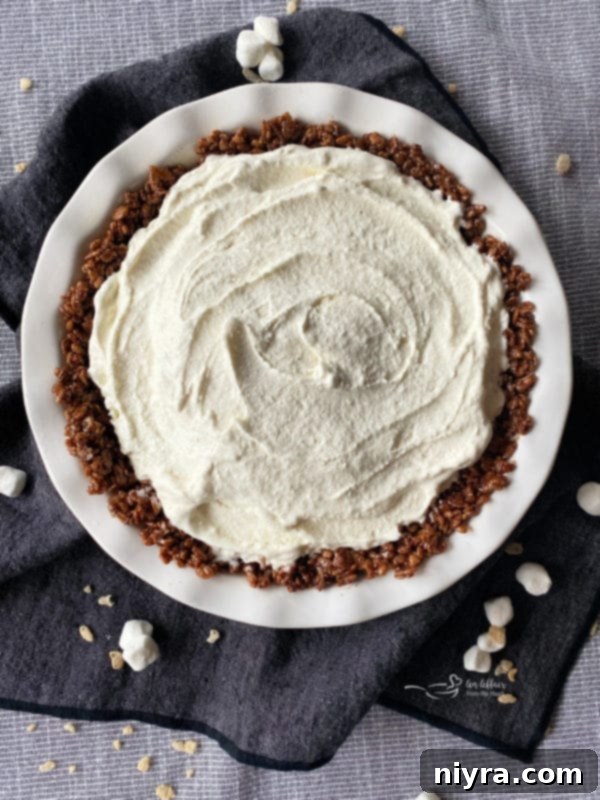
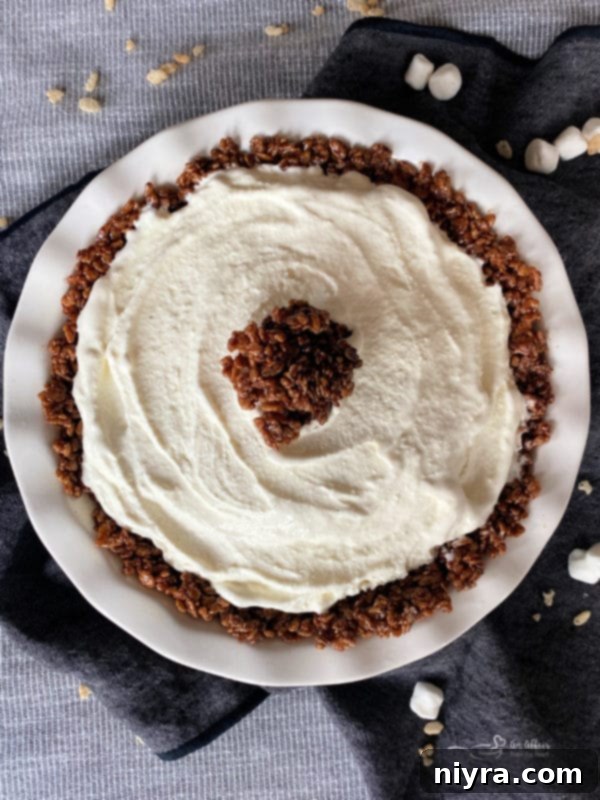
Unleash Your Creativity: Filling and Topping Your Marshmallow Cereal Crust
While this chocolate marshmallow crust is absolutely sublime with ice cream, its versatility extends far beyond. Its unique flavor and texture profile make it a fantastic base for a wide variety of desserts. Let your imagination run wild when it comes to fillings and garnishes!
Classic Pairings: The Ultimate Ice Cream Pie Experience
The simplest and perhaps most popular way to enjoy this crust is as an ice cream pie. The cold, creamy texture of ice cream creates a delightful contrast with the chewy, crispy crust. Vanilla bean ice cream is a timeless choice, allowing the rich chocolate flavor of the crust to shine through. However, don’t hesitate to experiment with your favorite flavors:
- Coffee Ice Cream: The bitterness of coffee beautifully complements the sweet chocolate.
- Mint Chocolate Chip: A refreshing and classic combination that works wonderfully with the chocolate crust.
- Peanut Butter Ice Cream: For a decadent treat, the salty-sweet combination is irresistible.
- Strawberry or Raspberry Swirl: The fruity notes provide a lovely counterpoint to the deep chocolate.
Beyond Ice Cream: Innovative Fillings to Explore
This no-bake marshmallow cereal crust can serve as the foundation for an array of chilled desserts:
- Chocolate Mousse: Create a double chocolate sensation by filling it with a light and airy chocolate mousse.
- No-Bake Cheesecakes: A creamy, tangy no-bake cheesecake filling would be spectacular against the sweet, crunchy base. Try a classic vanilla, or add a twist with a peanut butter or strawberry cheesecake filling.
- Puddings: Instant or homemade puddings like chocolate, butterscotch, or banana cream would be utterly delicious. Allow the pudding to set fully in the crust for easy slicing.
- Fruit & Cream Fillings: Layer with fresh berries and a light whipped cream or mascarpone filling for a refreshing summer dessert.
- Peanut Butter or Caramel Cream: A thick, luscious peanut butter or caramel cream filling would elevate this pie to an indulgent masterpiece.
Garnishing for Grandeur: Elevating Your Dessert
A well-garnished dessert not only looks more appealing but can also add extra layers of flavor and texture. For your Chocolate Marshmallow Pie, consider these garnishing ideas:
- More Chocolate Syrup: A simple drizzle of extra chocolate syrup over the top is always a welcome addition.
- Whipped Cream: A dollop or a generous swirl of freshly whipped cream can lighten the dessert and add a creamy contrast.
- Chocolate Shavings or Chips: Enhance the chocolate theme with a sprinkling of dark, milk, or white chocolate shavings.
- Miniature Marshmallows: A few extra mini marshmallows, perhaps lightly toasted, would tie into the crust’s theme.
- Fresh Berries: Strawberries, raspberries, or blueberries add a pop of color and a burst of freshness.
- Chopped Nuts: Pecans, walnuts, or peanuts can add an extra layer of crunch and nutty flavor.
- Caramel or Butterscotch Drizzle: For those who love a rich, sweet topping, a drizzle of caramel or butterscotch sauce works wonders.
Endless Flavor Adventures: Variations on Your No-Bake Pie Crust
The beauty of this marshmallow cereal crust recipe is its incredible adaptability. Just like the myriad of ice cream flavors available, this pie crust can be transformed with countless flavor twists. The secret? Simply switch up the syrup! By changing one ingredient, you unlock a universe of new dessert possibilities, creating a custom pie experience every time.
A Spectrum of Syrups: Transforming Your Marshmallow Crust
While Hershey’s Chocolate Syrup gives us our foundational recipe, imagining other flavored syrups opens up a world of culinary creativity. Consider these delicious alternatives:
- Caramel Syrup: A rich, buttery caramel syrup would create a golden-brown crust with a deep, sweet, and slightly salty flavor. This variation is pure indulgence and pairs well with many fillings.
- Butterscotch Syrup: For a nostalgic, old-fashioned flavor, butterscotch syrup offers a sweet, caramelized taste that is uniquely comforting.
- Strawberry Syrup: A vibrant strawberry syrup would infuse the crust with a fruity, sweet aroma and a lovely pink hue, making it perfect for spring and summer desserts.
- Raspberry Syrup: Similar to strawberry but with a tarter, more intense berry flavor, raspberry syrup creates a sophisticated and fruity crust.
- Peanut Butter Ice Cream Topping/Syrup: For the ultimate peanut butter lover, a peanut butter syrup would create an intensely nutty and creamy crust that’s utterly irresistible.
Each of these syrups gives the marshmallow pie crust a whole new taste profile, providing endless options for complementary ice cream or other delightful fillings. Imagine the possibilities for holiday baking, special occasions, or just a fun family treat!
Perfect Pairings: Matching Crusts with Fillings
My mind is already spinning with delicious combinations just talking about it! The original chocolate syrup version is fabulous with vanilla bean ice cream, but it would also be amazing filled with more adventurous options like my Grape Nut Ice Cream, a rich Cherry Chocolate Chip, or my creamy Vanilla Caramel Swirl.
Let’s explore some more exciting pairings with our flavored crusts:
- Strawberry Marshmallow Crust: This fruity base would be absolutely divine with bright and refreshing fillings such as Lemon Ice Cream or a luscious Peach Ice Cream. You could also fill it with a no-bake strawberry cheesecake for a double strawberry delight.
- Caramel Marshmallow Crust: The sweet, rich caramel crust pairs beautifully with a scoop of Almond Nougat Ice Cream or a warm and spicy Cinnamon Vanilla Bean. A coffee ice cream filling would also create an exquisite depth of flavor.
- Butterscotch Marshmallow Crust: This classic flavor profile demands something equally comforting. Try filling it with a seasonal No-Churn Pumpkin Ice Cream for autumn, or a classic vanilla pudding for a simple yet satisfying treat.
- Raspberry Marshmallow Crust: The tartness of raspberry is an excellent foil for rich, dark flavors. It would be utterly spectacular with a scoop of classic Chocolate Ice Cream, or even a white chocolate mousse. You could even use homemade raspberry sauce in the crust for an even bolder berry flavor.
- Peanut Butter Marshmallow Crust: This is a dream come true for peanut butter enthusiasts! It would be over-the-top delicious with Peanut Butter Fudge Ripple Ice Cream, or consider a rich chocolate ganache filling for a Reese’s-inspired pie.
The ideas are truly endless! This easy no-bake crust is a blank canvas for your dessert dreams, encouraging experimentation and delicious results every time.
Expert Tips for the Best Chocolate Marshmallow Pie Crust
While this recipe is incredibly simple, a few expert tips can ensure your Chocolate Marshmallow Pie Crust turns out perfectly every time, maximizing its flavor and texture and helping you troubleshoot common issues.
- Use Low Heat: When melting the marshmallows, butter, and chocolate syrup, keep the heat consistently low. High heat can burn the marshmallows, leading to a tough texture and an unpleasant taste. Patience is key here; a gentle melt ensures a smooth, pliable mixture.
- Stir Constantly: Frequent stirring prevents the mixture from sticking to the bottom of the saucepan and ensures that the ingredients melt and combine evenly. This creates a uniform base for your cereal.
- Act Quickly After Mixing: Once the cereal is added to the marshmallow mixture, work swiftly to press it into the pie plate. The mixture begins to set as it cools, so the faster you can get it into the desired shape, the easier it will be to achieve an even crust.
- Butter Your Hands or Spatula: If the mixture is too sticky to handle when pressing it into the pie plate, lightly butter your hands or the back of your spatula. This prevents sticking and allows you to create a smooth, compact crust.
- Don’t Over-Compress: While you want the crust to be firm, avoid pressing it down too hard. Over-compressing can make the crust overly dense and difficult to slice once frozen. Aim for a firm but not rock-hard consistency.
- Freezing Time is Crucial: The initial 30-minute freeze for the crust, followed by the 1.5-hour freeze once filled, is important for stability. Don’t rush these steps, as they ensure your pie is firm enough to slice cleanly.
- Serving Temperature: For the easiest slicing and best texture, allow the finished pie to sit at room temperature for about 10 minutes before cutting. This softens the ice cream slightly without compromising the crust’s integrity.
- Storage: Store any leftover pie, covered, in the freezer. It will remain delicious for up to 1-2 weeks. For longer storage, wrap individual slices tightly in plastic wrap before placing them in an airtight container.
- Make-Ahead Convenience: This crust is an excellent make-ahead component. You can prepare the crust and freeze it in the pie plate for up to a month. Just wrap it tightly in plastic wrap once fully set. When ready to serve, simply fill it with your chosen ice cream or filling and refreeze.
- Gluten-Free Option: If you need a gluten-free option, ensure you use a certified gluten-free crispy rice cereal. Most marshmallows and chocolate syrups are naturally gluten-free, but always check labels to be sure.
Frequently Asked Questions (FAQ) about Marshmallow Pie Crusts
Here are some common questions about making and enjoying this fantastic Chocolate Marshmallow Pie Crust:
Q: Can I use different types of cereal besides Rice Krispies?
A: Absolutely! While Rice Krispies offer a classic crispy texture, you can experiment with other cereals. Cocoa Krispies would give an even richer chocolate flavor, or try Cheerios, Corn Flakes, or even crushed Graham crackers for a different twist. Just ensure the cereal is not too dense or heavily flavored, so it doesn’t overpower the marshmallow and syrup.
Q: How long does this pie crust last in the freezer?
A: The un-filled crust, properly wrapped, can last in the freezer for up to one month. Once filled with ice cream or another frozen dessert, the complete pie is best enjoyed within 1-2 weeks for optimal freshness and texture. Always cover it tightly to prevent freezer burn.
Q: Can I make this crust ahead of time for a party?
A: Yes, this crust is perfect for making ahead! Prepare the crust according to the instructions, press it into the pie plate, and freeze until firm. Once solid, you can wrap it tightly in plastic wrap and then foil, and store it in the freezer for several weeks. When you’re ready to serve, simply unwrap, fill with your chosen dessert, and refreeze to set.
Q: Is this crust suitable for savory pies?
A: Due to its inherent sweetness from the marshmallows and chocolate syrup, this particular crust is designed for sweet desserts. For savory pies, you would need to use a completely different type of crust recipe.
Q: What other desserts can I use this crust for besides pie?
A: This versatile mixture isn’t just for pies! You can press it into an 8×8 inch pan and cut it into bars for a simple treat. It also makes a fantastic base for individual dessert cups or trifles. Consider forming mini crusts in muffin tins for delightful personal-sized desserts.
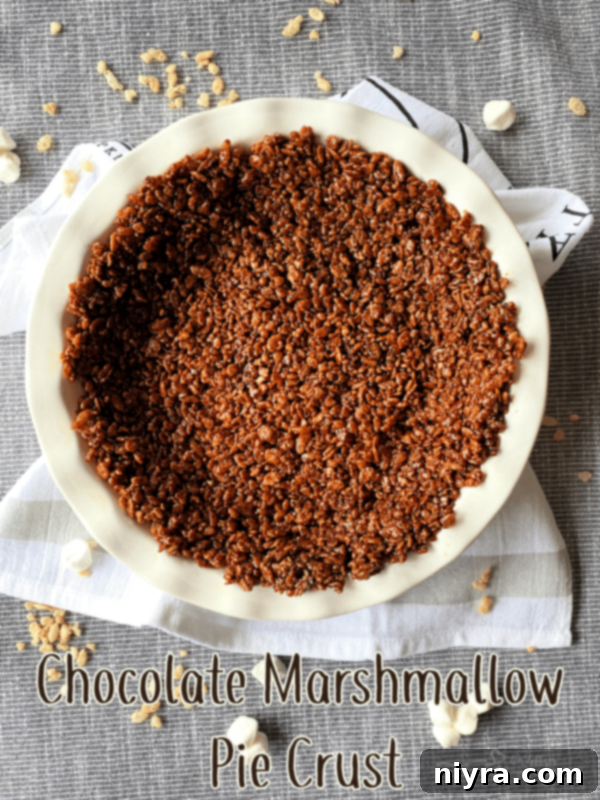
Now that you’ve seen just how incredibly easy and versatile this Chocolate Marshmallow Pie Crust is, it’s time to get into the kitchen and create your own amazing dessert! Enjoy the process and the delightful results. 
LIKE THIS RECIPE?
Don’t forget to give it a ⭐️⭐️⭐️⭐️⭐️ star rating and
leave a comment below the recipe!
5 from 4 votes
Print Recipe
Chocolate Marshmallow Pie Crust
A funky and fun way to do dessert. Chocolate Marshmallow Pie Crust is made with just four ingredients in a matter of minutes. Fill it with ice cream for a delicious and unique dessert option.
Prep Time: 5 mins
Additional Time: 2 hrs
Total Time: 2 hrs 5 mins
Course: Pies
Cuisine: American
Keyword: cereal crust, chocolate, marshmallow, pie crust, pie crust for ice cream pie, rice krispy
Servings: 9″ deep dish crust
Calories: 124 kcal
Author: Michaela Kenkel
Equipment
- Cuisinart Chef’s Classic Nonstick 1-Quart Saucepan with Lid
- Rubber Spatulas
- Ceramic Pie Dish, 10-Inch
Ingredients
- 1 cup miniature marshmallows
- 1/2 cup Hershey’s Chocolate Syrup
- 1 Tablespoon butter
- 3 cups Rice Krispies Cereal
Instructions
- Butter one 9″ deep dish pie plate.
- In a medium-sized saucepan over low heat, stir marshmallows, chocolate syrup and butter until marshmallows and butter are melted and can be stirred smooth.
- Remove from the heat and stir in cereal until it’s completely coated.
- Transfer to pie plate, reserving about 1/4 cup for topping if desired. Press into the bottom and up the sides of the pie plate.
- Place in the freezer for about 30 minutes.
- Fill with about 1 – 1.5 quarts of your favorite ice cream, top with reserved cereal, if desired. Return to the freezer for about 1.5 hours.
- Let rest on the counter for about 10 minutes to make slicing easier.
Nutrition
Calories: 124kcal |
Carbohydrates: 26g |
Protein: 1g |
Fat: 2g |
Saturated Fat: 1g |
Polyunsaturated Fat: 1g |
Cholesterol: 4mg |
Sodium: 85mg |
Fiber: 1g |
Sugar: 14g
