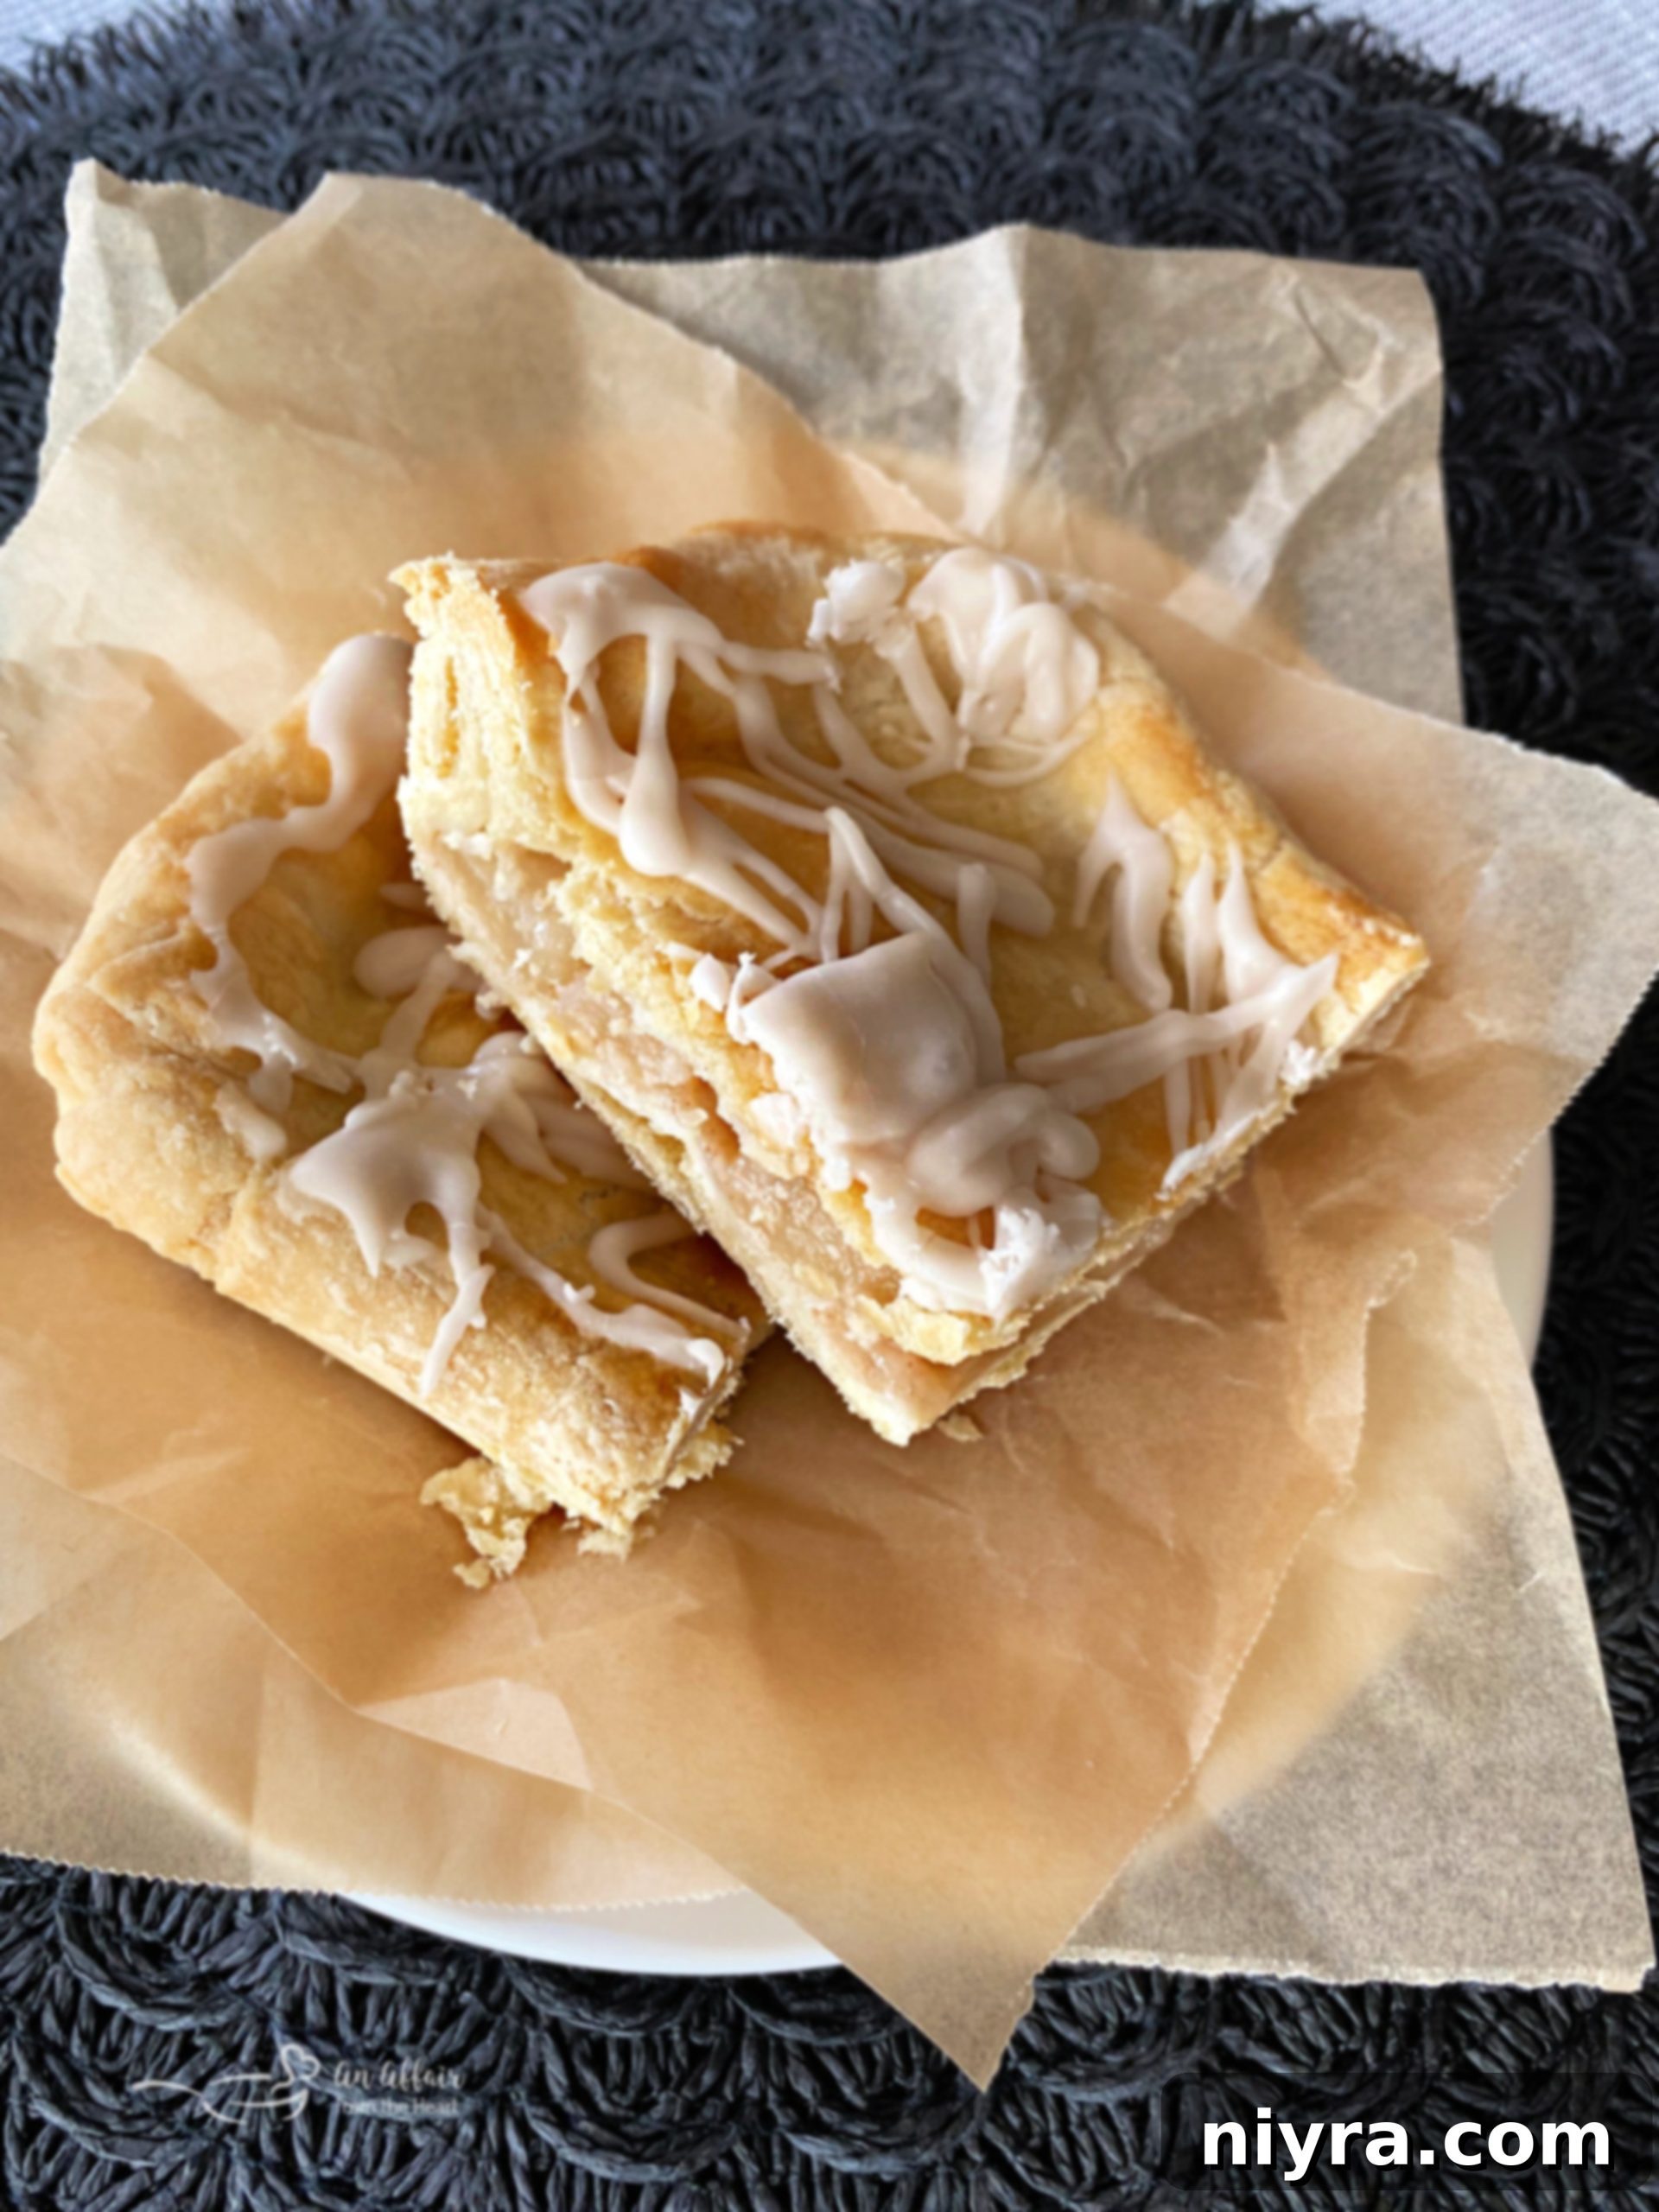
Indulge in the ultimate fall treat: homemade Apple Bars featuring a perfectly flaky crust, luscious jarred cinnamon apples, and a delightful glaze drizzled on top while still warm. These irresistible bars are a true celebration of autumn flavors, destined to become one of your most cherished seasonal desserts!
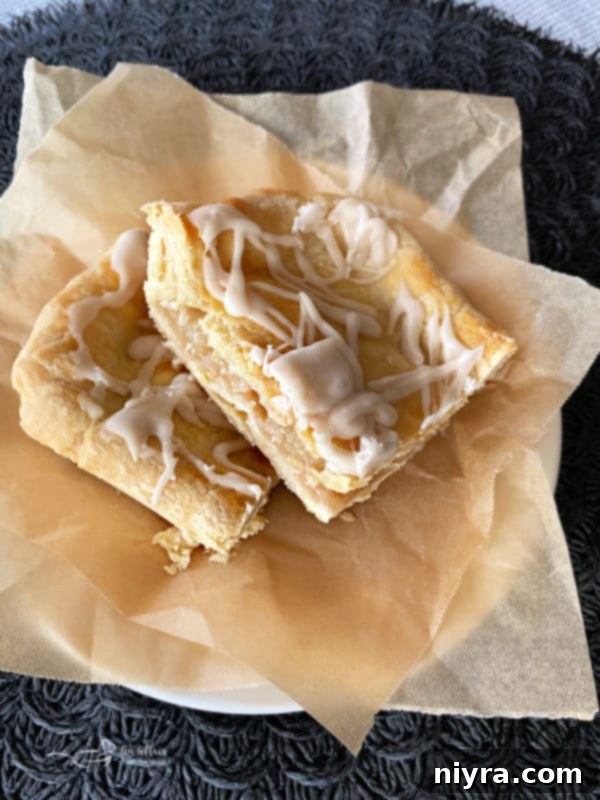
Prepare your taste buds for an extraordinary experience, because today, we’re diving into the delightful world of Apple Bars. For as long as I can remember, apple bars have held a special place in my heart, a dessert I adored but typically enjoyed when lovingly prepared by someone else. That tradition, however, has finally changed!
I recently found the perfect inspiration—and the perfect ingredient—to create these cherished treats myself, and now I’m thrilled to share my journey and the incredibly satisfying recipe with you. Get ready to bake a batch of pure autumnal bliss!
This delightful recipe post is proudly sponsored by Paisley Farm Foods. All opinions, enthusiasm, and genuine love for their exceptional products are entirely my own.
SOME OF THE ITEMS BELOW CONTAIN AFFILIATE LINKS; I AM A PARTICIPANT IN THE AMAZON SERVICES LLC ASSOCIATES PROGRAM, AN AFFILIATE ADVERTISING PROGRAM DESIGNED TO PROVIDE A MEANS FOR US TO EARN FEES BY LINKING TO AMAZON.COM AND AFFILIATED SITES. I AM ALSO AN AFFILIATE FOR OTHER BRANDS. HOWEVER, I ONLY PROMOTE THINGS THAT I LOVE AND THINK YOU WILL LOVE, TOO. FOR MY ENTIRE DISCLOSURE POLICY PLEASE CLICK HERE.
Introducing Paisley Farm Sliced Apples with Cinnamon: A Game Changer for Apple Bars
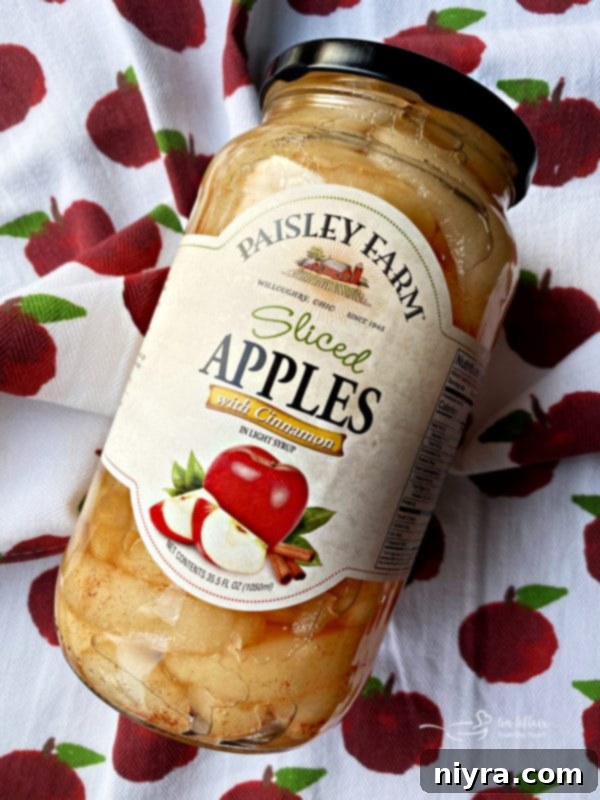
If you’ve been following my culinary adventures for a while, you’ve likely heard me sing praises for various Paisley Farm products. Their commitment to quality and convenience has made them a staple in my kitchen, inspiring countless recipes over the years. But today, I’m particularly excited to introduce something truly special and brand new: their Sliced Apples with Cinnamon.
These incredible apples have only recently hit a limited market, and I was fortunate enough to receive an early batch to try out. The moment I tasted them, I knew they deserved a star role in one of my treasured apple recipes. The decision was clear: Apple Bars. The combination of a tender, buttery crust with these perfectly seasoned apples promised a match made in heaven. And indeed, it was!
Unveiling the Flavor and Texture of Paisley Farm Sliced Apples
What truly sets Paisley Farm Sliced Apples apart is their exceptional quality and straightforward ingredient list. You won’t find any mystery additives here—just peeled sliced apples, water, sugar, cinnamon, salt, and a touch of citric acid. Citric acid, a natural preservative, simply prevents the apples from browning, ensuring they look as good as they taste.
The texture is wonderfully unique, reminiscent of a perfectly canned pear—firm enough to hold its shape beautifully, yet tender to the bite. These apples strike an ideal balance of sweetness, perfectly infused with just the right amount of cinnamon. I have a little confession: I even kept the residual juice in the jar, convinced it will make an excellent addition to another recipe down the line! Unlike overly soft apple pie fillings, these retain a delightful bite. For my Apple Bars, all I did was drain the liquid and toss them lightly with a bit of flour to ensure the filling wouldn’t be too wet during baking. The result? Pure perfection!
The convenience factor is undeniable. Imagine skipping the laborious peeling and coring, saving precious time and effort. Not only does this simplify the prep, but it also means your apple bars bake quicker, bringing you closer to that first delightful bite even faster! It’s truly a win-win situation for any home baker.
Crafting the Perfect Flaky Crust for Homemade Apple Bars
While Paisley Farm provided a fantastic shortcut for the apple filling, I decided to take on the challenge of making the crust entirely from scratch. I must admit, I approached this part with a touch of apprehension. My past attempts at homemade crusts haven’t always been successful, often ending in dry, crumbly dough. With only two precious jars of these new apples, the stakes felt high! What if I messed it up?
In a moment of culinary doubt, I reached out to my Aunt Carol, my go-to baking confidante, who expertly “talked me off the ledge.” She patiently guided me through the process, imparting the wisdom and confidence I needed for a successful attempt. Her key advice: it’s always easier to gradually add more flour to a slightly wet dough than to try and salvage a dry one by adding more liquid once the dough is formed. Sometimes, a little straightforward wisdom is all you need to demystify baking!
This time, I meticulously followed the recipe, resisting the urge to deviate, particularly with the liquid measurements. My previous failures stemmed from being too cautious with moisture, fearing the dough wouldn’t roll out properly. Aunt Carol’s guidance helped me embrace the slight stickiness of a properly hydrated dough, which is essential for that coveted flaky texture.
To achieve this wonderfully tender and flaky crust, you’ll need a few basic ingredients: all-purpose flour, a pinch of salt to balance the flavors, a touch of sugar for subtle sweetness, shortening for its flakiness-enhancing properties, one egg (separated into yolk and white), and fresh milk. For the sweet, delicate glaze that finishes these bars, gather powdered sugar, a splash of milk, and pure vanilla extract.
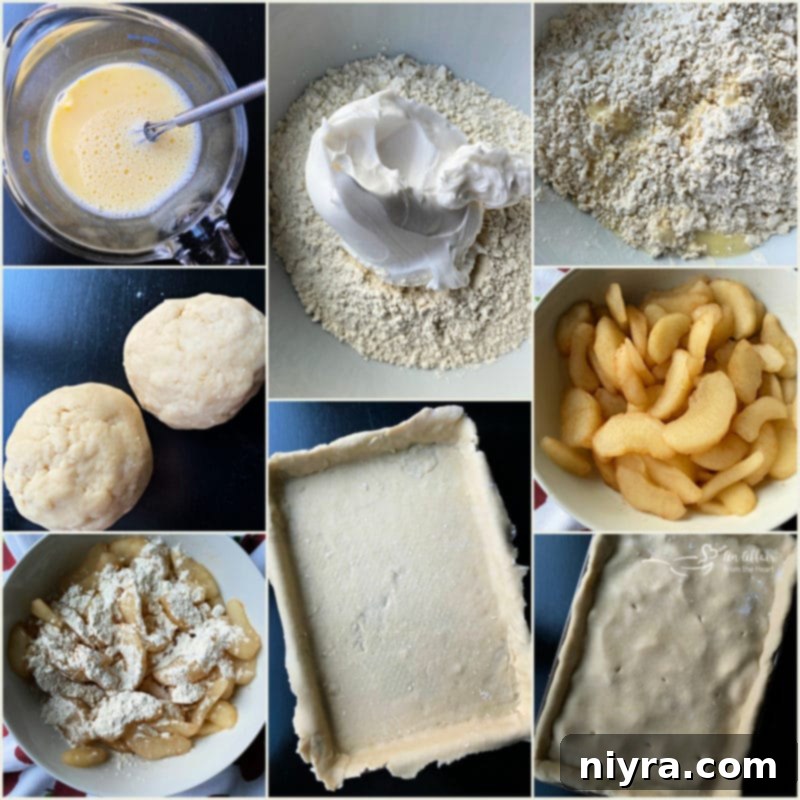
Begin your crust by whisking together the egg yolk and milk. In a separate, larger bowl, combine your flour, sugar, and salt, then cut in the shortening using a pastry blender or your fingertips until the mixture resembles coarse crumbs. Gently incorporate the liquid mixture, mixing until just combined and a soft dough forms. Divide this dough into two equal balls.
On a lightly floured surface, roll out one of the dough balls slightly larger than your 9×13 cookie sheet (it’s important to use a cookie sheet, not a deeper baking pan, for the ideal bar thickness). Carefully transfer and press this rolled dough into the bottom and up the sides of the pan.
Next, drain your Paisley Farm Sliced Apples thoroughly and toss them with a couple of tablespoons of flour to absorb any remaining moisture and prevent a soggy bottom crust. Spread these flour-coated apples evenly over the bottom crust. Roll out the second dough ball for the top crust, place it over the apple filling, and seal the edges tightly. Don’t forget to cut a few small vents in the top crust to allow steam to escape. Before baking, brush the top with a whisked egg white for a beautiful golden sheen.
Bake until golden brown and fragrant. Once out of the oven, allow the bars to cool slightly before generously drizzling them with the simple glaze made from powdered sugar, milk, and vanilla extract. Let the glaze set, then slice into squares and savor every bite!
Why These Apple Bars Are a Must-Try Fall Dessert
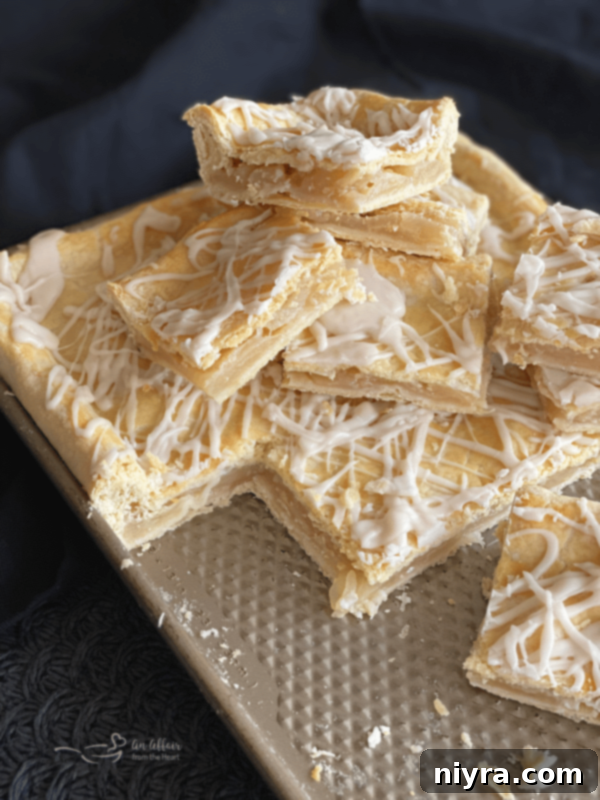
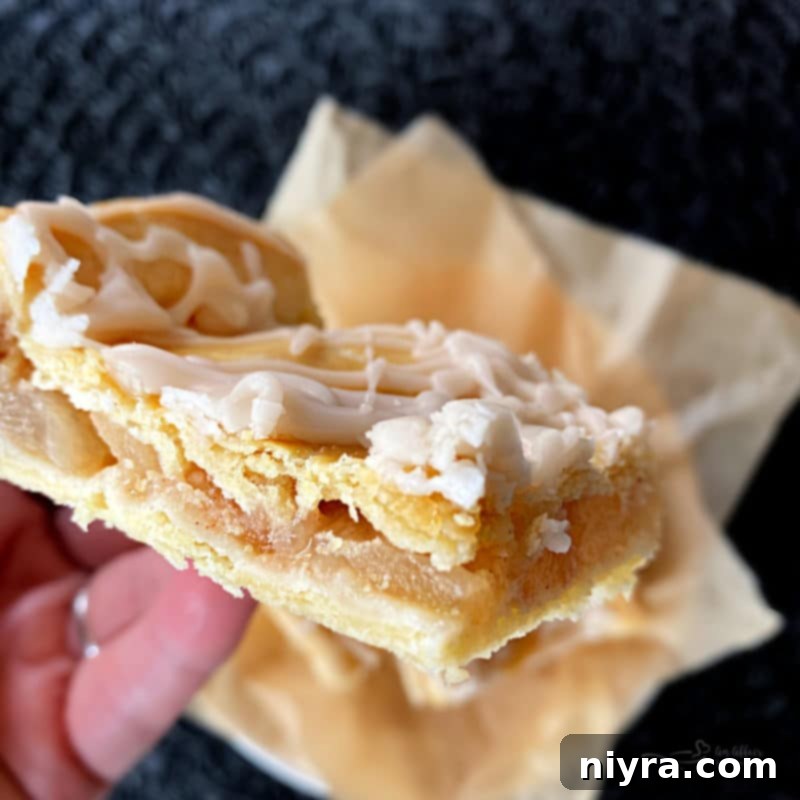
Just take a moment to admire that picture – the golden, flaky crust, the tender, cinnamon-spiced apple filling, and that luscious, sweet glaze. It’s a symphony of textures and flavors that truly captures the essence of autumn. These apple bars aren’t just a dessert; they’re a comforting experience, perfect for cozy evenings, holiday gatherings, or simply a delightful snack with a cup of coffee or tea.
The combination of a homemade crust, which adds unparalleled depth and texture, with the convenient and perfectly balanced flavor of Paisley Farm cinnamon apples, makes this recipe surprisingly easy to execute while delivering show-stopping results. It’s the ideal solution for when you crave that authentic, from-scratch taste without all the time-consuming prep.
Now that you’ve seen how incredible these apples make this recipe, let’s work together to make them more widely available! Your voice can make a real difference.
Where to Find and How to Request Paisley Farm Sliced Apples with Cinnamon
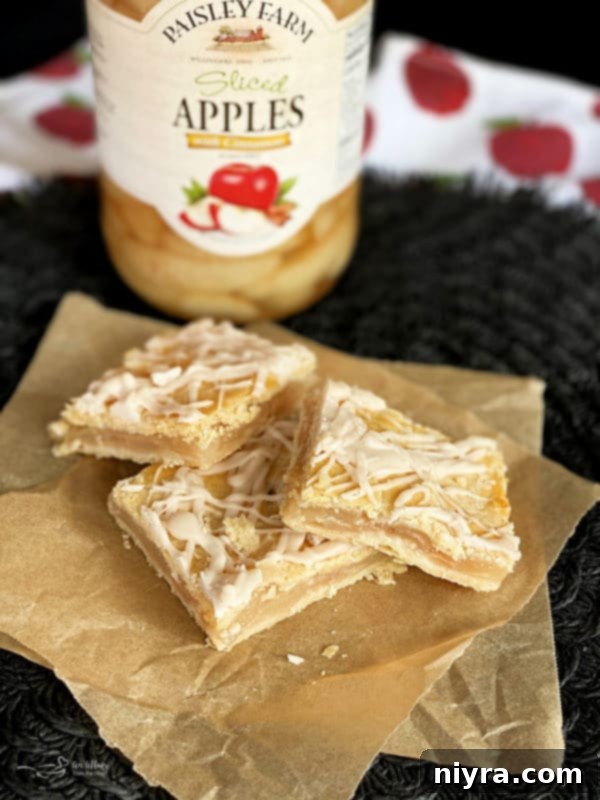
Currently, these fantastic Paisley Farm Sliced Apples with Cinnamon are available for a limited time seasonally at select Costco stores. They’ve made appearances in Canada, Arizona, San Diego, and certain areas of Colorado. But for those of us who live elsewhere, or who want to ensure they remain a perennial favorite, we need to take action!
The next time you visit your local Costco or your favorite grocery store, please take a moment to request these apples. Customer feedback is incredibly powerful, and the more requests they receive, the more likely these delicious jarred apples will become a regular pantry item across more locations. Trust me, once you try them, you’ll understand why it’s worth the effort. Let’s help get these incredible apples into every store, so everyone can experience the ease and flavor they bring to dishes like these Apple Bars!
A huge thank you from both Paisley Farm and myself for helping us spread the word and bring these delightful apples to a wider audience!
Discover More from Paisley Farm Foods
Paisley Farm Foods offers a diverse array of exceptional products that are perfect for enhancing everyday meals and special occasion dishes. I encourage you to explore their entire range by visiting their comprehensive website. To stay updated on new products, exciting recipes, and seasonal inspirations, be sure to follow them across their social media platforms. You can find them on Facebook, Instagram, Twitter, and Pinterest. You’ll find a wealth of culinary ideas to keep your kitchen inspired all year long!
EXPLORE ALL MY DELICIOUS PAISLEY FARM RECIPES HERE
Don’t Forget to Pin It!
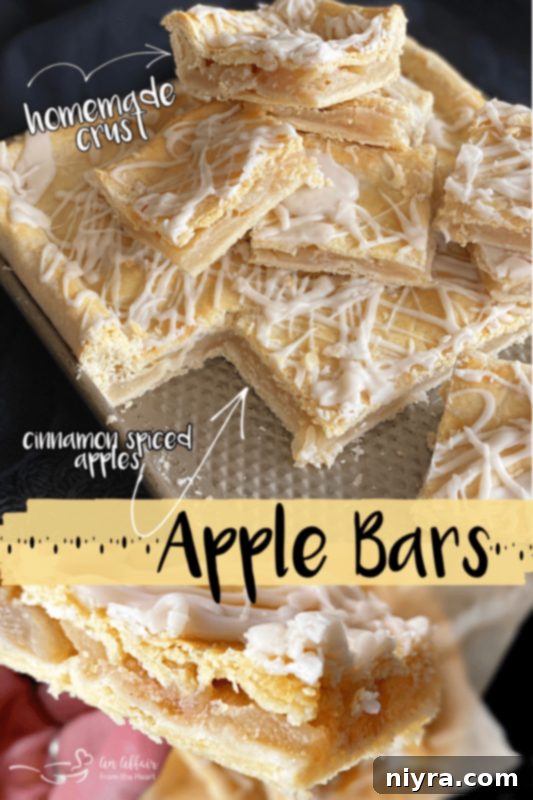
Loved this easy and delicious Apple Bar recipe? Make sure you can find it again whenever the craving strikes! Pin it to your favorite Pinterest recipe board right now so it’s always just a click away when you’re ready to bake another batch of these autumnal delights.
Embrace the Flavors of Apple Season with More Recipes
Apple season is, without a doubt, my absolute favorite time of year. There’s something truly magical about the crisp autumn air, the vibrant colors, and especially the comforting aroma of apples and warm spices baking in the kitchen. It evokes a sense of nostalgia and brings an undeniable warmth to the home. If you’re looking to add an extra touch of “wow factor” to any of your apple recipes, I highly recommend trying my homemade apple pie spice blend. The carefully balanced combination of fresh spices in this mix elevates any apple dessert from delicious to truly unforgettable.
While you’re here, why not explore more apple-centric creations? I’ve curated a list of other fantastic apple recipes that would be absolutely perfect with Paisley Farm Sliced Apples with Cinnamon, leveraging their convenience and delightful flavor profile. These recipes are sure to become new favorites in your fall baking repertoire:
More delightful Apple Recipes to explore:
- Apple Kuchen (A traditional German Apple Cake, moist and flavorful)
- The Very BEST Apple Crisp (A classic dessert with a crunchy oat topping)
- Apple Upside Down Cake (A stunning cake where apples caramelize beautifully on top)
- Caramel Apple Tea Cake (Elegant and bursting with sweet apple and caramel notes)
- Apple Crisp in a Mug for One (A quick, comforting single-serving treat)
Expert Tips for Flawless Apple Bars
Achieving perfect apple bars every time is easier than you think, especially with a few expert tips. For the crust, remember the importance of cold shortening; this creates steam during baking, leading to those desirable flaky layers. Don’t overmix the dough, as this can develop the gluten too much, resulting in a tough crust. Mix just until the ingredients come together, and a slightly sticky texture is ideal. When rolling out the dough, use plenty of flour on your surface and rolling pin to prevent sticking, but avoid incorporating too much extra flour into the dough itself. Handle the dough gently to maintain its tender consistency.
For the filling, using Paisley Farm Sliced Apples is a fantastic shortcut. Always remember to drain them well and toss them with a little flour. This crucial step prevents the filling from becoming too watery, which can make your bottom crust soggy. The flour thickens any juices released during baking, ensuring a firm, flavorful filling. When assembling the bars, make sure the apple layer is even so they bake uniformly.
During baking, the initial lower temperature (300°F) helps the crust set without browning too quickly, allowing the apples to gently cook. Increasing the temperature to 375°F for the final 15 minutes ensures a beautiful golden-brown finish on your crust. Always vent the top crust with a few holes; this allows steam to escape, preventing the bars from puffing up excessively and creating a crispier top layer. And for that irresistible shine and added richness, brush the top crust with an egg white wash before baking.
Finally, for the glaze, applying it while the bars are still warm but not piping hot allows it to melt slightly and seep into the crust, creating a beautiful, cohesive finish. Allow the glaze to set completely before slicing for clean, picture-perfect bars. With these tips, your homemade Apple Bars will be a resounding success!
Serving Suggestions and Storage
These homemade Apple Bars are incredibly versatile and can be enjoyed in many ways. While they are utterly delicious on their own, especially when still slightly warm with the glaze, consider serving them alongside a scoop of vanilla bean ice cream for an indulgent dessert. A dollop of fresh whipped cream also complements the cinnamon apples beautifully. For a cozy breakfast or brunch treat, pair them with a cup of hot coffee or spiced tea. They are perfect for potlucks, family gatherings, or simply as a comforting after-dinner delight.
To store any leftover apple bars, place them in an airtight container at room temperature for up to 2-3 days. If you want to extend their freshness, especially in warmer climates, you can refrigerate them for up to a week. For longer storage, apple bars freeze wonderfully. Simply wrap individual bars tightly in plastic wrap, then place them in a freezer-safe bag or container for up to 2-3 months. Thaw at room temperature or gently warm them in the oven for a freshly baked taste. Reheating in a microwave can make the crust a bit soft, so an oven is preferred for maintaining crispness.
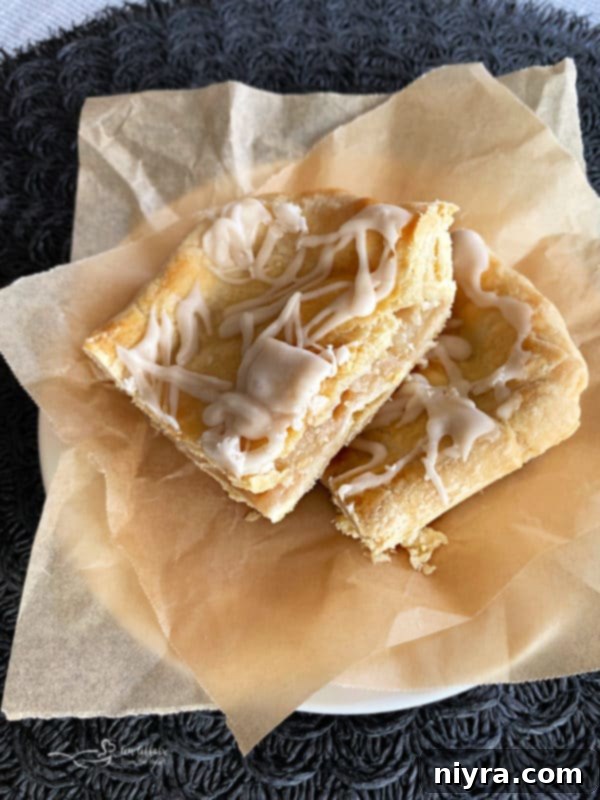
Ready to create this simple yet spectacular apple bar recipe? Let’s get baking and fill your home with the irresistible aromas of fall! 
LIKE THIS RECIPE?
Don’t forget to give it a ⭐⭐⭐⭐⭐ star rating and
leave a comment below the recipe!
Print Recipe
Apple Bars with Paisley Farm Cinnamon Apples
Equipment
- Pyrex Glass Measuring Cup 3 piece set
- KitchenAid Gourmet Rolling Pin, One Size, Red
- Professional Dough Blender, Pastry Cutter Stainless Steel
- OXO Good Grips Non-Stick Pro Jelly Roll, 9 x 13 Inch
Ingredients
For the Bars
- 2 1/2 cups all-purpose flour + 2 Tablespoons, divided
- Pinch of Salt
- 1 Tablespoon sugar
- 1 cup cold shortening
- 1 large egg (yolk and white separated)
- 2/3 cup milk
- 1 35.5 ounce jar Paisley Farm Sliced Apples with Cinnamon
For the Glaze
- 1 cup powdered sugar
- 1/2 teaspoon vanilla extract
- 1 Tablespoon milk
Instructions
- Preheat your oven to 300 degrees F (150 degrees C).
- In a large mixing bowl, combine the 2 1/2 cups of flour, 1 tablespoon of sugar, and a pinch of salt. Add the cold shortening and cut it into the flour mixture using a pastry blender or your fingertips until the mixture resembles coarse crumbs.
- In a separate measuring cup, add the egg yolk. Then, add enough milk to reach a total of 2/3 cup. Whisk this egg yolk and milk mixture together until well combined.
- Pour the egg/milk mixture into the flour and shortening mixture. Use your hands to gently combine everything until a cohesive, slightly sticky dough forms. Be careful not to overmix.
- Divide the dough into two equally sized balls.
- Lightly flour your work surface and rolling pin. Roll out one of the dough balls into a rectangle slightly larger than your 9×13 inch cookie sheet. Carefully transfer the rolled-out dough to the cookie sheet and press it gently into the bottom and up the sides to form the bottom crust.
- Thoroughly drain the Paisley Farm Sliced Apples with Cinnamon. In a bowl, toss the drained apples with the remaining 2 tablespoons of flour until they are lightly coated. This helps absorb excess moisture and prevents a soggy crust.
- Evenly spread the flour-coated apples over the bottom crust in the cookie sheet.
- Roll out the second dough ball for the top crust, mirroring the size of the bottom crust. Carefully lay it over the apple filling. Seal and crimp the edges of both crusts together to enclose the filling.
- Poke a few small holes or cut slits in the top crust to allow steam to vent during baking. In a small bowl, whisk the reserved egg white with about a teaspoon of water. Lightly brush this egg wash over the entire top crust for a beautiful golden-brown finish.
- Bake the apple bars for 30 minutes at 300 degrees F. After 30 minutes, increase the oven temperature to 375 degrees F (190 degrees C) and continue baking for another 15 minutes, or until the crust is beautifully golden brown and the filling is bubbly.
- While the bars are baking, prepare the glaze: In a small bowl, whisk together the powdered sugar, vanilla extract, and 1 tablespoon of milk until smooth. Once the apple bars have cooled slightly (they should still be warm to the touch), generously drizzle the glaze evenly over them. Allow the glaze to set for a few minutes.
- Cut the apple bars into squares and serve immediately, or allow them to cool completely. Enjoy your delicious homemade fall treat!
