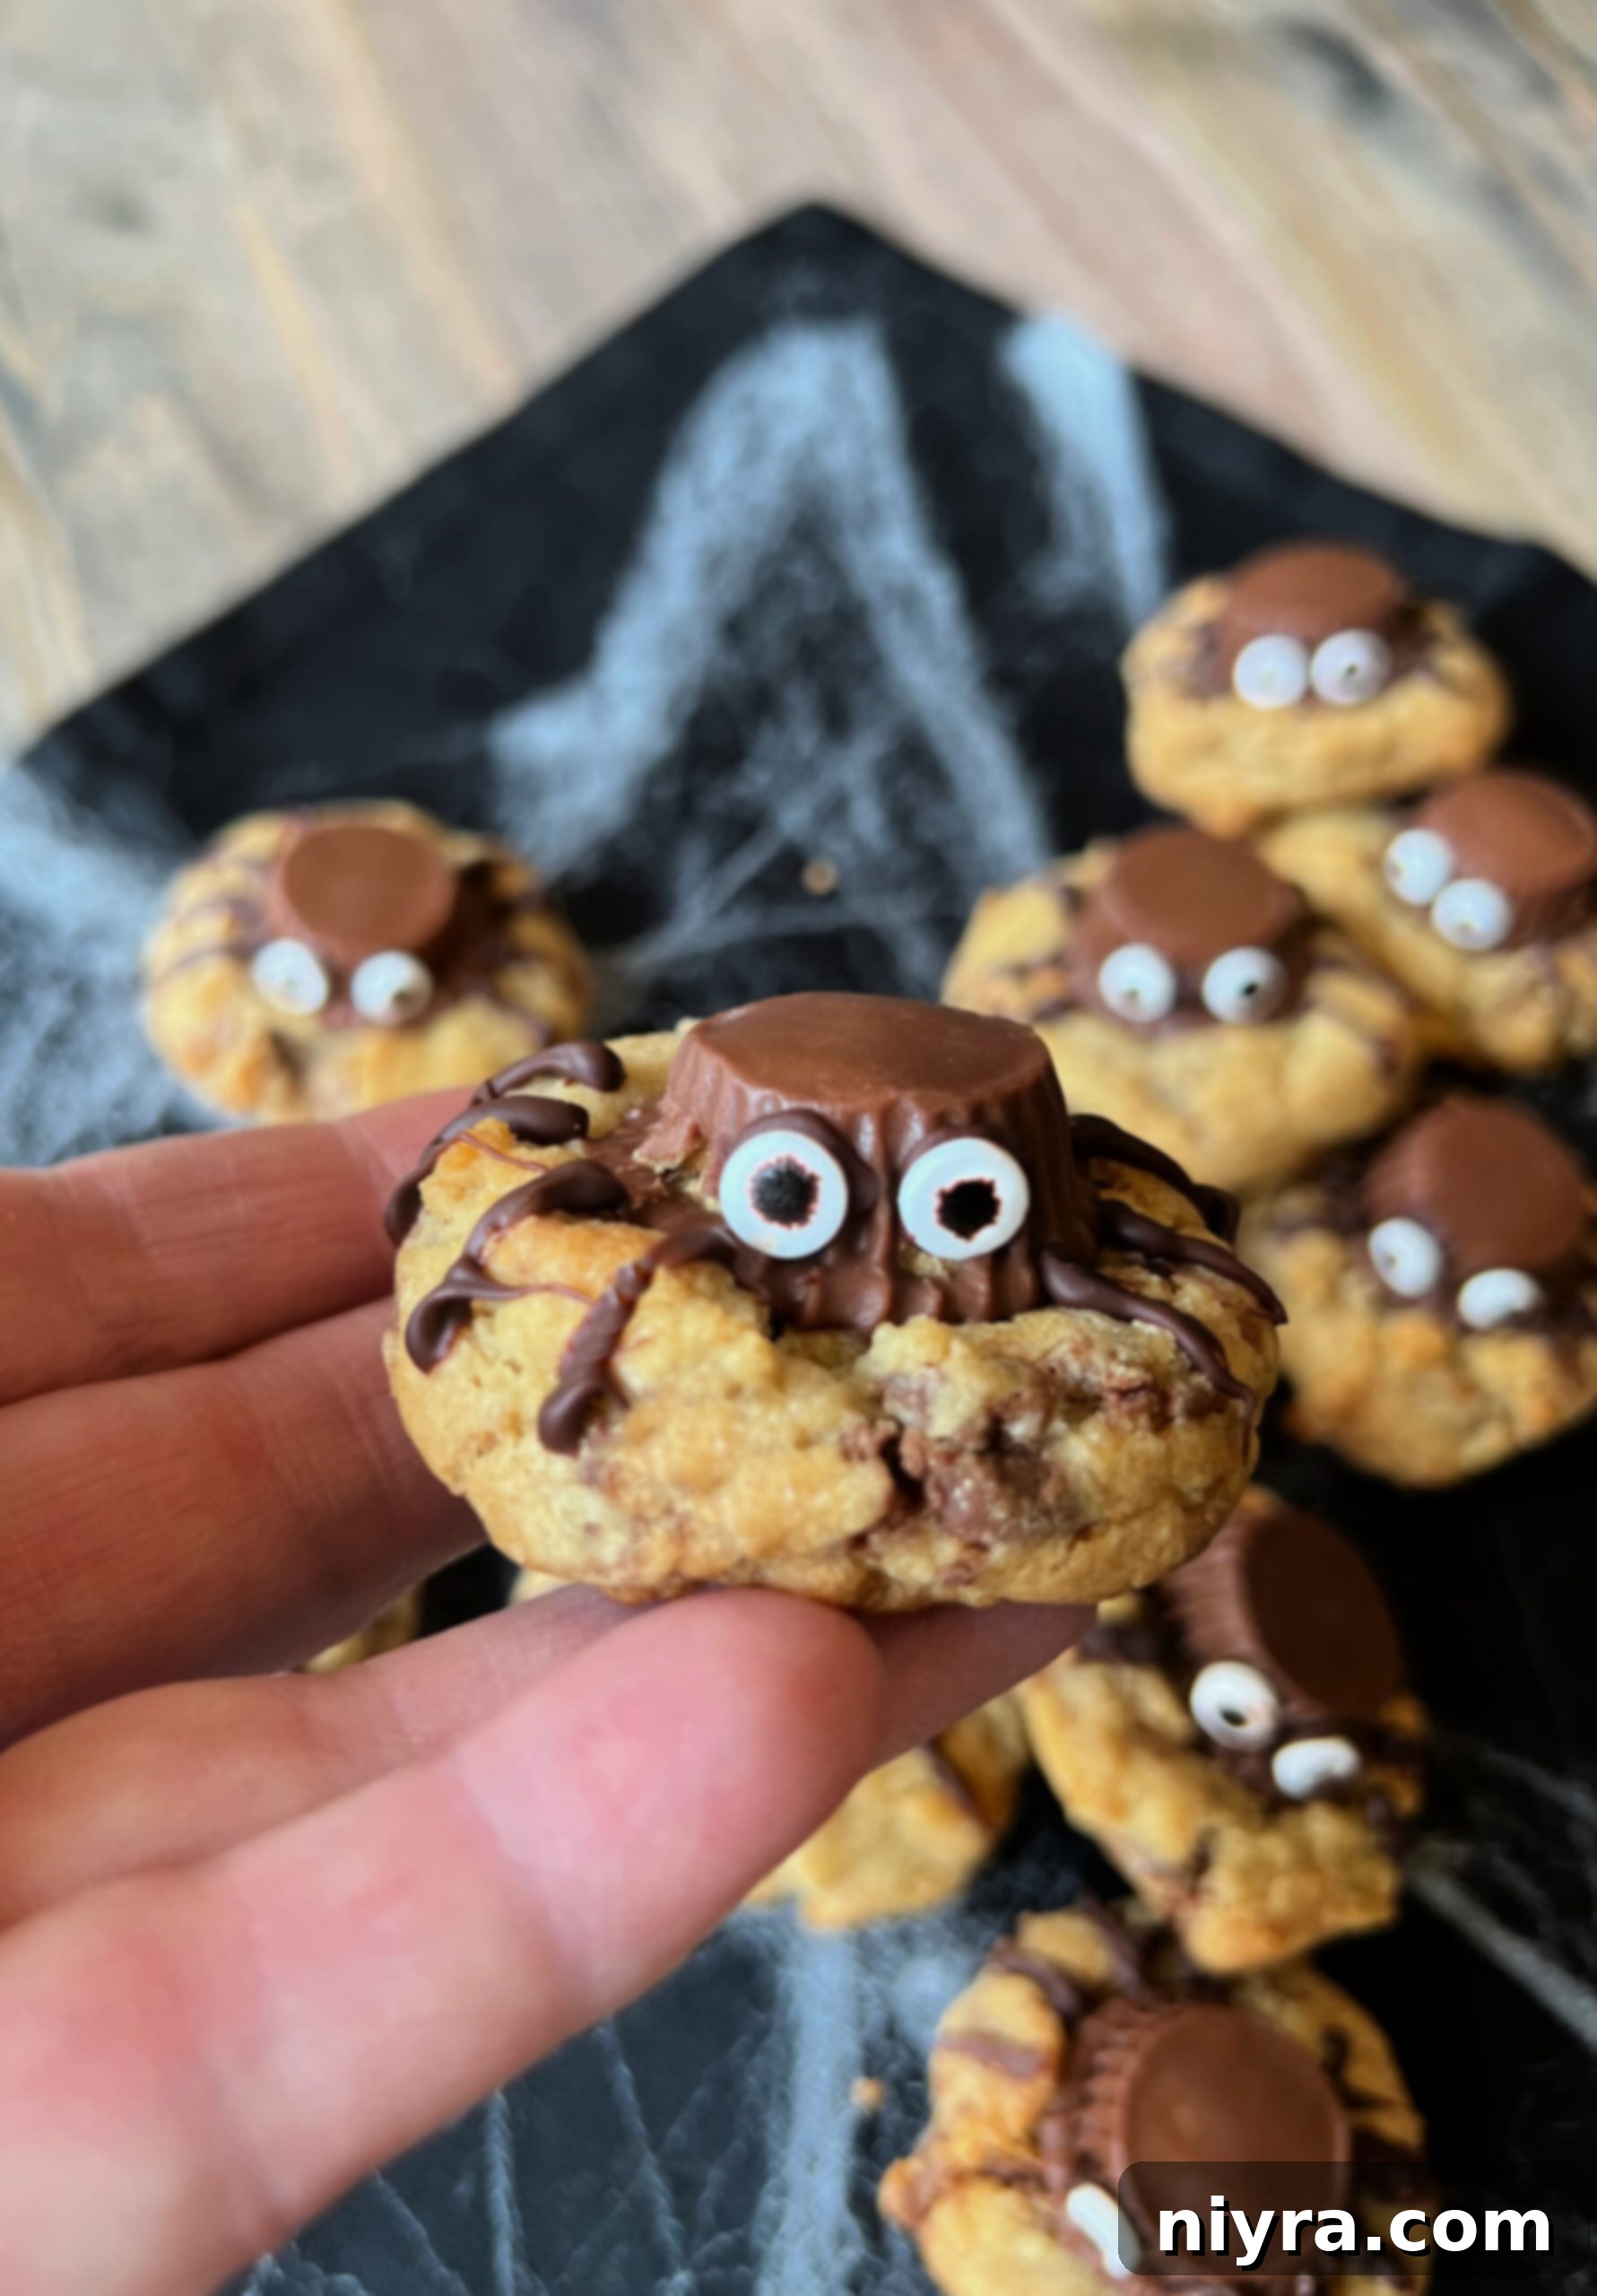
Get ready to bewitch your taste buds with these enchanting Reese’s Peanut Butter Cup Cookies, perfectly dressed up for Halloween! Featuring an adorable, not-too-spooky Reese’s Cup Spider on top, these delightful treats are guaranteed to be a hit with kids and adults alike. Dive into the festive spirit of the season with our easy-to-follow recipe for the ultimate Halloween Spider Cookies!
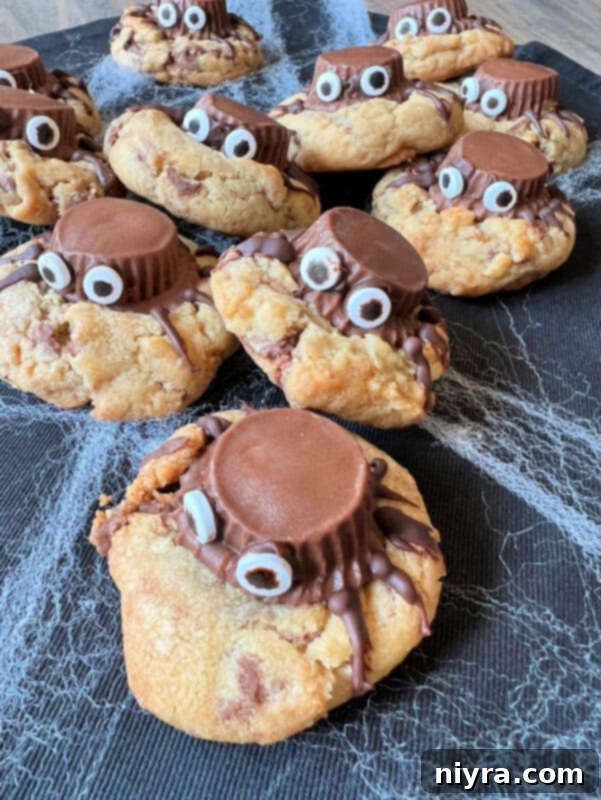
As the air grows crisp and autumn leaves begin to fall, Halloween truly lurks around the corner, bringing with it a craving for all things spooky and sweet. What better way to celebrate than with homemade cookies that are as fun to make as they are to eat? Our Spider Cookies are not just any Halloween treat; they’re a creative spin on a beloved classic. We’ve taken a tried-and-true Reese’s Peanut Butter Cup cookie recipe and transformed it into a delightful arachnid creation by simply adding candy eyes and chocolate drizzle for legs. The result? A perfectly spooky, yet incredibly delicious cookie that’s sure to be the star of any Halloween gathering.
Spooky Sweet Treats: Your Guide to Halloween Spider Cookies
Imagine the rich, chewy texture of a perfectly baked cookie, where the classic combination of chocolate and peanut butter creates an irresistible flavor profile. Our Halloween Spider Cookies start with a fantastic base – a decadent dough brimming with delightful peanut butter cup pieces. Then, we elevate them into festive spiders using Reese’s Miniatures as the bodies, candy eyes for that playful gaze, and a delicate chocolate drizzle to form the legs. Despite their creepy-crawly appearance, there’s absolutely nothing scary about these cookies once you take a bite. They’re simply a fantastic fusion of flavors and fun, guaranteed to bring smiles all around.
If you’re as passionate about crafting Halloween-themed treats as we are, you’ll love exploring some of our other festive creations. Don’t miss out on these exciting recipes:
- Halloween Monster Burgers
- Halloween Trash Snack Mix
- Sweet and Savory Halloween Snack Board with Peanut Butter Dip
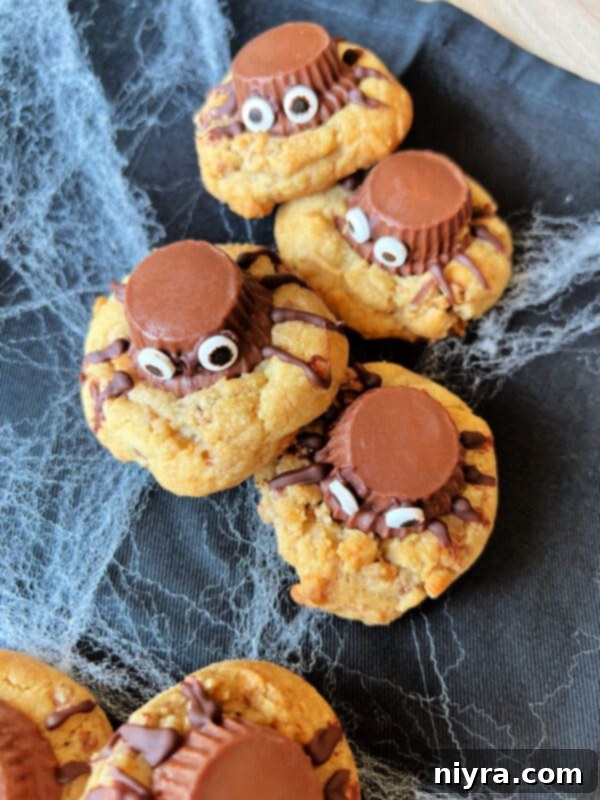
Why These Peanut Butter Spider Cookies Are a Must-Make This Halloween
Our Spider Cookies are truly the ideal treat to grace your Halloween party table. Their charmingly spooky appearance makes them an instant conversation starter, while their irresistible flavor ensures they’ll disappear in no time. Imagine the excitement when your kids bring a batch of these adorable peanut butter spider cookies to school; they’ll absolutely adore them! These unique and delicious Halloween cookies are destined to be the hit of any celebration, captivating guests of all ages. From little monsters to grown-up ghouls, everyone will appreciate these perfect Halloween treats!
Customizing Your Spider Cookies: Peanut Butter & Beyond
Wondering if you can make these delightful spider cookies without peanut butter? Absolutely! While our recipe hero features Reese’s Peanut Butter Cups, the beauty of this concept lies in its versatility. You can technically use almost any cookie recipe as your base, as long as the cookie provides a sturdy foundation for the spider’s body and legs. The key is to ensure the “body” (a candy or chocolate piece) and the “legs” (chocolate drizzle) are easily discernible, creating that iconic spider silhouette. Don’t feel limited to a homemade base either; for a super quick solution, you could even use store-bought cookie dough or pre-baked cookies!
If you’re short on time, decorating store-bought cookies can be a convenient option. However, there’s a small trick to remember: for best adhesion of the peanut butter cup and candy eyes, the cookie dough needs to be warm and pliable when you press the Reese’s cup into it. This allows the candy to settle slightly and adhere firmly as the cookie cools. If using pre-baked, cooled cookies, you might need a dab of melted chocolate or icing as “glue” to secure the spider’s body and eyes.
Essential Ingredients for Your Halloween Spider Cookies
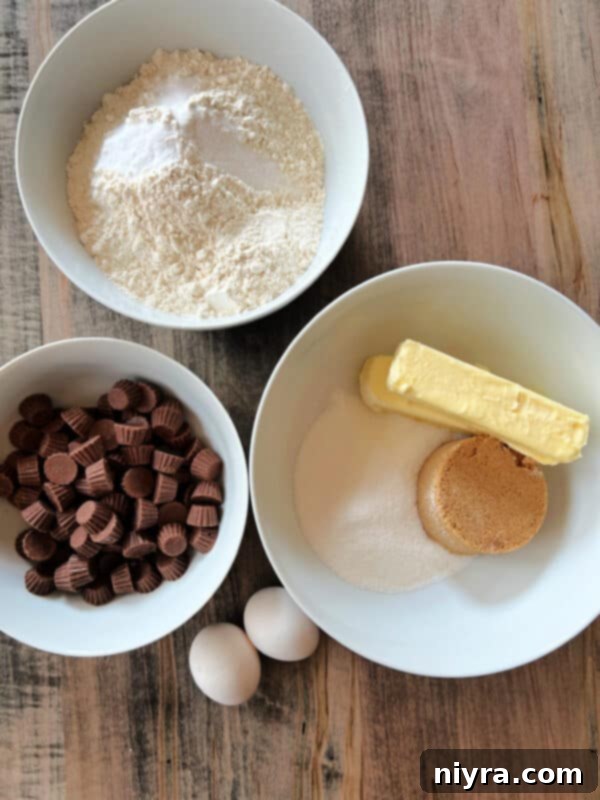
Crafting these delicious and decorative spider cookies requires a blend of pantry staples and a few fun, festive additions. Here’s a detailed look at what you’ll need:
- All-Purpose Flour: The foundation of our chewy cookies. Always keep a bag on hand for spontaneous baking adventures!
- Baking Soda: This leavening agent helps our cookies achieve that perfect soft, slightly risen texture.
- Salt: A touch of salt is crucial. It balances the sweetness and enhances all the rich flavors in the cookie dough.
- Unsalted Butter (or Salted): Softened to room temperature, butter provides richness and contributes to the cookie’s texture. Both unsalted and salted butter work fine; if using salted, you might slightly reduce the added salt.
- Granulated Sugar: For sweetness and to achieve that classic cookie crispness around the edges.
- Brown Sugar: Adds a deeper, molasses-rich sweetness and contributes to the cookies’ chewiness and delightful caramel-like flavor.
- Vanilla Extract: Pure vanilla extract makes a noticeable difference in flavor depth, though imitation vanilla will still yield delicious results.
- Large Eggs: Essential binders for the dough, providing structure and moisture. Any size egg will technically work, but large eggs are standard for baking recipes.
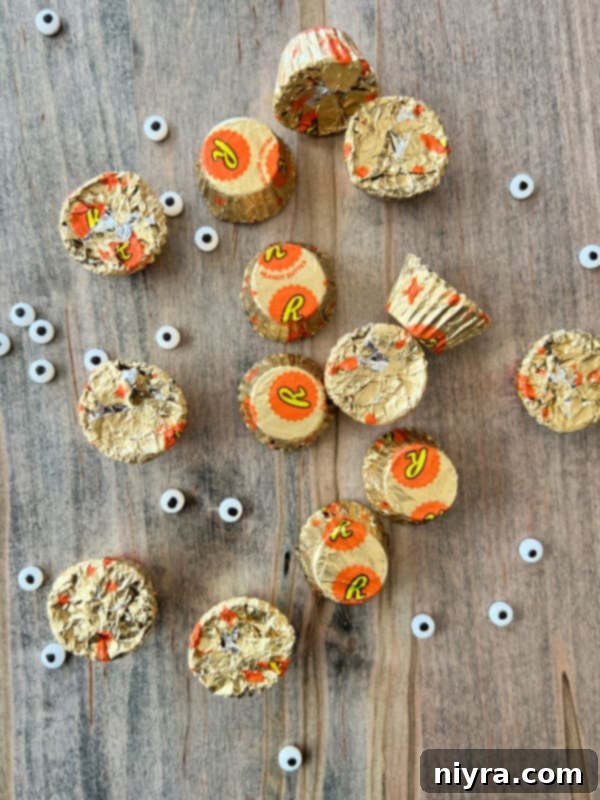
- Reese’s Peanut Butter Cup Minis: These delightful miniature cups are folded into the cookie dough, infusing every bite with that iconic chocolate and peanut butter taste.
- Reese’s Miniature Peanut Butter Cups (unwrapped): These are the stars that form the “spider bodies” on top of each cookie.
- Candy Eyeballs: The playful touch that brings our spiders to life, making them cute rather than truly spooky.
- Chocolate Chips (Semi-Sweet or Milk Chocolate): Melted chocolate is used to “glue” the eyeballs onto the Reese’s cups and to pipe the intricate spider legs. Semi-sweet offers a classic flavor, but milk chocolate can be used for a sweeter finish.
Step-by-Step Guide: Crafting Your Spooky Spider Cookies
Creating these festive Halloween Spider Cookies is a fun and rewarding process. Follow these detailed steps to bring your edible arachnids to life:
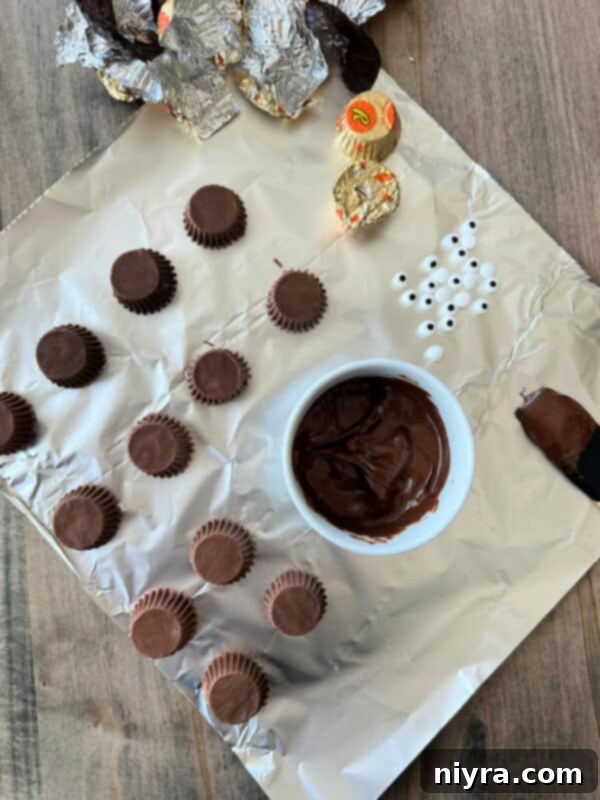
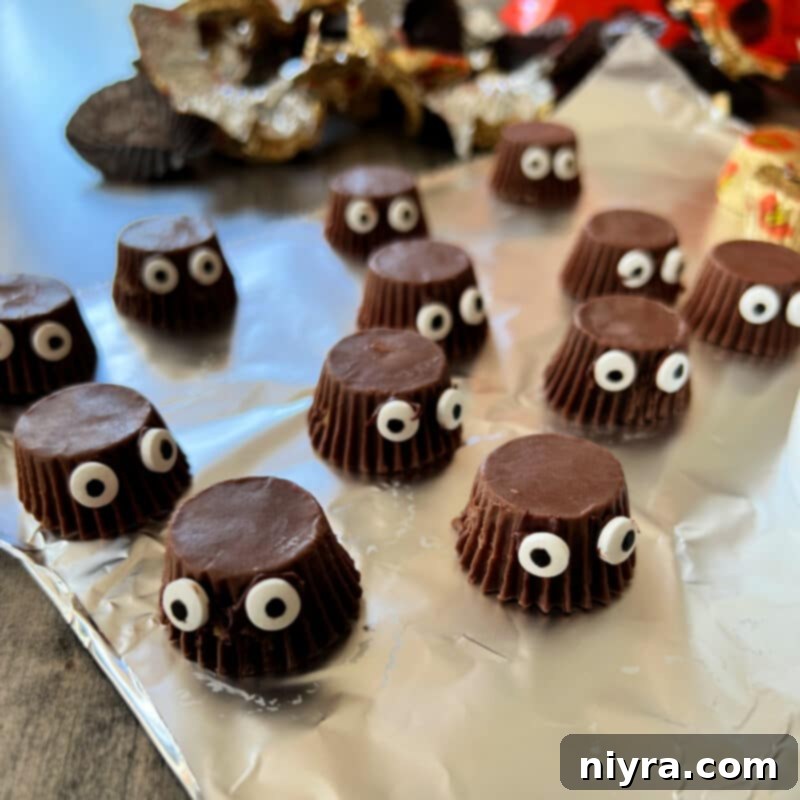
- Prepare the Spider Bodies: Begin by melting your chocolate chips. Place them in a microwave-safe bowl and heat for about 1 minute. Stir until smooth and melted, ensuring it’s thick enough to cling, but not overly thin or runny. Dip the flat backside of two candy eyeballs into the melted chocolate. Gently press these two eyes onto one side of an unwrapped miniature Reese’s Peanut Butter Cup. Repeat for all your Reese’s cups. Place these newly “eyed” Reese’s cups on a sheet of parchment paper or a plate and transfer them to the refrigerator for a short period to allow the chocolate to set firmly.
- Preheat Oven and Prep Baking Sheet: While your spider bodies are setting, preheat your oven to 375 degrees F (190 degrees C). Line a baking sheet with parchment paper or a silicone baking mat to prevent sticking and ensure even baking. Set this aside.
- Cream Wet Ingredients: In a large mixing bowl, using an electric mixer, cream together the softened butter, granulated sugar, and brown sugar until the mixture is light, fluffy, and well combined. This process incorporates air, contributing to a lighter cookie texture.
- Incorporate Eggs and Vanilla: Beat in the large eggs one at a time, ensuring each is fully incorporated before adding the next. Stir in the vanilla extract until just combined. Be careful not to overmix at this stage.
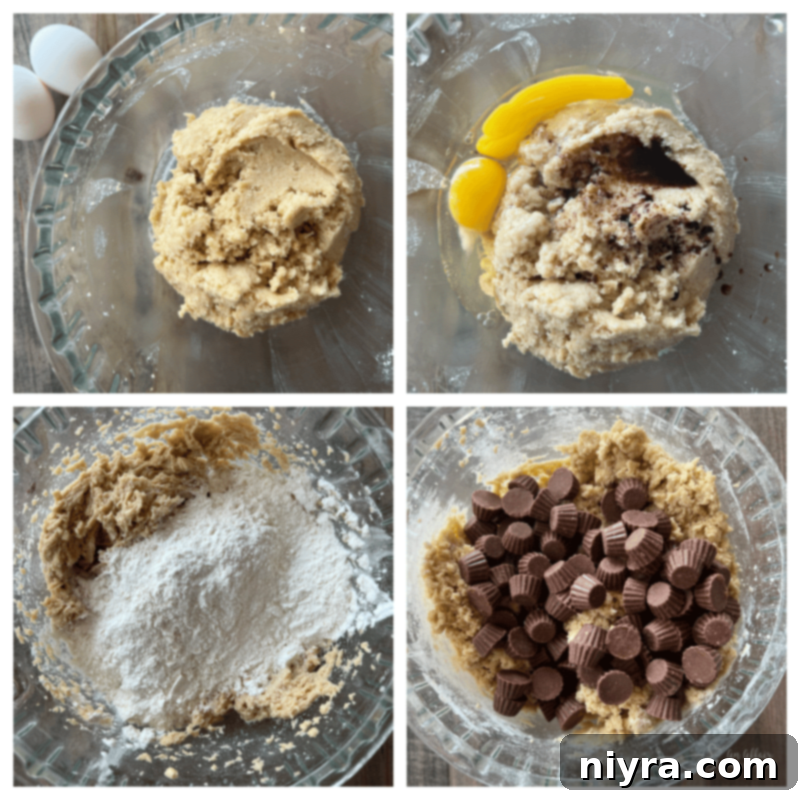
- Combine Dry Ingredients: In a separate medium bowl, sift together the all-purpose flour, baking soda, and salt. Sifting helps to remove lumps and ensures these dry ingredients are evenly distributed, leading to a consistent cookie texture.
- Gradually Add Dry to Wet: Slowly incorporate the sifted dry ingredients into the wet mixture, mixing on low speed until just combined. Stop mixing as soon as no dry streaks of flour remain; overmixing can lead to tough cookies.
- Fold in Reese’s Minis: Gently fold in the Reese’s Peanut Butter Cups baking minis using a spatula. Distribute them evenly throughout the dough for a burst of peanut butter and chocolate in every bite.

- Scoop and Bake: Using a 1-tablespoon-sized cookie scoop (or simply roll even balls with your hands), place portions of dough onto the prepared baking sheet, leaving some space between each cookie.
- Bake to Golden Perfection: Bake for approximately 10-12 minutes, or until the edges are lightly golden brown and the centers are still slightly soft. Keep a close eye on them to prevent overbaking.

- Add Spider Bodies Immediately: As soon as the cookies are removed from the oven, while they are still warm and soft, immediately press one of your prepared Reese’s cups with eyeballs into the center of each cookie. The warmth of the cookie will help the Reese’s cup adhere properly.
- Cool the Cookies: Allow the cookies to cool on the baking sheet for a few minutes before transferring them to a wire cooling rack to cool completely. For quicker setting of the Reese’s cups, you can place the rack in a cool spot or even in the refrigerator for a short while.

- Pipe the Spider Legs: Once the cookies are cooled and the Reese’s cups are set, slightly reheat your remaining melted chocolate (add a bit more if needed to reach a good piping consistency). Transfer the melted chocolate to a small piping bag fitted with a tiny round tip, or simply use a plastic baggie with a tiny corner snipped off. Carefully pipe eight thin spider legs onto each cookie, extending from the Reese’s cup.
- Final Setting & Storage: Let the cookies set once more on the wire rack until the chocolate legs are firm. Store your finished Halloween Spider Cookies in an airtight container at room temperature for several days, or freeze for longer storage.

Love this Spooktacular Recipe? Pin it!
If you adore this easy spider cookie recipe and want to keep it handy for future Halloween celebrations, don’t let it disappear! Make sure to pin it to your favorite Pinterest recipe board before you go. Sharing is caring, especially when it comes to delicious Halloween treats!
Frequently Asked Questions About Halloween Spider Cookies
How can I make spider cookies without peanut butter for allergy concerns?
If you’re baking for someone with a peanut allergy or simply prefer to avoid peanut butter, it’s incredibly easy to adapt this recipe. Instead of Reese’s Peanut Butter Cups, you can substitute the spider bodies with other chocolate candies like Rolos, malted milk balls, or even a small chocolate-covered cherry. For the cookie base, use a standard chocolate chip cookie recipe (without peanut butter chips) or any plain sugar cookie recipe. The key is finding a suitable round-ish candy for the body that can hold the candy eyeballs.
What’s the best way to store these delicious spider cookies?
To keep your Halloween Spider Cookies fresh and tasty, store them in an airtight container. They will maintain their quality at room temperature on your kitchen counter for about 3-4 days. If you need to store them for longer, these cookies freeze exceptionally well. Simply place them in an airtight freezer-safe container or bag, separating layers with parchment paper, and they’ll keep for up to 2-3 months. Thaw at room temperature before serving.
Can I prepare these cookies in advance for a big Halloween party?
Absolutely! These spider cookies are perfect for making ahead, which can be a huge help when planning a large Halloween celebration. You can bake the cookies, add the Reese’s bodies, and pipe the legs in advance, then freeze them as described above. Alternatively, you can prepare the cookie dough a day or two before, store it in the refrigerator, and then bake fresh on the day of your event. This allows you to tackle your Halloween to-do list with ease and ensure you have fresh treats ready for your guests.
Is it possible to make these cookies gluten-free?
While this specific recipe hasn’t been tested with gluten-free flour, many home bakers have success substituting standard all-purpose flour with a 1-to-1 gluten-free baking flour blend, such as those offered by Bob’s Red Mill or King Arthur Baking Company. These blends are specifically formulated to replace wheat flour in recipes without significant alterations. Ensure your chosen Reese’s products and other ingredients are also certified gluten-free if you need to adhere to strict dietary requirements.
Creative Substitutions for Your Spider Cookies
Get creative with your Halloween Spider Cookies by trying these fun substitutions:
- For a non-peanut butter option, bake classic chocolate chip cookies and top them with a Rolo or a malted milk ball to form the spider’s body. The caramel or malty center offers a delightful contrast to the chocolate cookie.
- Consider using a chocolate-covered almond or a larger chocolate-covered raisin for the spider’s body. These provide a satisfying chew and a different flavor profile.
- Hershey’s dark chocolate kisses can also make perfect spider bodies. Simply unwrap them and press the pointed side down into the warm cookie for a sleek, dark spider look.
- While peanut butter cookies offer a fantastic flavor, any kind of light-colored cookie dough will work wonderfully as the base for these spider cookies. Think sugar cookies, snickerdoodles, or even a plain vanilla cookie to let the dark spider decorations truly stand out.
Expert Tips & Tricks for Perfect Spider Cookies
Achieve cookie perfection with these helpful hints:
- Room Temperature Ingredients: Always bring your butter and eggs to room temperature before you start preparing the cookie dough. This ensures they cream together smoothly and incorporate evenly, leading to a perfectly textured cookie.
- Softened Butter is Key: Make sure your butter is truly softened, but not melted. It should yield easily when pressed but still hold its shape. This consistency is crucial for proper creaming with the sugars, which creates a light and airy base for your dough.
- Uniform Cookie Size: Use a cookie scoop to ensure all your cookies are the same size. This not only makes for a more professional-looking batch but also guarantees that they bake at the same pace, preventing some from being undercooked while others are overdone.
- Don’t Overbake: For chewy cookies, remove them from the oven when the edges are set and lightly golden, but the centers still look slightly soft. They will continue to cook slightly on the hot baking sheet.
- Allow for Setting Time: Be patient and allow the chocolate for the eyes and legs to fully set. Rushing this step can result in smudged designs. A quick chill in the fridge can speed up the process.

HAPPY HALLOWEEN!
Welcome to this year’s Halloween Treats Week event! This annual online celebration brings together fantastic Halloween-loving bloggers who share their most wickedly delicious and creative Halloween treats and recipes throughout the week. Join us as talented culinary creators share their favorite spooky delights!
You can follow the hashtag #HalloweenTreatsWeek on social media to discover and collect all these frightful recipes, perfect for your own Halloween parties and events. Be sure to check out all the fun Halloween recipes we’re sharing this week!
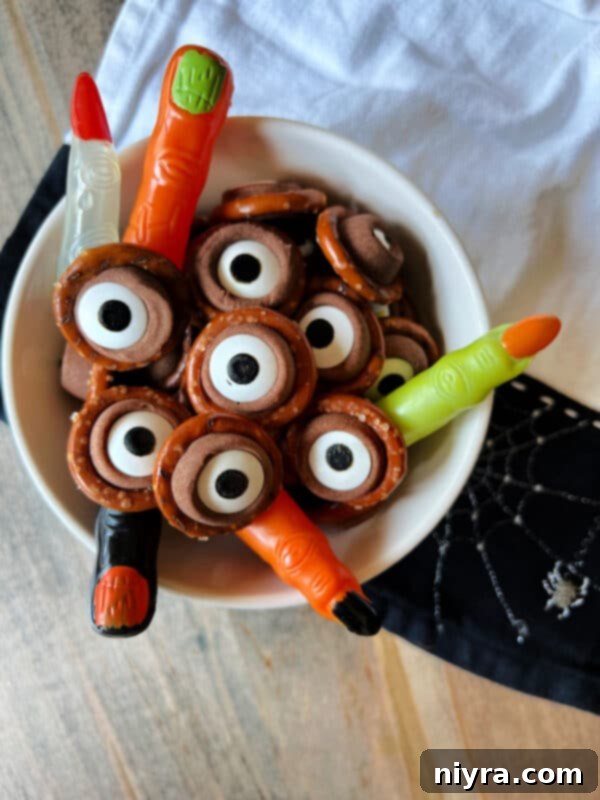
Speaking of spooky treats, did you see our Rolo Pretzel Eyeballs that we shared earlier for Halloween Treats Week? They are another incredibly quick and easy treat, ideal for adding a touch of ghoulish fun to your Halloween festivities!

More Bewitching Halloween Recipes to Love
- Bloody Dirty Shirley Cocktails (pictured above)
- Sweet & Savory Halloween Snack Board with Peanut Butter Dip
- RedRum RedRum Punch
- Ghostly Poptarts
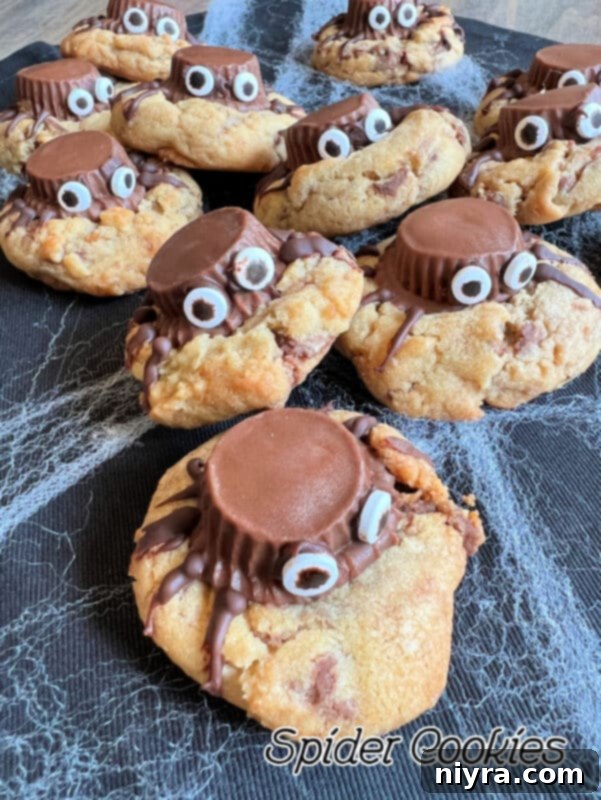
Don’t let this Halloween pass without adding these easy spider cookies to your baking repertoire. You won’t be disappointed by the fantastic combination of rich chocolate and creamy peanut butter, perfectly complemented by their fun, spooky-but-not-too-spooky appearance. We guarantee your guests will be “crawling” all over each other to get their hands on these delightful treats!

LIKE THIS RECIPE?
Don’t forget to give it a ⭐️⭐️⭐️⭐️⭐️ star rating and
leave a comment below the recipe!

Print Recipe
Spider Cookies for Halloween
Reeses Peanut Butter Cup Cookies are dressed up for Halloween with a cute, not too spooky Reese’s Cup Spider on top. Kids of all ages will love these festive Spider Cookies for Halloween!
Equipment
- Assorted Candy Eyeballs Box
- Reynolds Kitchens Non-Stick Parchment Paper
- Heavy Duty Aluminum Foil
- 13×18 Half Sheet Pan
- REESE’S Peanut Butter Cups Minis (8-Ounce)
Ingredients
- 2 1/4 cups all-purpose flour
- 1 teaspoon baking soda
- 1 teaspoon salt
- 1 cup (2 sticks) butter, softened to room temperature
- 3/4 cup granulated sugar
- 3/4 cup packed brown sugar
- 1 teaspoon vanilla extract
- 2 large eggs
- 2 cups Reese’s Peanut Butter Cup Minis
- 48 Reese’s Miniature Peanut Butter Cups, unwrapped
- 96 candy eyeballs
- 1/4 cup chocolate chips, melted
Instructions
- Make the spiders: Melt the chocolate chips for about a minute in the microwave. Stir until smooth, but not thin and runny. Dip the backside of two eyeballs into the melted chocolate and press them onto the side of a miniature Reese’s Peanut Butter Cup. Place on a sheet to set. (A quick chill in the fridge helps them set faster.)
- Preheat the oven to 375 degrees F (190 degrees C). Line a baking sheet with parchment paper and set it aside.
- With an electric mixer, cream together butter, granulated sugar, and brown sugar until light and fluffy.
- Add in eggs one at a time, then mix in the vanilla extract until just combined.
- In a separate bowl, sift together flour, baking soda, and salt. Gradually incorporate these dry ingredients into the wet mixture, mixing on low speed until just combined.
- Gently fold in the Reese’s Peanut Butter Cups baking minis.
- Scoop with a cookie scoop (approximately 1 Tablespoon size) onto the prepared cookie sheet, spacing them evenly.
- Bake for about 10-12 minutes, or until the edges are golden brown and the centers are still slightly soft. Remove from the oven and immediately press one of the Reese’s cups with eyeballs into the top of each warm cookie.
- Let the cookies set by leaving them on a wire rack in a cool place. For faster setting, place them in the fridge for a bit.
- Reheat the remaining melted chocolate (add more if needed for a good piping consistency) and place it in a small piping bag or a plastic baggie with a tiny corner snipped off.
- Pipe eight thin legs onto your spiders, extending from the Reese’s cup body onto the cookie. Let them set one more time until the chocolate is firm.
- Store your finished spider cookies in a cool place in an airtight container to maintain freshness.
Nutrition
Serving: 1 | Calories: 192kcal | Carbohydrates: 34g | Protein: 3g | Fat: 6g | Saturated Fat: 3g | Polyunsaturated Fat: 2g | Cholesterol: 9mg | Sodium: 120mg | Fiber: 1g | Sugar: 23g
Check out all of these great #HalloweenTreatsWeek recipes for today from our fellow bloggers:
- Skull Chicken Pot Pie from Big Bear’s Wife
- Mushroom Skull Spaghetti from Semihomemade Recipes
- Mummy Cinnamon Rolls from Fresh April Flours
- Pumpkin Patch Focaccia from Sweet ReciPEAs
- Spider Cookies from An Affair from the Heart
- Frankenstein Cookies with Peanut Butter Cups from Best Cookie Recipes
- Witch Hat Crescent Roll from Devour Dinner
- Chocolate Pretzel Owls from Savory Moments
- Candy Corn Hot Chocolate from Hezzi-D’s Books and Cooks
- Deathly Hallows Blondies from Simply Inspired Meals
- Oozing Mummy Baked Brie from A Kitchen Hoor’s Adventures
- Halloween Pimento Cheese Brain Dip from Pastry Chef Online
- Eyeball Zucchini Pizza Bites from Our Good Life
- Pumpkin Cheese Ball from Take Two Tapas
- Pretzel Ghosts from Sweet Beginnings
- Pumpkin Spice Rice Krispie Treats from Cheese Curd In Paradise
- Rice Krispy Treat Mummies from Jen Around the World
- Flying Purple People Eater Milkshakes from The Spiffy Cookie
