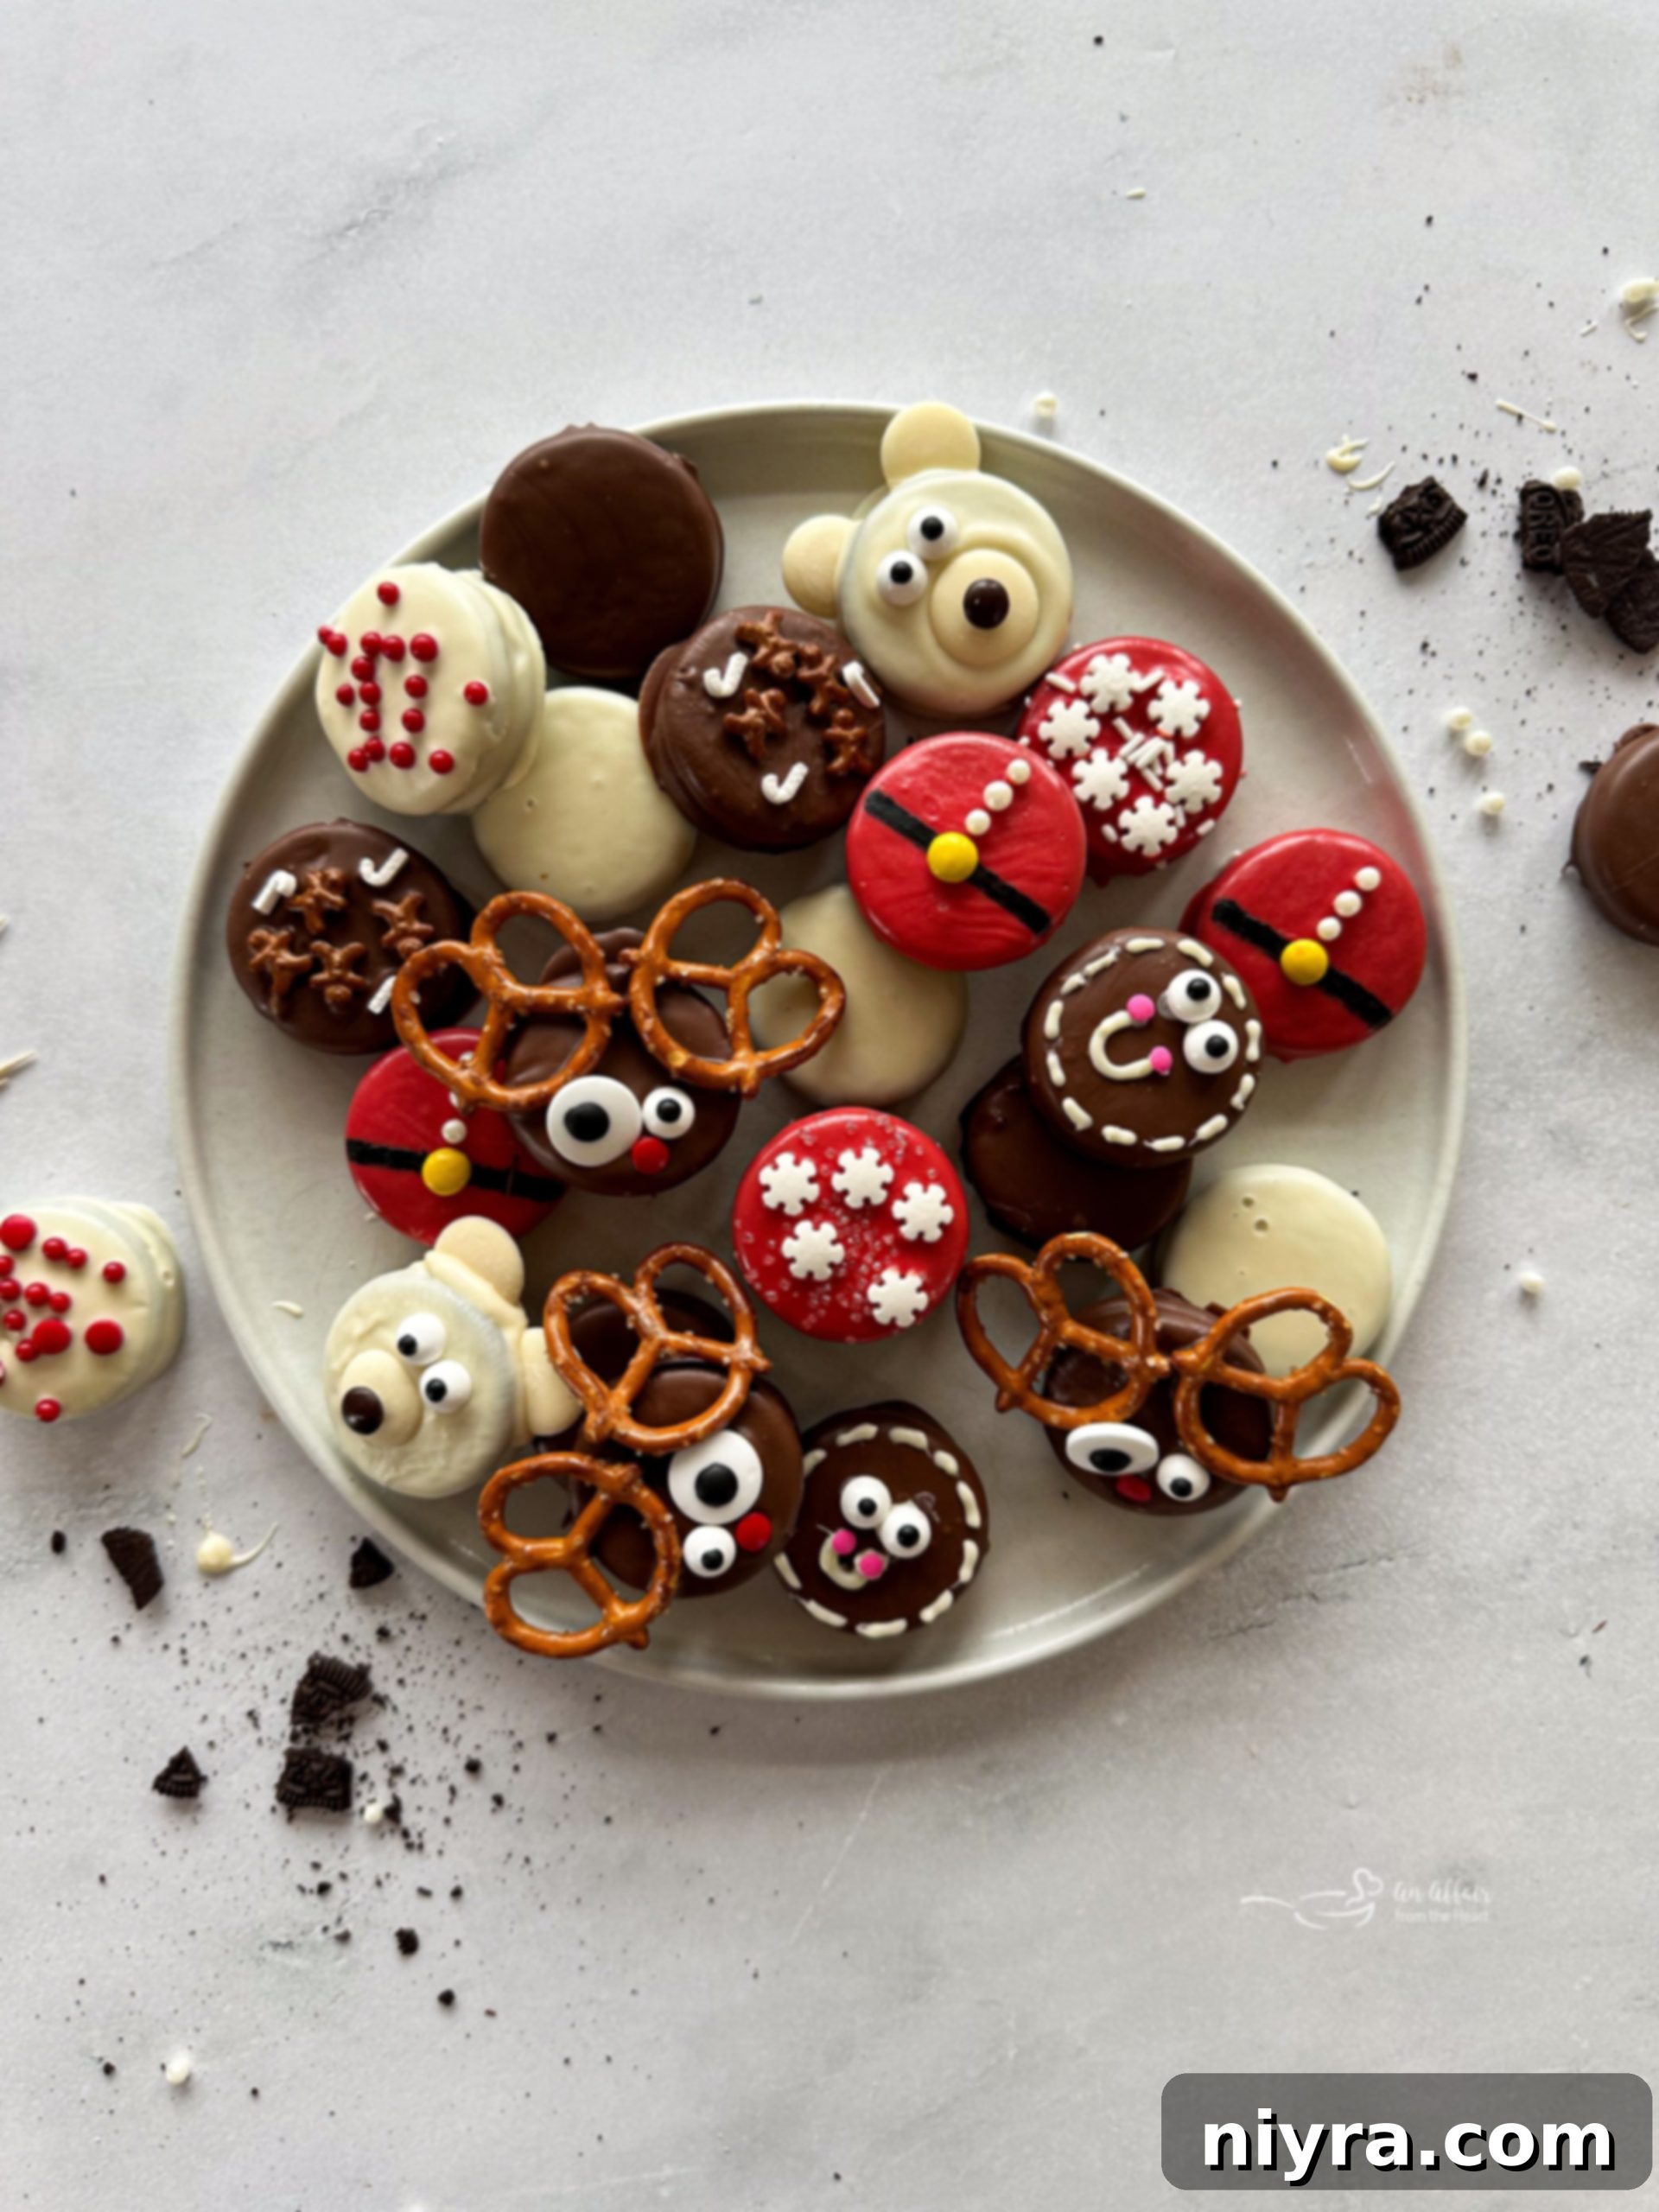
The holiday season is a magical time, filled with warmth, joy, and, of course, delicious treats. While store shelves are brimming with festive options, there’s something truly special about homemade goodies that bring an extra touch of charm. These delightful Christmas Oreos are the perfect example – almost too charming to eat, yet utterly irresistible. They’re incredibly easy to make, wonderfully festive, and promise as much fun in the kitchen as they do on your holiday dessert table. Get ready to transform ordinary Oreos into extraordinary edible masterpieces that will captivate both young and old.
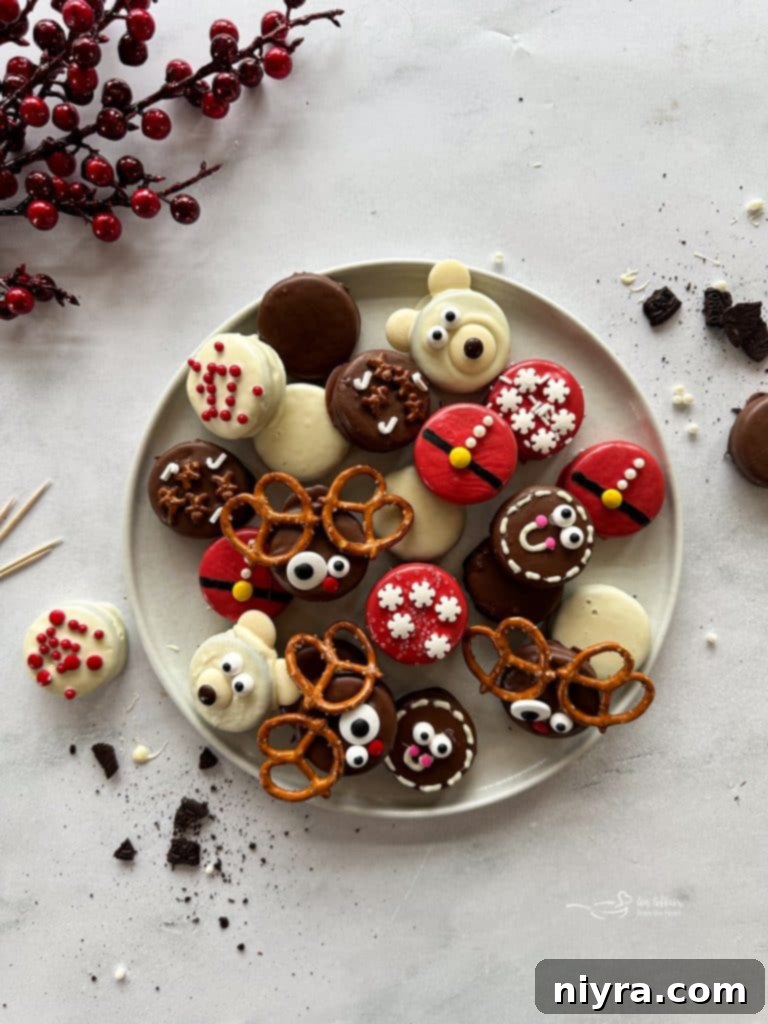
Our pantry rarely sees a day without a pack of classic Oreo cookies. They’re a beloved staple, especially when a quick, satisfying sweet bite is needed after a meal. While Oreo consistently releases a range of holiday-themed cookies – some with colored fillings, others flavored with peppermint, and even chocolate-dipped varieties – I’ve found that nothing quite compares to the personalized charm of these homemade dipped Oreos for Christmas. Have you ever stumbled upon such festive, handcrafted delights in your local store? Probably not! That’s where the magic of DIY holiday baking comes in, allowing us to create unique treats that truly stand out.
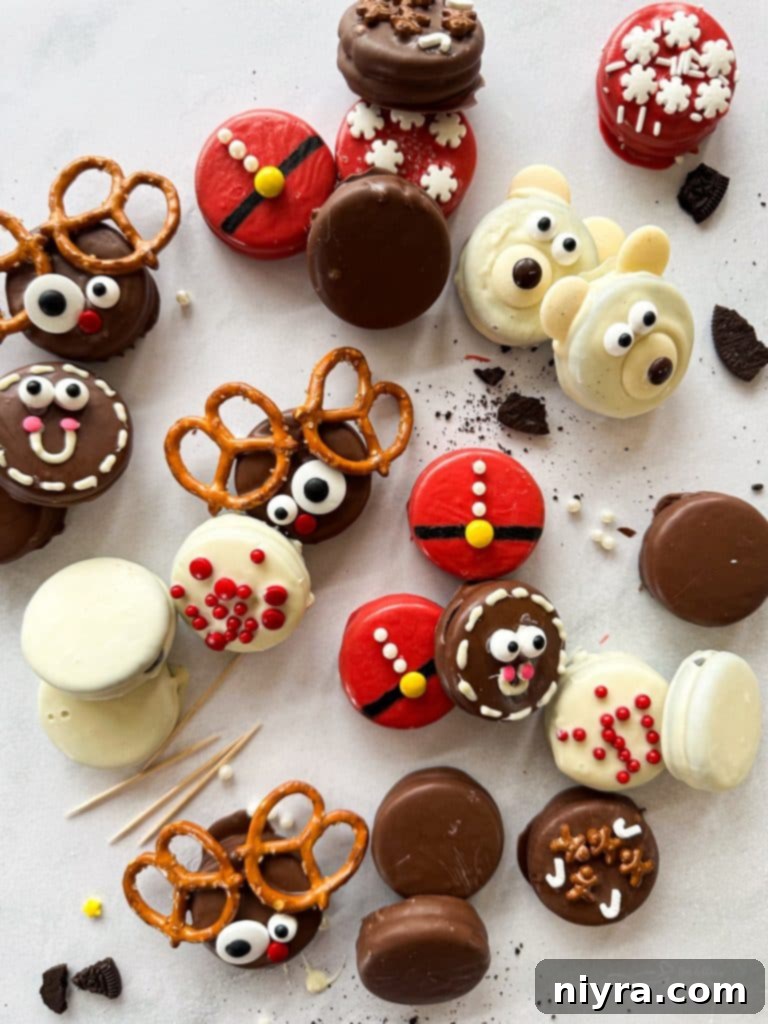
Crafting Adorable Christmas Oreos
If you’re an avid Oreo enthusiast, prepare to fall in love with these holiday-themed creations. We’re taking plain or even your favorite holiday-flavored Oreos and transforming them into whimsical Santa Clauses, charming polar bears, and playful reindeer. The secret lies in using candy melting wafers and a dash of festive decorations. The result? Cookies that look incredibly fancy and intricate, yet are surprisingly simple to assemble. And, as you might expect, they taste absolutely divine, combining the classic crunch of an Oreo with a rich, sweet coating and delightful candy accents.
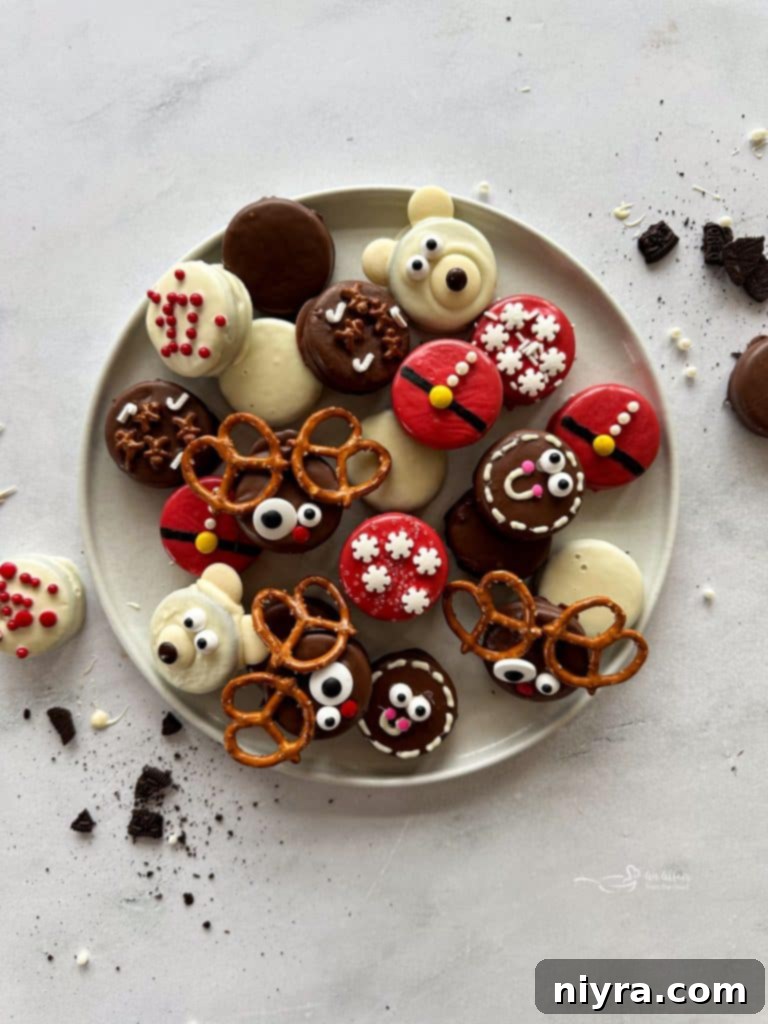
Festive Christmas Oreo Cookies for Every Occasion
These festive Christmas Oreo cookies truly embody the spirit of the holiday season. Beyond being a delectable treat for your family, they make perfect edible gifts. Imagine wrapping up a batch with beautiful festive paper and ribbons for a thoughtful, affordable present for neighbors, friends, or dedicated teachers. They’re also an absolute hit at holiday cookie swaps, guaranteed to impress with their unique designs and irresistible flavor. For children, decorating these Oreos can become a cherished holiday activity, sparking creativity and creating lasting memories. They are not just cookies; they are miniature works of edible art that spread cheer wherever they go.
If you enjoy the delightful simplicity and festive charm of these Christmas Oreos, you’ll definitely want to explore more Oreo-inspired recipes. Be sure to try my Oreo Bark, a quick and versatile treat, and my indulgent Oreo Truffle recipes, both perfect for satisfying any sweet craving.
Effortless & Delicious: Easy Christmas Cookies
One of the best qualities of these Christmas Oreos is how ideal they are for making ahead. Prepare a large batch well in advance of your holiday gatherings, and store them properly to maintain their freshness. Layer them between sheets of parchment paper in an airtight container, and they will remain perfectly delicious for up to two weeks at room temperature. For an extra refreshing indulgence, you can even stash them in the freezer for a cold, delightful treat. They thaw beautifully and provide a wonderful option for spontaneous holiday snacking. I confidently guarantee that these charming and easy Christmas cookies will be a standout addition to your holiday dessert table, bringing smiles and festive cheer to everyone who tries them.
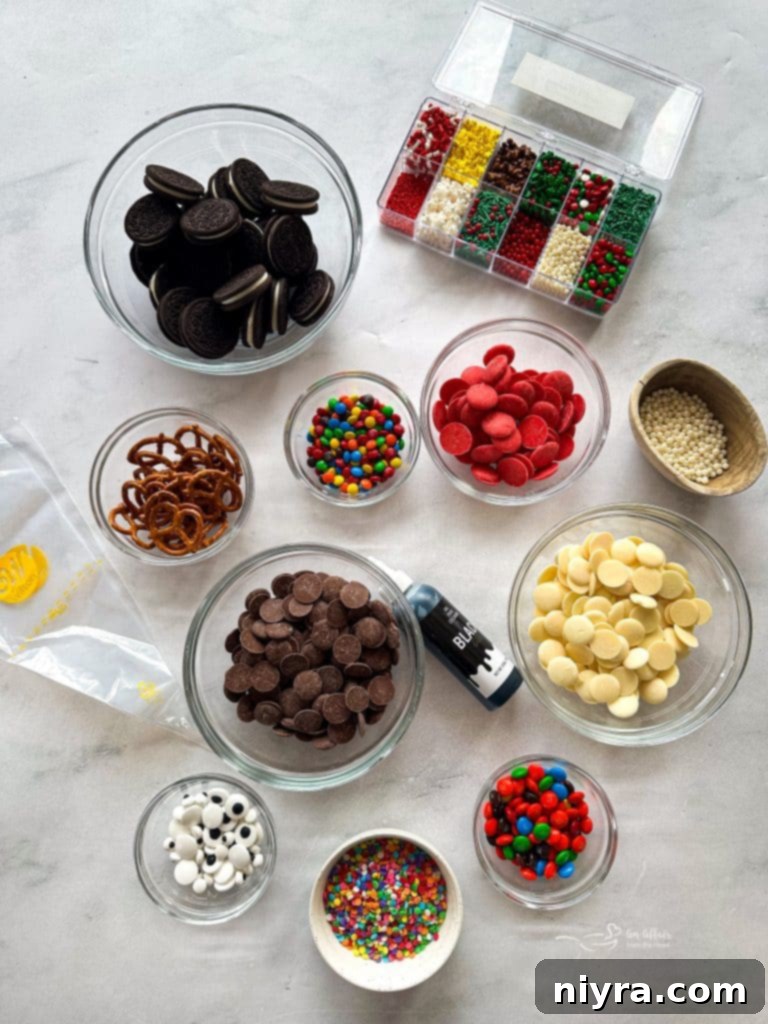
Essential Ingredients for Chocolate Dipped Christmas Oreos
Creating these festive chocolate-dipped Christmas Oreos requires just a few simple ingredients, easily found at most grocery stores. The beauty of this recipe lies in its flexibility, allowing you to customize flavors and designs to your heart’s content. Below you’ll find a detailed breakdown of the components needed for each charming design. For a comprehensive printable recipe card with exact measurements and detailed steps, please scroll to the end of this post.
To Make the Charming Reindeer Oreos:
- Candy Melting Wafers: Milk chocolate or dark chocolate wafers provide a rich, smooth coating for your Oreo cookies. These are specifically designed for easy melting and a beautiful finish.
- Oreo Cookies: While Original Oreos are a fantastic base, feel free to use any variety you prefer, such as Golden Oreos or even holiday-themed flavors.
- Candy Eyes: Small, edible candy eyes instantly bring your reindeer to life with a whimsical touch.
- Red M&Ms: These vibrant red candies serve as the iconic Rudolph nose, adding a pop of color and sweetness.
- Mini Pretzel Twists: The perfect shape and salty crunch for crafting adorable reindeer antlers.
For Crafting the Delightful Santa Suit Oreos:
- Red Candy Melting Wafers: Essential for creating Santa’s classic red suit, providing a smooth and vibrant base.
- Oreo Cookies: Again, any type of Oreo works beautifully here, allowing for personal preference.
- Black Gel Writer: A fine-tipped black gel writer is ideal for drawing Santa’s distinctive belt with precision.
- Yellow M&Ms: Mini yellow M&Ms are perfectly sized to create Santa’s iconic belt buckle.
- Small White Sugar Pearls: These elegant pearls act as Santa’s buttons, adding a refined touch to his suit.
To Create the Adorable Polar Bear Oreo Cookies:
- White Chocolate Candy Melting Wafers: Crucial for mimicking a polar bear’s pristine white fur, offering a creamy and delicious coating.
- Oreo Cookies: Choose your favorite Oreo variety to ensure a base you love.
- Festive Sprinkles, M&Ms, and Candy Eyes: A selection of these allows for creative decoration, bringing your polar bears to life with unique details and expressions.
For Simple Yet Elegant Chocolate Dipped Sprinkled Oreos:
- Oreos: Whether you opt for Original, Golden, or a special flavored Oreo, these will be the canvas for your sprinkled designs.
- Melting Wafers: Various colored melting wafers (milk chocolate, dark chocolate, white, red, green) offer a range of bases for your sprinkles, allowing for diverse and colorful creations.
- Decorations: Unleash your imagination with sugar pearls, M&Ms, a variety of festive sprinkles, colored sugars, and gel writers. Anything goes when it comes to personalizing these joyful treats!
Continue reading to discover valuable tips and tricks, creative ingredient substitutions, and answers to common questions you might have about mastering this delightful recipe for dipped Oreo cookies this Christmas season.
Step-by-Step Guide: How to Make Easy Chocolate Covered Christmas Oreos
Making these Christmas Oreo cookies is a wonderfully fun and straightforward activity, perfect for getting into the holiday spirit. Follow these detailed steps to create your edible masterpieces. For visual learners, remember that watching a recipe video can often provide even more helpful guidance!
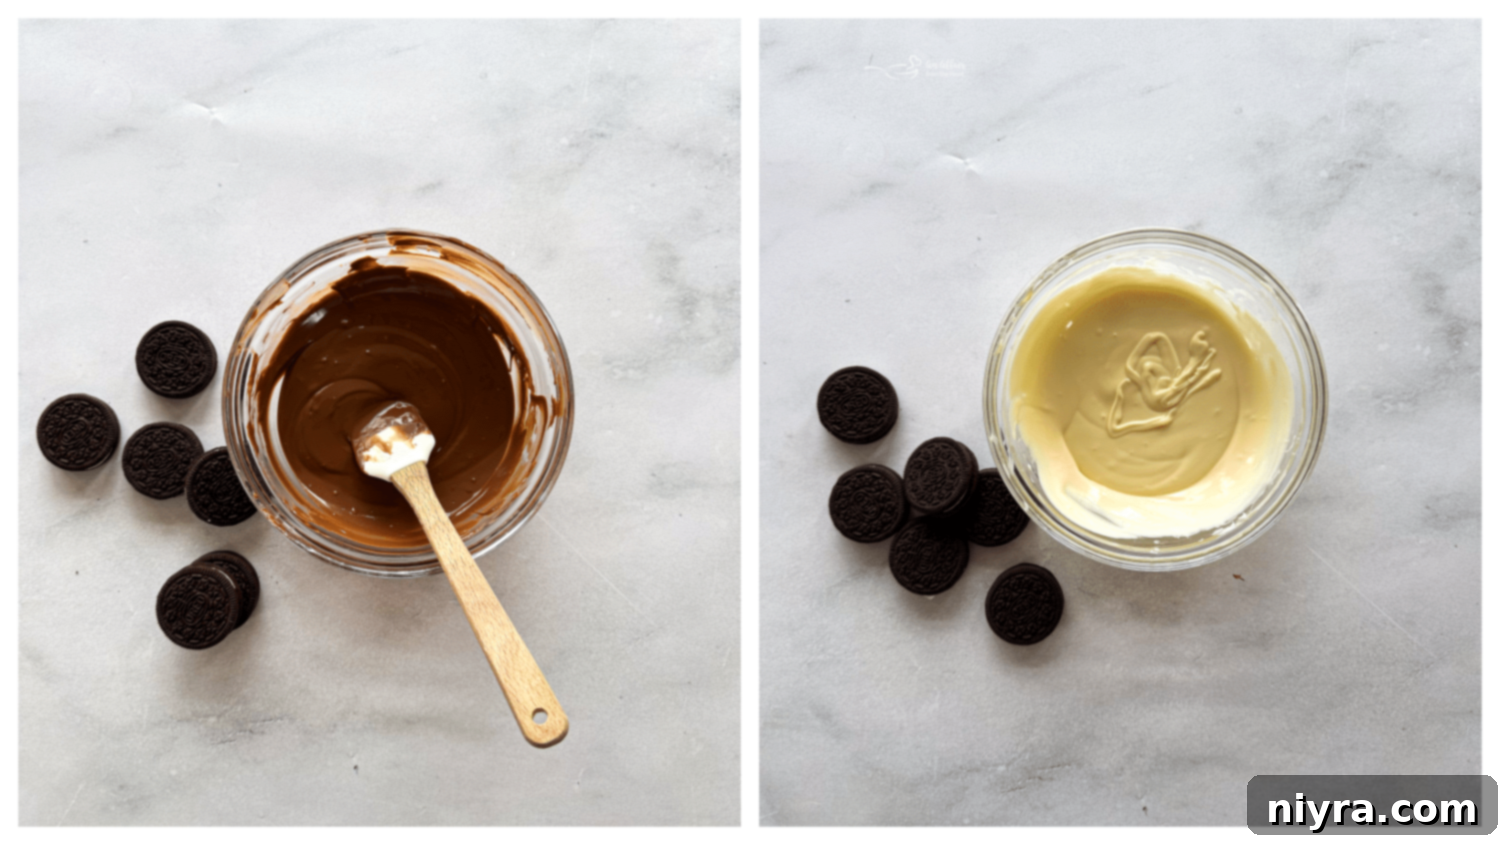
First, prepare your workspace by lining a sturdy baking sheet with parchment paper, wax paper, or a silicone silpat mat. This will prevent your dipped Oreos from sticking and ensure easy cleanup.
Next, it’s time to melt your candy wafers. In a medium, microwave-safe bowl, add the chocolate candy melting wafers of your chosen color or flavor (this will depend on the decoration you plan to make). Heat the wafers in the microwave for 1 minute at 50% power, then remove and stir thoroughly. Continue heating in 30-second intervals at 50% power, stirring diligently between each interval, until the chocolate is completely melted and smooth. Ensure there are no lingering lumps and that the consistency is easy to stir, indicating it’s ready for dipping. Alternatively, for a more controlled melting process, you can use a double boiler, which gently melts the chocolate over simmering water.
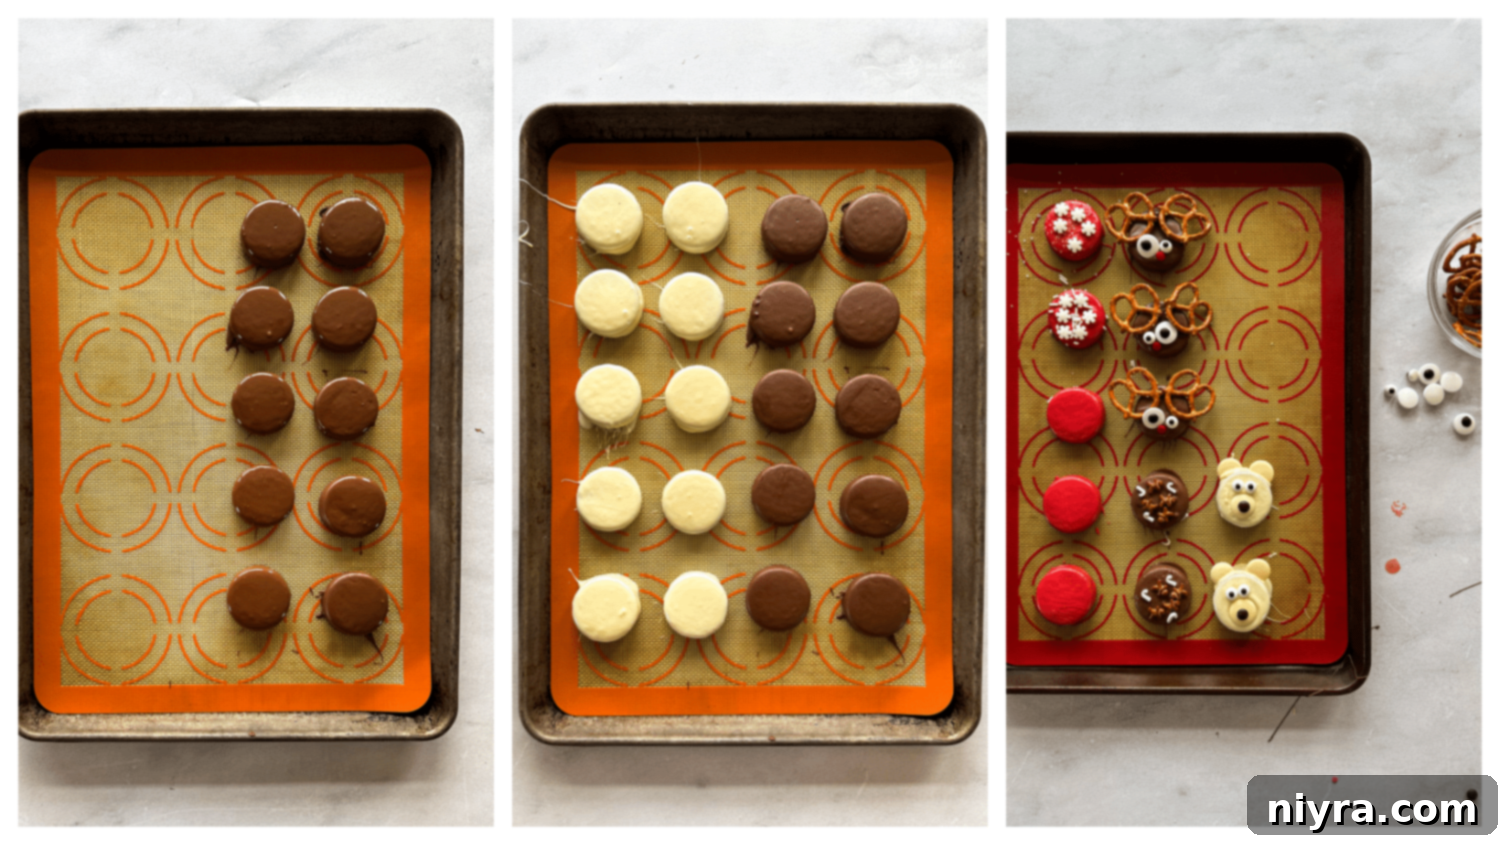
Once your chocolate is perfectly melted, carefully place an Oreo cookie onto the tines of a fork. Submerge the Oreo into the melted chocolate, turning it gently to ensure it’s completely coated. When the entire cookie is enrobed in chocolate, lift it out with the fork. Gently tap the fork several times against the side of the bowl. This crucial step allows any excess melted chocolate to drip off, preventing puddles and ensuring a clean, even coating on your cookie.
Using a toothpick, carefully slide the chocolate-covered Oreo from the fork onto your prepared baking sheet. The toothpick helps guide the cookie without disturbing the wet chocolate. Repeat this process with your remaining Oreos, ensuring they are spaced apart on the baking sheet to prevent them from touching as they set.
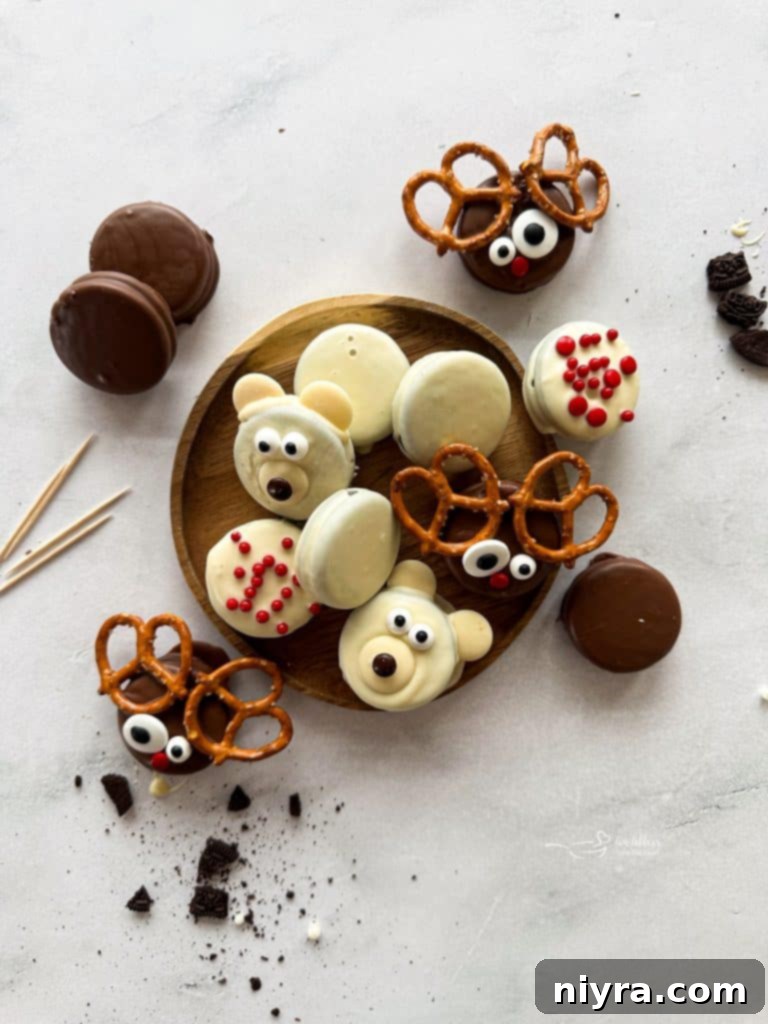
To Decorate the Reindeer Oreos:
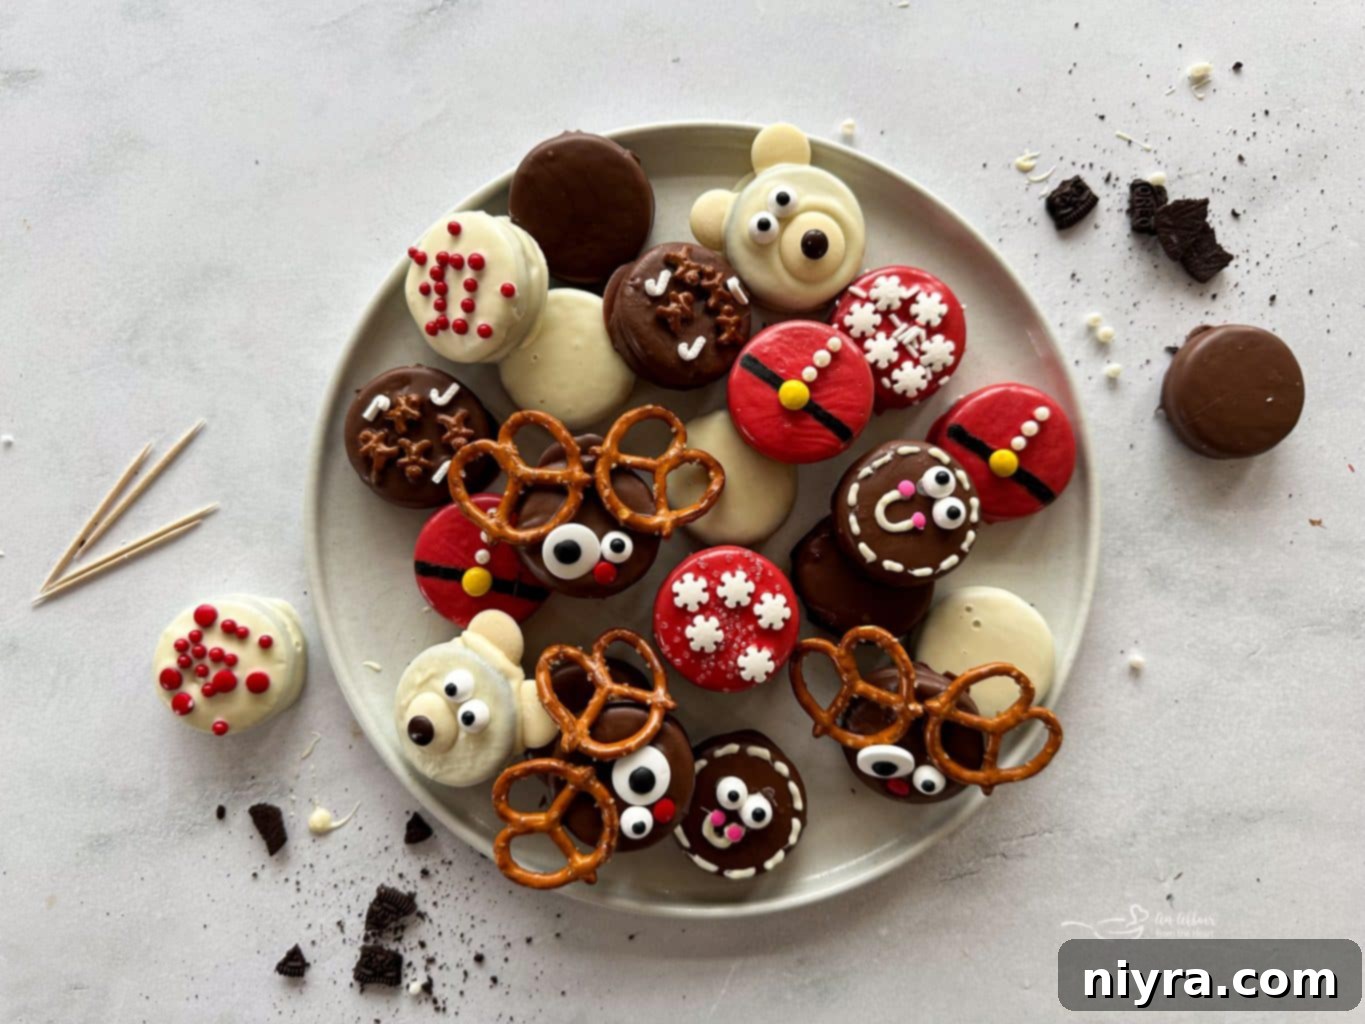
While the milk chocolate coating is still warm and pliable, carefully place two candy eyes onto the upper half of the Oreo. Position one red M&M just below the eyes for the reindeer’s nose. Finally, gently press two mini pretzel twists into the top of the cookie, resembling adorable antlers. Allow the decorated cookie to set completely until the chocolate is firm. Continue this process for all your reindeer Oreos.
To Create the Cute Polar Bears:
For your polar bear designs, work quickly while the white chocolate coating is still warm. Place two small white chocolate candy wafer melts on the top sides for ears, and one larger wafer melt for the snout. Then, press one brown M&M onto the center of the snout wafer to create the polar bear’s nose. You can also add candy eyes at this stage for added personality. Let the cookies set completely.
To Assemble the Festive Santa Suits:
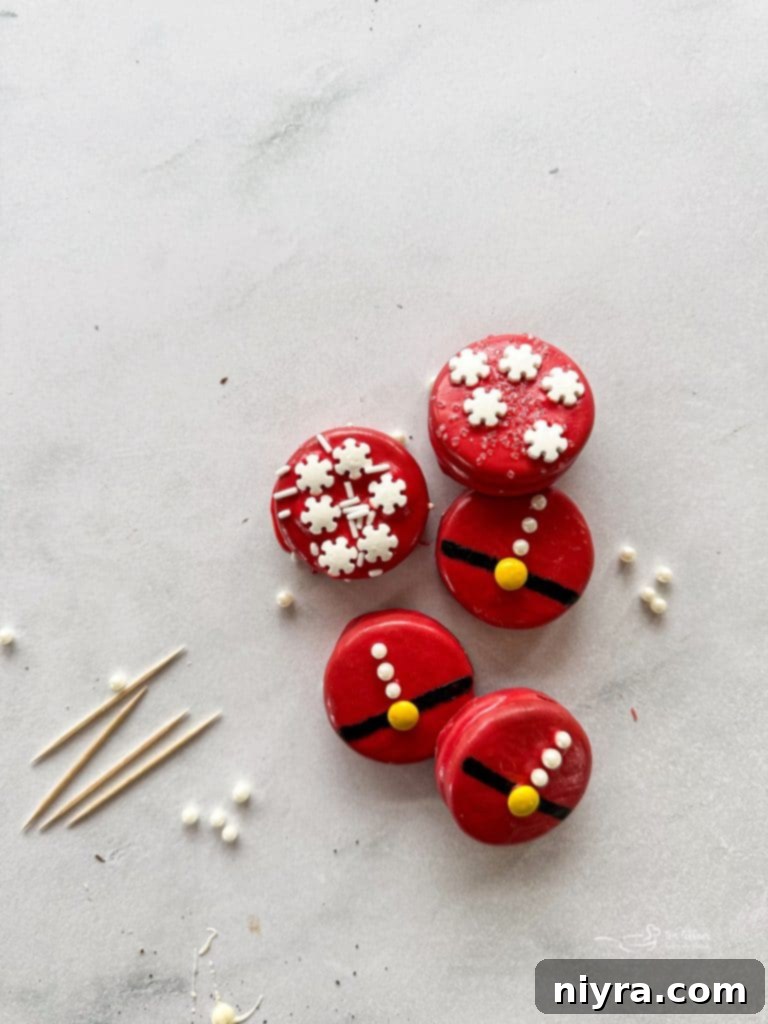
For the Santa Suit Oreos, it’s important to let the red candy coating harden completely before proceeding with decorations. Once firm, use a black gel writer or a fine paintbrush with black icing to draw a straight line across the lower center of the Oreo, creating Santa’s belt. For the belt buckle, add a tiny dab of melted chocolate to the back of one yellow M&M and carefully place it on the center of the black belt. Finish the suit by piping on small dots of white icing for buttons or by gently adhering small white sugar pearls with a touch of melted chocolate.
To Make the Joyful Sprinkled Cookies:
This is arguably the easiest and most customizable design! While the chocolate coating is still hot and wet, generously sprinkle your chosen festive sprinkles over the entire surface of the Oreo. You can use a single type of sprinkle or a colorful mix. Allow the cookie to cool down to room temperature, letting the chocolate harden completely and securing the sprinkles in place.
Fun Idea: For an extra festive touch, immediately after dipping and while the chocolate is still wet, press a mini Reese’s Cup onto the top of the cookie. Once set, it will resemble a charming edible ornament! Leftover chocolate-dipped Oreos should be stored in an airtight container at room temperature, where they will keep well for up to two weeks. For longer storage, you can freeze them for up to three months. Simply thaw them at room temperature on the kitchen counter before serving.

Love It? Pin It for Later!
If you adore this delightful recipe for Christmas Oreo cookies and want to make sure you can easily find it for future holiday seasons, don’t let it slip away! Pin this recipe to your favorite Pinterest holiday or cookie board before you navigate away. It’s the perfect way to keep track of your favorite festive treats and share inspiration with others!
Creative Substitutions for Your Christmas Oreos
When it comes to baking and decorating, don’t hesitate to get creative! Making substitutions in recipes is a fantastic way to personalize treats and cater to various tastes or dietary preferences. Feel empowered to make these Christmas Oreos uniquely your own with these flexible ideas:
- Oreo Varieties: Instead of classic Original Oreos, try Golden Oreos for a vanilla base, Mint Oreos for a cool twist, or even seasonal flavors like Gingerbread or Peppermint Bark Oreos for an extra holiday kick.
- Melting Wafers: If you don’t have white candy melting wafers, you can easily substitute them with high-quality melted white chocolate chips, melted white chocolate bars, or even almond bark for a similar smooth coating. For chocolate flavors, switch out chocolate melting wafers for dark chocolate chips, milk chocolate bars, or semi-sweet chocolate.
- Candy & Toppings: Any small, colorful candy can be used in place of M&Ms for noses or buttons. Think mini chocolate chips, Reese’s Pieces, or even colorful sprinkles that resemble tiny candies. For an extra festive crunch, sprinkle finely chopped nuts (like pecans or walnuts) over the wet chocolate, or crush candy canes for a refreshing peppermint topping. Edible glitter or colored sanding sugars can also add a beautiful sparkle.
- Pretzel Alternatives: If mini pretzel twists aren’t available, you can use chocolate-covered pretzel sticks broken into smaller antler-like pieces for your reindeer.
Frequently Asked Questions About These Oreo Christmas Cookies
To ensure your Christmas Oreo making experience is smooth and successful, here are answers to some common questions:
Can I make this Christmas Oreos recipe in advance? Absolutely! These Christmas cookies are excellent for preparing ahead of time. When stored correctly in an airtight container between layers of parchment paper, they will maintain their freshness and delicious taste for up to two weeks, making them perfect for busy holiday schedules.
Why is the coating on my Christmas Oreos not firming up? If you find that your chocolate coating isn’t setting or is remaining too soft, it’s often an indication that the melted coating is too thick. To remedy this, add a very small amount (about ½ to 1 teaspoon) of coconut oil or vegetable shortening to your melted coating and stir until it thins out to a smoother, more dip-friendly consistency. This will help it set firmer.
What are some creative packaging ideas for gifting these delightful cookies? The possibilities for packaging these holiday cookies are endless and part of the fun! For affordable and festive options, visit your local dollar store or craft supply store. Look for clear cellophane bags, small decorative boxes, holiday-themed tins, or even simple parchment paper tied with colorful ribbons. You can also layer them in clear plastic containers with tissue paper for a beautiful presentation. Don’t forget personalized labels or tags!
Essential Tips & Tricks for Perfect Christmas Oreos
Achieving perfectly dipped and decorated Christmas Oreos is simple with a few insider tips:
- Smooth Melting: Ensure your candy melting wafers or chocolate are completely smooth and free of any lumps before you begin dipping. A silky-smooth coating is key for professional-looking results.
- Shake Off Excess: After dipping each Oreo, tap the fork gently against the side of the bowl. This helps shake off any excess coating, preventing thick, uneven layers and ensuring your decorations adhere beautifully.
- Quick Setting: To speed up the setting process, especially if your kitchen is warm, place the dipped Oreos in the refrigerator for 5-10 minutes immediately after dipping and decorating. The cool temperature will help the chocolate firm up quickly.
- Double Boiler Method: If you prefer to avoid the microwave or want more control over the melting process, use a double boiler. This method melts chocolate gently and consistently, reducing the risk of scorching.
- Piping Precision: For neat and consistent dots for Santa’s buttons or other fine details, consider using a piping bag fitted with a very small round tip, or even a ziplock bag with a tiny corner snipped off.
- Work in Batches: Especially when dealing with multiple colors or intricate designs, work in small batches. This ensures your chocolate stays warm and pliable for dipping and decorating.

This recipe is proudly featured as part of The Sweetest Season, an annual virtual cookie swap. This heartwarming event is co-hosted by Erin of The Speckled Palate and Susannah of Feast + West. Each year, a community of talented food bloggers comes together to share innovative and delicious holiday cookie recipes, perfect for baking and gifting during the festive season. It’s a wonderful opportunity to discover new favorites and expand your holiday baking repertoire.
Beyond the joy of sharing recipes, this year’s Sweetest Season event holds an even deeper purpose: we are dedicated to raising much-needed funds for Cookies 4 Kids’ Cancer. This remarkable organization is a recognized 501(c)3 non-profit entirely committed to funding critical research for new, innovative, and, most importantly, less-toxic treatments for childhood cancer. Their mission provides hope and tangible solutions for families facing immense challenges.
Since its inception in 2008, Cookies for Kids’ Cancer has made an incredible impact, granting nearly $18 million to pediatric cancer research. These funds have translated into over 100 research grants awarded to leading pediatric cancer centers across the country. From these vital grants, an astonishing 35+ treatments are now available to children battling cancer today, offering them better chances and improved quality of life. Every contribution, no matter how small, plays a crucial role in advancing these life-saving efforts.
We invite you to join us in supporting this incredibly important cause! Please consider making a donation through our dedicated fundraising page. Your generosity directly contributes to finding cures and providing brighter futures for children. There’s even more exciting news: Cookies for Kids’ Cancer is currently in a matching window with their generous friends at OXO. This means that every dollar raised through the end of 2024, up to $100,000, will be matched by OXO. Whatever money we collectively raise will automatically be doubled on our fundraising page, maximizing the impact of your donation!

Discover More Holiday Recipes to Love
If you’re still in the mood for festive baking and looking for more delightful holiday treats, you’ll love these additional recipes from our collection. Explore my heartwarming Holiday Biscotti, perfect for dipping in coffee or hot cocoa, or indulge in the spiced comfort of these Gingerdoodle Cookies. For a light and airy delight, try these sweet Peppermint Meringues. And for recipes with an extra festive twist, don’t miss my rich Chocolate Mint Candy Cookies or these cozy Hot Chocolate Thumbprint Cookies. Each recipe offers a unique flavor and texture to complete your holiday spread.
These Christmas Oreo cookie ideas are more than just a recipe; they are an invitation to create, share, and enjoy the holiday season. Whether presented as a decadent treat for your family or a thoughtful homemade gift, they are bound to be an unforgettable hit.
LIKE THIS RECIPE?
Don’t forget to give it a ⭐⭐⭐⭐⭐ star rating and
leave a comment below the recipe!
Christmas Dipped Oreo Cookies
These Christmas Oreos are almost too cute to eat and they won’t stick around for long! Easy and festive, these holiday cookies are as much fun to make as they are to eat.
Prep Time: 15 mins
Setting Time: 30 mins
Course: Cookies
Cuisine: American
Keyword: Christmas cookies, Christmas Oreos, Dipped Oreos, Oreo Polar Bears, Oreo Reindeer, Oreos, Santa Oreos
Servings: 48 servings
Ingredients
- For Making the Santa Suit Oreos:
- 2 cups Red candy melting wafers
- 24 Oreo cookies
- Black gel writer
- 24 Yellow mini M&Ms
- Sugar pearls or piped chocolate
- To Make the Polar Bear Oreo Cookies:
- 2 cups White chocolate or vanilla candy melting wafers (+ 72 additional for ears and nose)
- 24 Oreo cookies
- 48 Candy Eyes
- 24 brown mini M&Ms
- For Making the Reindeer Oreos:
- 2 cups Milk chocolate or dark chocolate candy wafers
- 24 Oreo cookies
- 48 Candy eyes
- 24 Red mini M&Ms
- 48 Mini pretzel twists
- For Chocolate Dipped Sprinkled Oreos:
- 24 Oreos
- 2 cups various melting wafers
- M&Ms, festive sprinkles, colored sugars, and gel writers.
Instructions
- Line a baking sheet with parchment paper.
- In a medium, microwave-safe bowl, add your choice of chocolate candy melting wafers. Heat 1 minute at 50% power and stir. Continue heating in 30-second intervals at 50% power until chocolate is melted, stirring between each. Stirring until smooth and no lumps appear. Alternatively, use a double boiler.
- Place the Oreos on a fork and dip into the melted chocolate. Turn to coat completely in chocolate. When the entire cookie is covered with chocolate, lift it out using the fork. Tap the fork on the side of the bowl and let the excess chocolate drip off.
- Using a toothpick, slide the Oreo onto the prepared baking sheet. Repeat with remaining Oreos.
- To Make the Santa Suit Oreos:
Let the red candy coating harden completely before decorating. Using the gel writer or a fine paintbrush with black icing, draw a line across towards the lower center of the Oreo to make the belt.
Add a dab of melted chocolate to 1 mini yellow M&M to make the belt buckle then make the buttons by piping on dots or using sugar pearls.
- To Make the Polar Bear Oreos:
While the white chocolate is still hot, place 2 white chocolate candy wafer melts for the ears and 1 for the nose before pressing 1 brown mini M&Ms for the tip of the nose.
- To Make the Oreo Reindeer:
While the milk chocolate is still hot, place 2 candy eyes for eyes and 1 red mini M&M as the nose. Add 2 pretzels to the top for antlers. Let set completely. Repeat with remaining Oreos.
- To Make the Sprinkled Oreo Cookies:
While the chocolate is still hot, sprinkle with festive sprinkles. Let set completely.
Notes
- Use white, milk, or dark chocolate depending on flavor or color preference.
- Make with different Oreos. Choose holiday flavors, Golden Oreos, Original, or Double Stuff Oreos.
- Grab some lollypop sticks from your local craft store and add a stick to the dipped Oreos before dipping and decorating.
- Decorate with colored sprinkles, chopped nuts, cookie crumbs, crushed candy canes, or sugar crystals.
- Store Christmas Oreos in an airtight container at room temperature for up to 2 weeks. These cookies can be frozen for up to 3 months.
