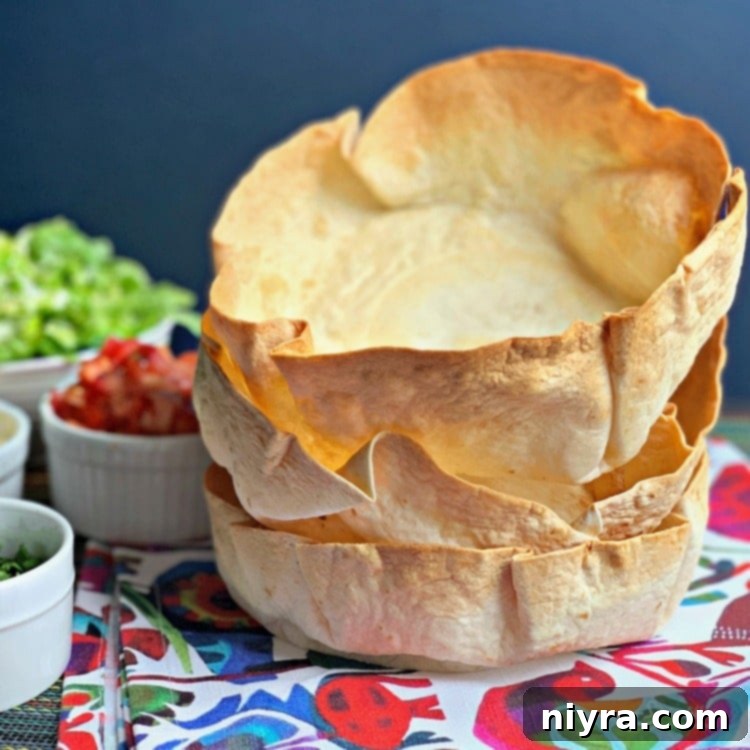
Crispy Air Fryer Taco Salad Bowls: Your Ultimate Guide to Healthier, Homemade Edible Tortilla Bowls
Transform your ordinary taco night into an extraordinary culinary experience with these incredibly easy-to-make, healthier taco salad bowls, crafted right in your air fryer. Using simple flour tortillas, you can create perfectly crispy, edible bowls in minutes, offering a delicious and fun way to enjoy your favorite taco salad. Forget the messy plates and greasy fried shells – these homemade air-fried versions are a game-changer!
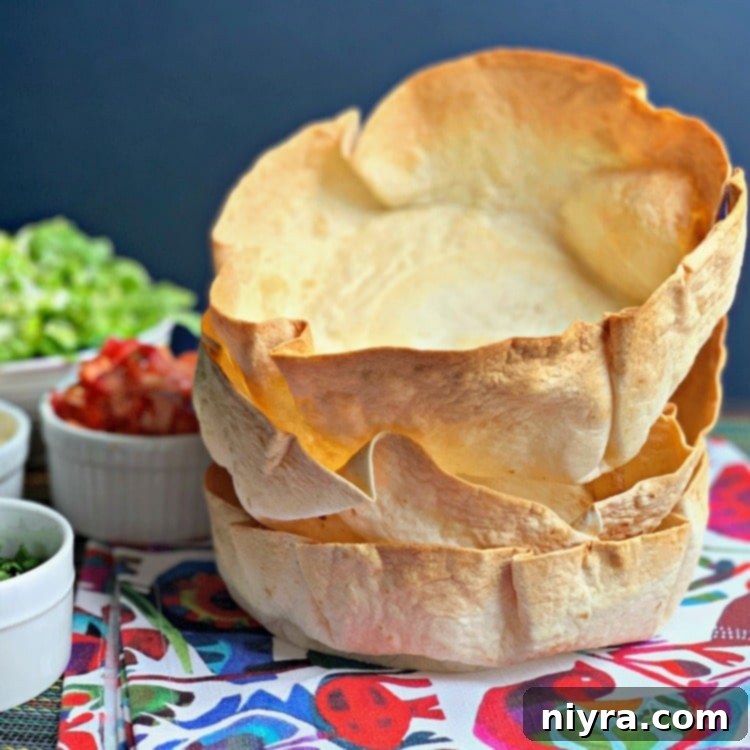
Who doesn’t love a vibrant, flavorful taco salad? But what if you could take that enjoyment to the next level by literally eating the bowl your salad comes in? This technique for creating Air Fryer Taco Salad Bowls is not only ingenious but also surprisingly simple, making it accessible for any home cook. Say goodbye to the deep-fried, calorie-laden shells of the past and embrace a lighter, equally satisfying alternative that’s perfect for weeknight dinners or festive gatherings.
Please note: Some of the links below are affiliate links, meaning I may earn a small commission if you make a purchase through them, at no extra cost to you. I only recommend products and brands that I genuinely love and believe will benefit you. For my full disclosure policy, please click here.
^Don’t forget to save this recipe! Pin it now so you can find it later!^
My Enduring Love Affair with the Taco Salad
My passion for taco salads runs deep, truly ever since I landed my first job at Wendy’s before I even turned 15. The Wendy’s taco salad, with its hearty chili and crunchy tortilla chips, was a revelation, even if it didn’t come in an edible bowl. That early culinary memory stuck with me so much that I developed and shared a copycat Wendy’s Taco Salad recipe right here on my blog. It captures the nostalgic flavors perfectly, bringing back a taste of my youth.
(On a personal note – for anyone who frequented the Wendy’s on 120th and Center in Omaha, that was my stomping ground! I recently drove by and saw it had closed. So many memories from that place – a true piece of my past.)
Beyond my early fast-food days, our family has another beloved taco salad tradition: “Aunt Sue’s Taco Salad.” This recipe, a guaranteed crowd-pleaser, is packed with savory ground beef, hearty beans, crisp lettuce, fresh tomatoes, and a generous sprinkle of cheese. What truly sets it apart is the unexpected but delightful drizzle of Italian Dressing and the satisfying crunch of Nacho Cheese Doritos. It’s a testament to the incredible versatility of the humble taco salad.
For those seeking a plant-based option, my friend Debi offers a fantastic solution with her Slow Cooker Vegetarian Lentil Taco Salad. It proves that the joy of a taco salad can be adapted to suit any dietary preference, making it a truly inclusive dish.
The Magic of the Air Fryer: Crafting Your Perfect Tortilla Bowl
Today, however, our focus shifts from the delicious fillings to the innovative vessel that holds them. We’re diving into how to create those irresistible, edible tortilla bowls, and the secret weapon is your air fryer! This fantastic kitchen appliance isn’t just for fries and chicken wings; it’s a remarkably efficient tool for crafting healthier, perfectly crispy tortilla bowls without the need for excessive oil or a deep fryer.
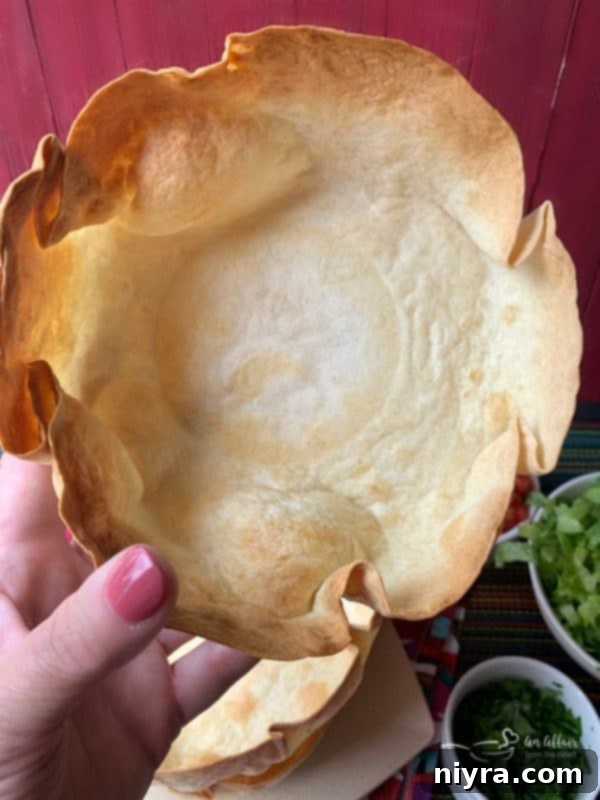
Using the air fryer means significantly cutting down on the fat content you’d find in traditionally fried tortilla bowls, making your taco salad a much lighter, guilt-free meal. The result is a beautifully golden-brown, wonderfully crispy shell with charming little puffy spots – each one perfectly imperfect and unique. My initial attempts involved a bit of experimentation to nail down the ideal temperature and timing. The process I developed is similar to how I approach pre-baking a pie crust: a two-stage cooking method. Covering the tortilla with foil during the initial phase prevents burning and promotes even cooking, while a shorter final burst of air frying without the foil crisps it up to perfection.
Essential Tools and Ingredients for Your Air Fryer Taco Salad Bowls
Gathering your supplies is the first simple step towards creating these fantastic edible bowls. You’ll be surprised at how few items you actually need!
Ingredients:
- Burrito-Sized Flour Tortillas: The larger size works best for creating a substantial bowl, but feel free to experiment with smaller ones for mini taco salad appetizers. Choose white or whole wheat for slightly different textures and nutritional profiles.
- Non-Stick Cooking Spray: A light mist is all it takes to help the tortilla crisp up beautifully and achieve that golden-brown finish. Alternatively, you can brush a small amount of neutral oil (like avocado or vegetable oil) onto both sides.
Equipment:
- Air Fryer: The star of the show! Remember that air fryer models vary in wattage and internal design (round vs. square basket), so cooking times might need slight adjustment.
- Aluminum Foil: Essential for shaping the tortilla and preventing it from becoming overly crisp or burnt in the initial cooking phase.
- Oven-Safe Ramekin or Small Bowl: This is crucial for weighing down the center of the tortilla and helping it maintain its bowl shape as it cooks, preventing a large air bubble from forming in the middle.
With just these two ingredients and a few common kitchen tools, homemade taco salad bowls are mere minutes away!
Step-by-Step Guide: How to Make Air Fryer Taco Salad Bowls
Follow these simple steps to create perfectly crispy taco salad bowls every time. Precision in shaping and careful monitoring are key to success!

- Prepare the Tortilla: Lightly spray both sides of a burrito-sized flour tortilla with non-stick cooking spray. Ensure an even coating for uniform crispness.

- Foil Preparation: Take a piece of heavy-duty aluminum foil, slightly larger than your tortilla, and fold it over to double its thickness. This stronger foil will help hold the tortilla’s shape.
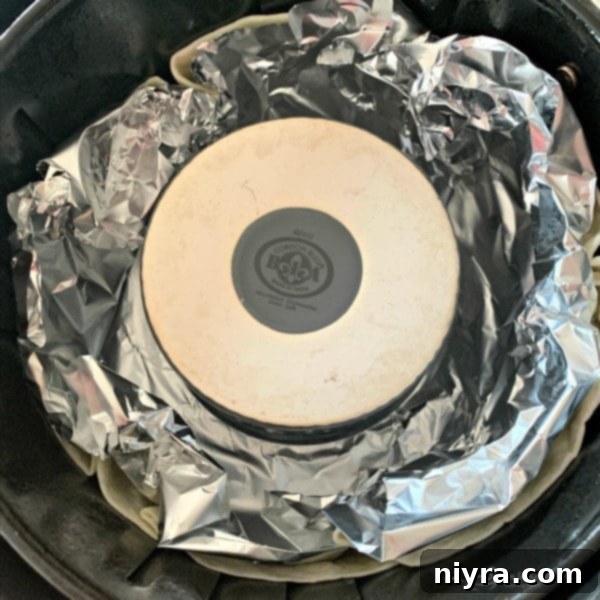
- Shape and Secure: Carefully press the sprayed tortilla into your air fryer basket, using the doubled-over foil to help shape it into a bowl. Place an oven-safe ramekin (or a similar-sized, weighty, oven-safe object) into the center of the tortilla. This acts as a weight to prevent the tortilla from puffing up into one large air bubble and ensures it retains a nice bowl shape.
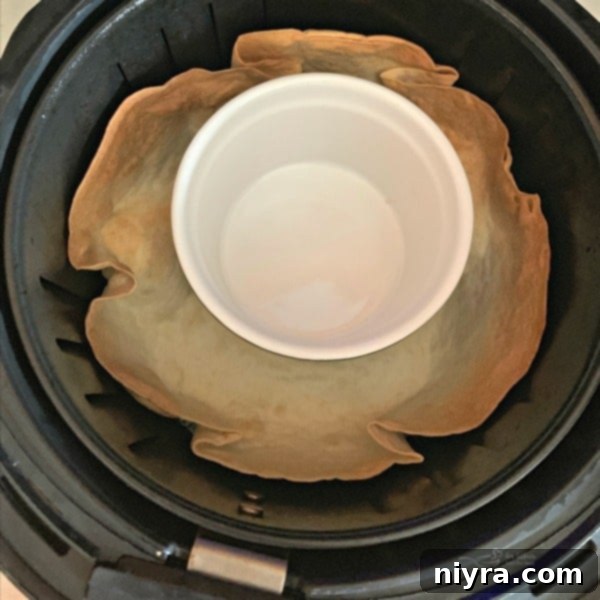
- Initial Air Fry: Air fry the tortilla at 400°F (200°C) for approximately 5 minutes. This initial phase with the foil helps the tortilla cook evenly without burning.
- Final Crisp: After 5 minutes, carefully remove the ramekin (it will be hot!) and the foil. Replace the ramekin in the center of the partially cooked tortilla bowl and air fry for an additional 2 minutes, or until the bowl is golden brown and perfectly crispy. Keep a close eye on it, as air fryer models vary, and edges can brown quickly.
- Cooling: Once crispy, remove the taco salad bowl from the air fryer and let it cool completely on a wire rack. It will continue to crisp as it cools, achieving the ideal texture for your salad.
Expert Tips for Flawless Air Fryer Tortilla Bowls
Achieving the perfect crispy, golden taco salad bowl is simple with a few insider tips:
- Air Fryer Basket Shape Matters: My air fryer has a round basket, which naturally helps shape the tortilla. If your air fryer basket is square (as many are), you’ll need a slightly different approach. Place the doubled-over heavy-duty foil *under* the tortilla, then form both the foil and the tortilla into a circular bowl shape that’s a bit larger than the tortilla itself. Add the ramekin to the center. For extra shape retention and to prevent the edges from over-browning, you can gently fold a small portion of the foil over the very edge of the tortilla. This technique ensures a sturdy, well-formed bowl regardless of your air fryer’s design.
- Monitor Closely: Air fryers can vary significantly in heat distribution and cooking power. Always keep an eye on your tortilla bowls, especially during the final crisping stage, to prevent burning. Adjust cooking times by 30-60 second increments if needed.
- Don’t Overcrowd: Cook one tortilla bowl at a time to ensure proper airflow and even crisping. Overcrowding will result in soft or unevenly cooked bowls.
- Seasoning Options: For an extra layer of flavor, lightly sprinkle your tortillas with a pinch of salt, garlic powder, or even a dash of taco seasoning before air frying.
- Batch Cooking & Storage: These bowls are best enjoyed fresh, but you can make a batch ahead of time. Store cooled, crispy bowls in an airtight container at room temperature for up to 2-3 days. Re-crisp them in the air fryer for 1-2 minutes if they lose some crunch.
Beyond the Basics: Customizing Your Taco Salad Bowl Experience
Once you have your perfectly crispy air-fried tortilla bowls, the possibilities for customization are endless. They provide the ideal canvas for any flavor combination you can dream up!
Filling Ideas Galore:
- Proteins: Classic seasoned ground beef, shredded chicken, slow-cooked pork carnitas, grilled fish, black beans, pinto beans, or even seasoned tofu or tempeh for a vegetarian twist.
- Fresh Vegetables: Crisp shredded lettuce (iceberg or romaine are excellent), diced tomatoes, corn, black olives, sliced red onions, bell peppers, or jalapeños for a kick.
- Cheeses & Creamy Toppings: Shredded cheddar, Monterey Jack, crumbled cotija cheese, a dollop of sour cream or Greek yogurt, and a generous scoop of homemade guacamole or fresh avocado slices.
- Sauces & Dressings: Your favorite salsa, a zesty cilantro-lime dressing, a creamy ranch, or even a smoky chipotle ranch.
Tortilla Variations:
While flour tortillas are our go-to for their flexibility and crisping ability, feel free to experiment:
- Whole Wheat Tortillas: For a slightly nuttier flavor and added fiber, whole wheat tortillas work wonderfully and crisp up beautifully in the air fryer.
- Smaller Tortillas: If you’re hosting a party or just want smaller portions, use street taco-sized tortillas and adjust the cooking time down by a minute or two. These make fantastic individual appetizer bowls!
- Corn Tortillas: Corn tortillas can also be used, but they are less pliable. For best results, lightly warm them in the microwave or a skillet before shaping to make them more flexible and less prone to cracking.
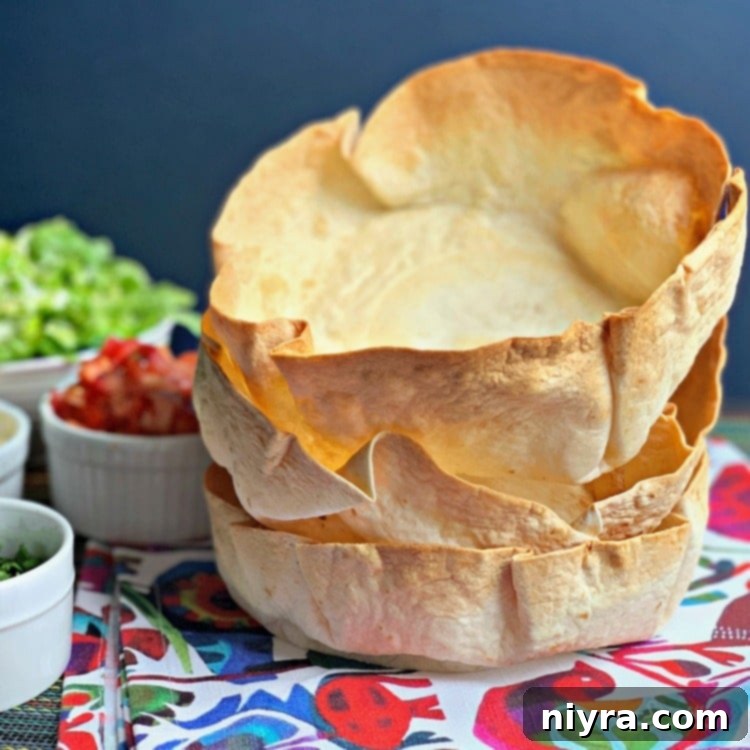
The versatility of these bowls means you can switch up your fillings endless ways, ensuring every taco night is a fresh and exciting culinary adventure!
More Edible Bowl Inspiration
If you love the idea of an edible salad bowl, you’re in for another treat! These Parmesan Cheese Salad Bowls are an incredibly fun and savory way to serve salads, offering a completely different flavor profile and texture. They’re perfect for impressing guests or simply making your meal more exciting!
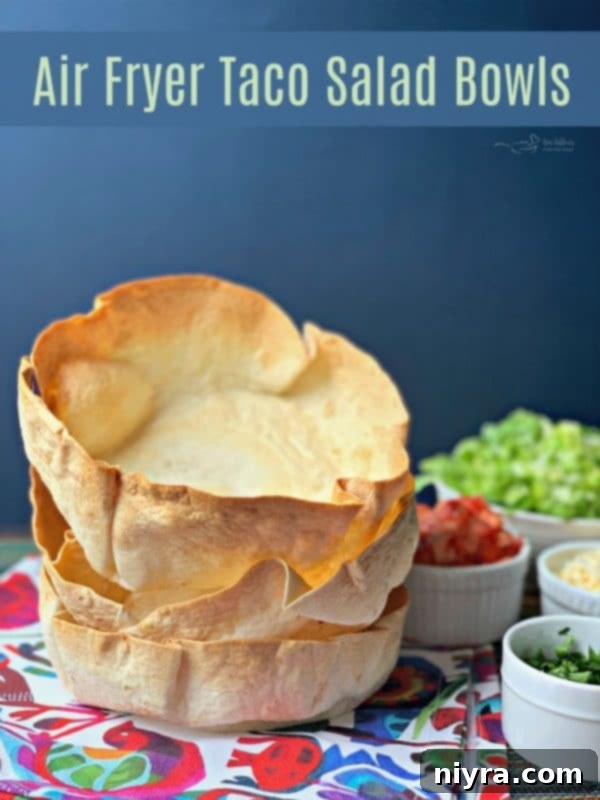
Ready to Transform Your Taco Night?
Now that you have all the secrets to crafting perfect, crispy flour tortilla bowls in your air fryer, what are you waiting for? This healthier, simpler, and more enjoyable method is sure to become a staple in your kitchen. Get ready to impress your family and friends with these delightful edible vessels. Let’s make every taco salad a masterpiece!

LIKE THIS RECIPE?
Don’t forget to give it a ⭐️⭐️⭐️⭐️⭐️ star rating and
leave a comment below the recipe!

Rated 4.24 stars by 71 users
Print Recipe
Air Fryer Taco Salad Bowls
Make homemade taco salad bowls right in your air fryer in minutes using flour tortillas. Healthier than fried and so simple to make!
Prep Time: 1 min
Cook Time: 7 mins
Total Time: 8 mins
Course: Mexican
Cuisine: Mexican
Keyword: Air Fryer, Flour Tortilla Bowls, Taco Salad Bowls, Tortilla Bowls
Servings: 1 bowl
Author: Michaela Kenkel
Equipment
- Hamilton Beach Air Fryer Oven Digital and Programmable, Nonstick (35050), 2.5 Liters, Black
- HIC Souffles, Porcelain, 4.5-Inch, 14-Ounce Capacity, Set of 6
Ingredients
- 1 burrito sized flour tortilla
- Cooking spray
Instructions
- Spray both sides of tortilla with cooking spray.
- Fold a piece of foil double thickness the size of the tortilla.
- Fold into the basket of your air fryer.
- Place a larger ramekin (or something similar) into the middle of the shell.
- Air fry for 5 minutes on 400 degrees.
- Carefully remove ramekin (it’s HOT!!) and foil. Place ramekin back into the center, air fry 2 minutes more.
Notes
**Note – My air fryer basket is round. So I was able to make my bowls the same size as the basket. If your air fryer basket isn’t round, and I know that many of them aren’t, the foil part of this process is a little different.
For shaping a bowl to make in a square air fryer, place the doubled over, heavy duty foil under the tortilla, form it into a circle that is a bit larger than the tortilla itself. Form the foil and the tortilla into the shape of a bowl, add the ramekin to the center, take that extra bit of foil and fold it over the edge of the tortilla slightly. It will help it keep its shape, and also aid in it getting too brown.
The recipe video you see here will show this technique, the photos show the technique for the round air fryer basket. Air fryers vary. Careful not to let it burn.
Nutrition
Serving: 1 | Calories: 220kcal | Carbohydrates: 84g | Protein: 21g | Fat: 20g | Saturated Fat: 7g | Polyunsaturated Fat: 11g | Cholesterol: 29mg | Sodium: 1321mg | Fiber: 11g | Sugar: 5g
