Create a Charming Easter Peep Centerpiece: A Simple DIY Guide
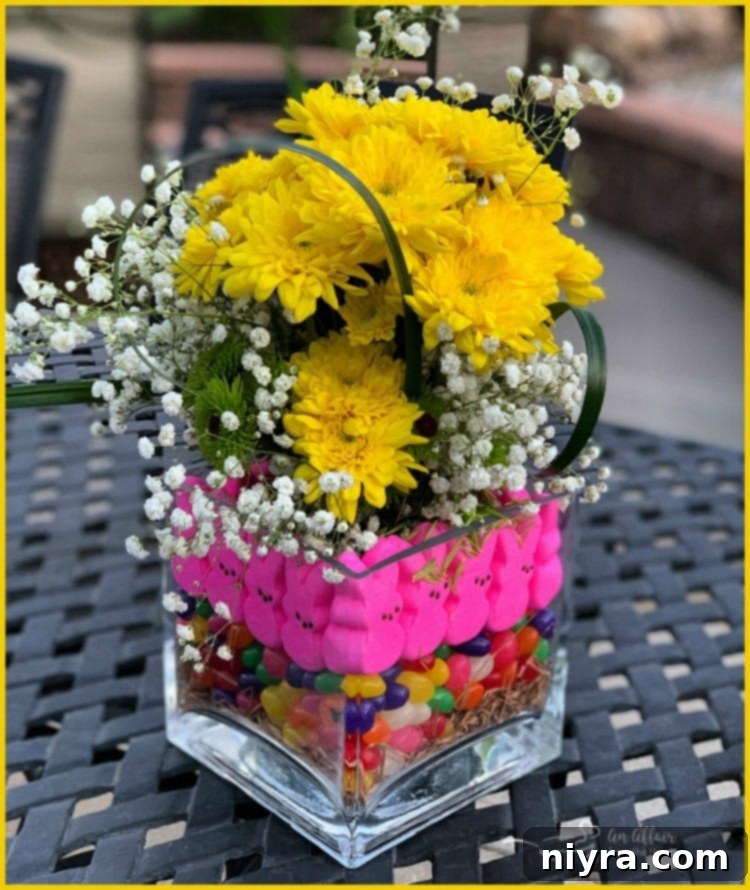
Transform your Easter table into a vibrant, whimsical display with this delightful Peep Centerpiece! A beloved tradition for years, this DIY project is not only easy to make but consistently becomes the star of any festive gathering. Each creation is unique, adding a touch of personalized charm to your spring celebrations. Let’s dive into how you can craft your own unforgettable Easter decoration.

My journey with this enchanting Easter centerpiece began back in 2011. Combining the sweet joy of jelly beans and the playful charm of marshmallow Peep bunnies, it instantly captured hearts and sparked countless questions about its creation. Recognizing the widespread interest, I decided to share this step-by-step guide, empowering everyone to craft this eye-catching decoration for their own Easter tables.
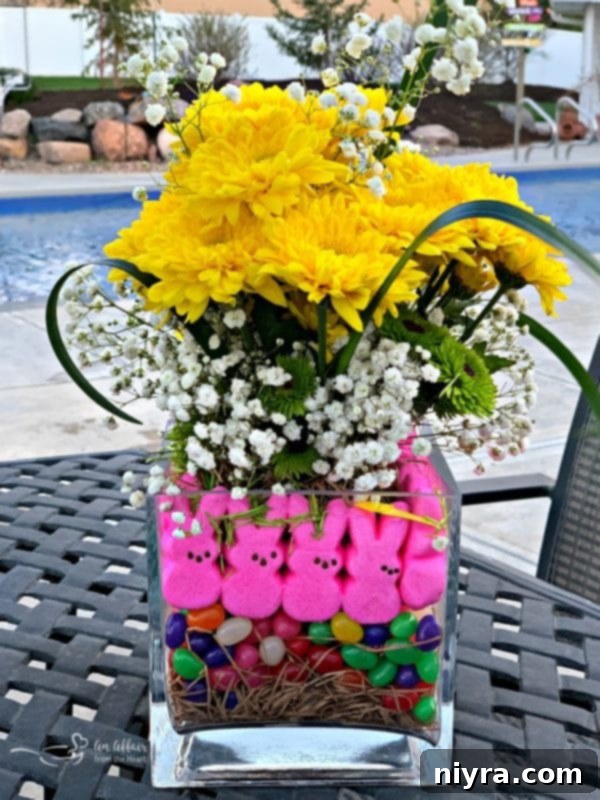
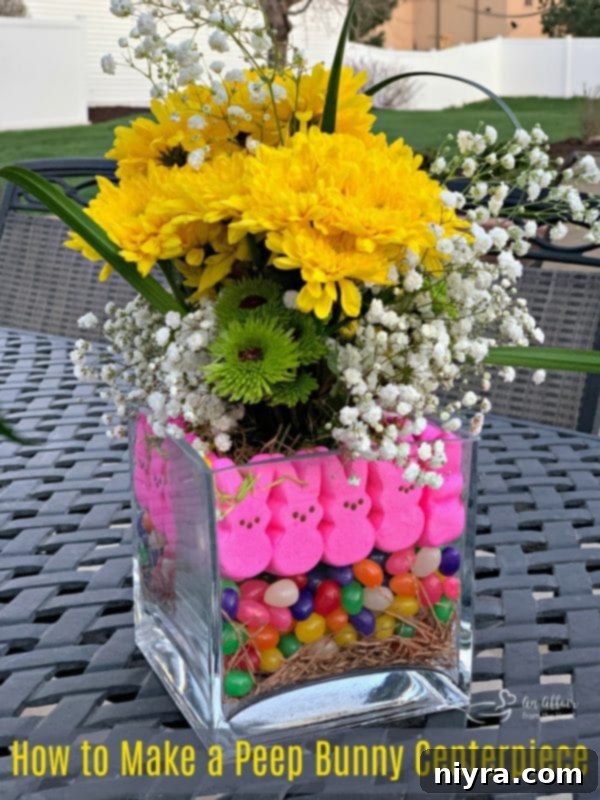
Above are some of the first creations from when this tradition began. Over the years, I’ve refined the process, always eager to capture new variations and share them with you. Even with the hustle and bustle of life, revisiting these joyful projects for new photography and detailed explanations is a true pleasure.
Essential Supplies for Your Peep Centerpiece
Gathering your materials is the first exciting step in bringing this festive Easter decoration to life. Most items can be easily found at your local craft store, grocery store, or even around your home. Remember, creativity is key, so feel free to adapt and personalize your choices!
- **A Clear Vase or Container:** You’ll need a vase large enough to hold a pint-sized mason jar, plenty of jelly beans, and an entire package of Peep bunnies. My preferred size is a 6″x6″ square vase, which provides ample space and a lovely display. Cylinder vases also work wonderfully and offer a different aesthetic. Choose a clear container so the vibrant layers of jelly beans and Peeps are visible.
- **Jelly Beans:** A generous amount of colorful jelly beans is crucial. These will form the base layer and provide a delightful visual backdrop for your Peeps. Consider using a mix of bright, spring-themed colors for maximum impact.
- **Marshmallow Peep Bunnies:** One package, typically containing 16 Peep bunnies, is ideal for a centerpiece of this size. You can stick to a single color for a cohesive look or mix and match for a playful, multi-colored display.
- **One Pint-Sized Mason Jar:** This jar will discreetly hold the flowers and fresh water, keeping them separate from the candy while maintaining the centerpiece’s structure.
- **Easter Grass (Optional):** A small amount of green or pastel-colored Easter grass can be used at the bottom for added texture and to help position the mason jar, though it’s not strictly necessary.
- **A Bouquet of Fresh Flowers:** Choose a bouquet of your favorite spring blooms. Tulips, daffodils, daisies, or mixed floral arrangements work beautifully. Opt for flowers that complement the colors of your Peeps and jelly beans.
- **Scissors:** For trimming flower stems.
Don’t hesitate to use what you already have on hand. The beauty of this DIY project lies in its flexibility and your ability to make it truly yours!
Step-by-Step Assembly: Crafting Your Easter Peep Centerpiece
Creating this charming Easter Peep Centerpiece is a straightforward and enjoyable process. Follow these simple steps to bring your vision to life:
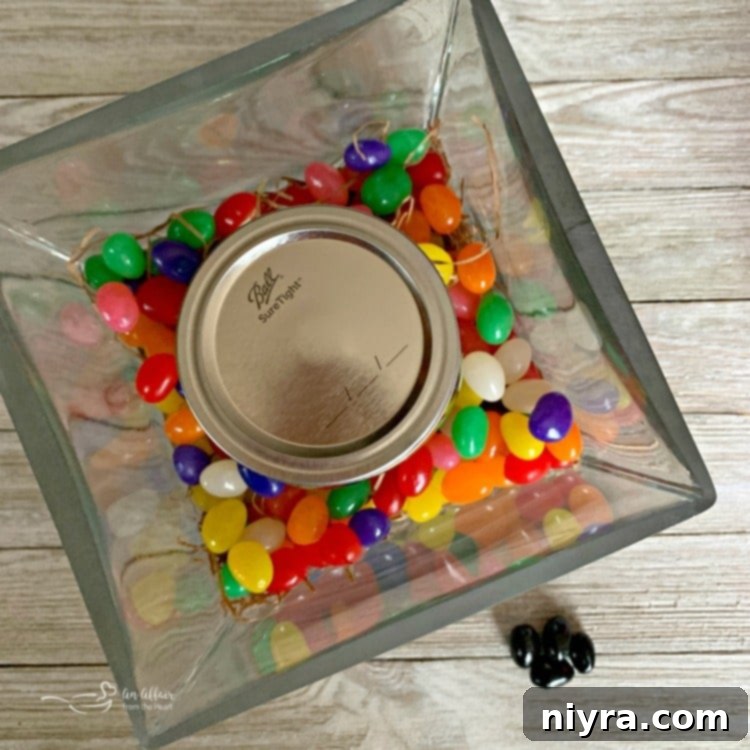
- **Position the Mason Jar:** Begin by placing the pint-sized mason jar directly in the center of your clear vase or container. Fill the mason jar with water, approximately two-thirds of the way full. This initial step establishes the core structure for your floral arrangement. You can loosely secure the lid if you wish, which helps keep the jelly beans out of the jar.
- **Add Optional Easter Grass and Jelly Beans:** If you’re using Easter grass, place a thin layer at the very bottom of the main container, around the base of the mason jar. This can add a touch of color and cushion. Next, carefully pour your jelly beans around the outside of the mason jar, filling the space between the jar and the container walls. For a 6″x6″ container, aim for about 2-3 inches of jelly beans at the bottom. The goal here is to create a base that supports the Peeps and ensures their ears don’t peek out above the container’s top edge once placed.
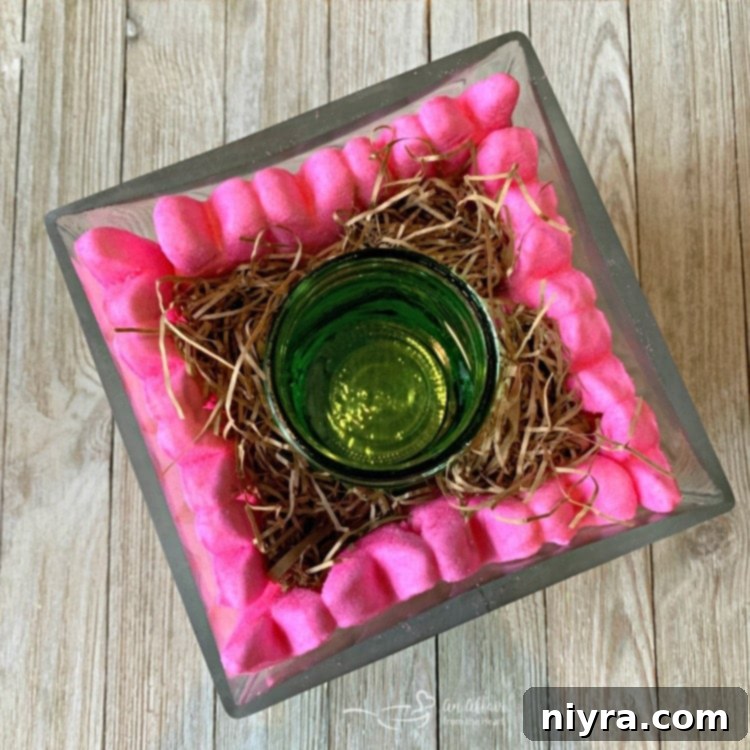
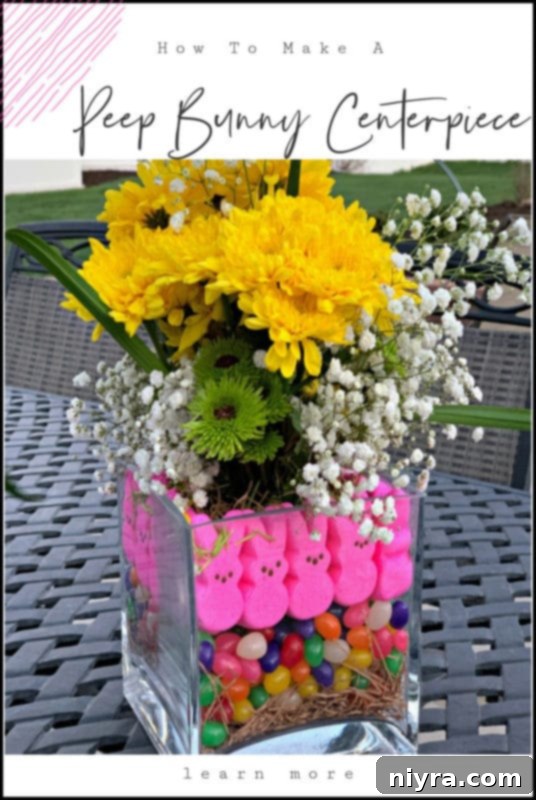
- **Arrange the Peep Bunnies:** With the jelly bean base in place, it’s time for the stars of the show! Gently position your marshmallow Peep bunnies around the outside edge of the container, resting them on top of the jelly beans. Arrange them so they face outwards, creating a delightful circle of colorful bunnies. Ensure they are snug against the container walls and upright. If your mason jar feels a little wobbly, a bit of artificial grass or extra jelly beans can help secure it more firmly within the outer container.
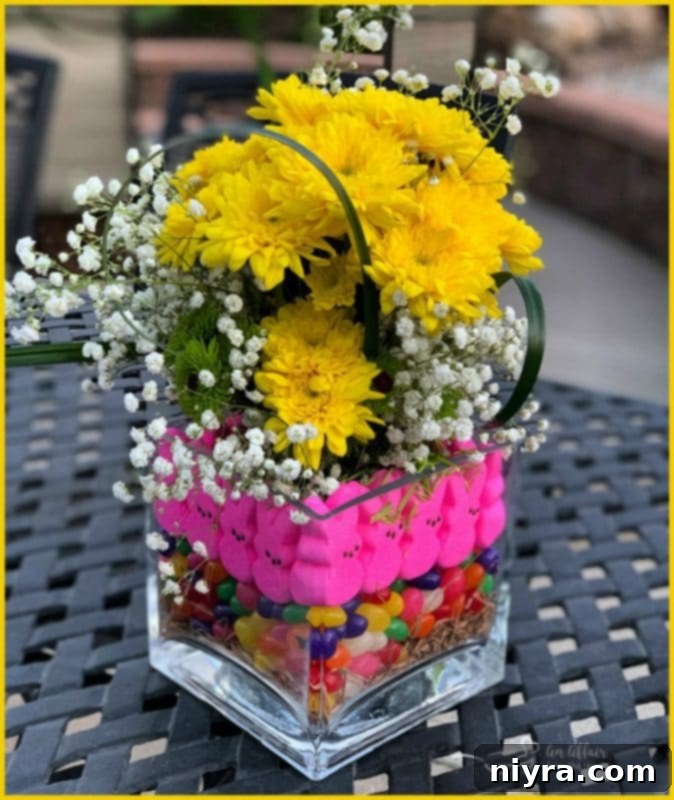
- **Add Your Floral Bouquet:** Now for the finishing touch! Take your bouquet of mixed blooms and carefully trim the stems to a suitable length. You want some flowers to be shorter, which helps conceal the inside of the mason jar and creates a fuller, more lush appearance. Arrange the flowers artfully inside the water-filled mason jar. It might seem like a small space, but a surprisingly large bundle of flowers is often needed to achieve a truly vibrant and abundant look. Play with heights and textures to create a visually appealing display that complements your colorful Peeps.
Tips and Tricks for Your Perfect Easter Centerpiece
- **Color Coordination:** Consider the colors of your Peeps, jelly beans, and flowers. You can go for a harmonious palette (e.g., all pastels) or a vibrant, contrasting mix. Coordinating with your existing Easter decor will create a cohesive look.
- **Vase Variations:** While a square vase is great, don’t shy away from cylinder vases, fishbowls, or even unique glass containers. Just ensure the mason jar fits comfortably inside with enough room for jelly beans and Peeps.
- **Kid-Friendly Fun:** This is a fantastic project to involve children! Let them help choose the Peep colors or arrange the jelly beans. Just be prepared for a few jelly beans to “disappear” during the process!
- **Peep Placement:** To ensure your Peeps stay upright and visible, gently push them into the jelly beans a little. The jelly beans will provide a soft but stable base.
- **Flower Freshness:** Change the water in the mason jar every day or two to keep your flowers fresh and vibrant throughout the Easter celebration.
- **Beyond Easter:** While perfect for Easter, this concept can be adapted for other holidays. Think red and green M&Ms with themed marshmallows for Christmas, or heart-shaped candies for Valentine’s Day.
- **Budget-Friendly:** This centerpiece is generally inexpensive to create, making it a great option for decorating on a budget without sacrificing visual appeal.
^ Love it? Pin it! ^
Don’t let this adorable Peep Centerpiece idea slip away! Make sure to save it to your favorite Pinterest board so you can easily find it when you’re ready to add a burst of spring cheer to your home.
Making Centerpieces to Theme Your Tables
Beyond festive holidays, I absolutely adore the art of themed party planning, and for me, decorating the tables is a huge part of the fun! Creating unique centerpieces is a passion, and I’ve put together some truly memorable ones over the years. Perhaps you’d be inspired by some of my other creative table decorations and party ideas?
An Affair from the Heart Centerpieces and Themed Parties
- Country Chic Graduation Party: Ideas for a rustic yet elegant celebration.
- Making an Easy Cranberry Centerpiece for the Holidays: A festive and simple decor idea for winter.
- How to Make a Conversation Heart Centerpiece: Sweet ideas for Valentine’s Day or a romantic gathering.
- The 80s Themed Party: Step back in time with radical decor and nostalgic fun.
- Peanuts & Gang Themed Party: A charming party theme for fans of Charlie Brown and friends.
- Confirmation Brunch: Elegant and thoughtful decor for a special family celebration.

LIKE THIS RECIPE?
Don’t forget to give it a ⭐⭐⭐⭐⭐ star rating and
leave a comment below the recipe!
Print Recipe
How To: Make a Peep Centerpiece for your Easter Table
I have been making this jellybean and marshmallow Peep Centerpiece for years. They turn out a little different every time, and they are always the talk of the table.
Equipment
- scissors
Materials
- 1 – 6″ x 6″ square vase or something similar
- 16 Marshmallow Peep Bunnies
- 1 package of jellybeans
- 1 large mixed bouquet of flowers
- 1 pint-sized mason jar
- Easter grass (optional)
Instructions
- First, place the mason jar, filled with water about 2/3 of the way, in the center of the container. Loosely secure the lid.
- You can place some Easter grass in the bottom if you want, but it’s not necessary.
- Add in your jellybeans. There should be about 2-3 inches of them in the bottom for a typical container size. Ensure that when you place the bunnies inside, their ears don’t peek out above the top of the container.
- Place the bunnies around the outside edge, on top of the jellybeans. You can use artificial grass or more jelly beans to secure the jar if needed.
- Cut your bouquet of mixed blooms down to fit inside the mason jar. You want some of them to be shorter, which helps conceal the inside and gives it a fuller appearance.
- It often takes a pretty big bundle of flowers to achieve a full and vibrant display.
Video
A video tutorial for this centerpiece can be found here.
