Unlock Your Creativity: Crafting the Perfect Homemade Cookie Bouquet

Why invest a fortune in store-bought edible arrangements when you can easily create a stunning and personalized cookie bouquet right in your own kitchen? This comprehensive guide will walk you through every step, ensuring your homemade cookie bouquet is not only delicious but also a truly memorable gift. Perfect for birthdays, holidays, teacher appreciation, or just because, a custom cookie bouquet is a thoughtful gesture that shows how much you care.
The joy of gifting something handmade is incomparable. A cookie bouquet allows for endless personalization, from choosing your recipient’s favorite cookie flavors to coordinating sprinkles and ribbons with their personality or the occasion. Beyond the sheer delight of receiving a beautiful edible treat, there’s a significant cost-saving benefit. Commercial cookie bouquets can be surprisingly expensive, but crafting one yourself proves that the most heartfelt gifts don’t have to break the bank.
I recently experienced this firsthand when celebrating my oldest daughter’s birthday. She’s incredibly dedicated to her cosmetology studies, often working long hours, leaving early and returning late. She had mentioned wishing for an Edible Arrangement, but after seeing the price tags, I knew I could create something just as special, if not more so, with a personal touch. Her favorite chocolate chip cookies, transformed into a vibrant bouquet, seemed like the perfect solution to bring a smile to her face on her busy birthday.

To surprise her, I arranged a lunch date on her birthday. When I presented her with the colorful cookie bouquet, her reaction was priceless. It truly underscored that a gift made with love carries a unique charm that no store-bought item can replicate. If you’re looking for a creative, affordable, and incredibly thoughtful gift idea, making a cookie bouquet is an absolute must-try. Let’s dive into how you can create your very own edible masterpiece.
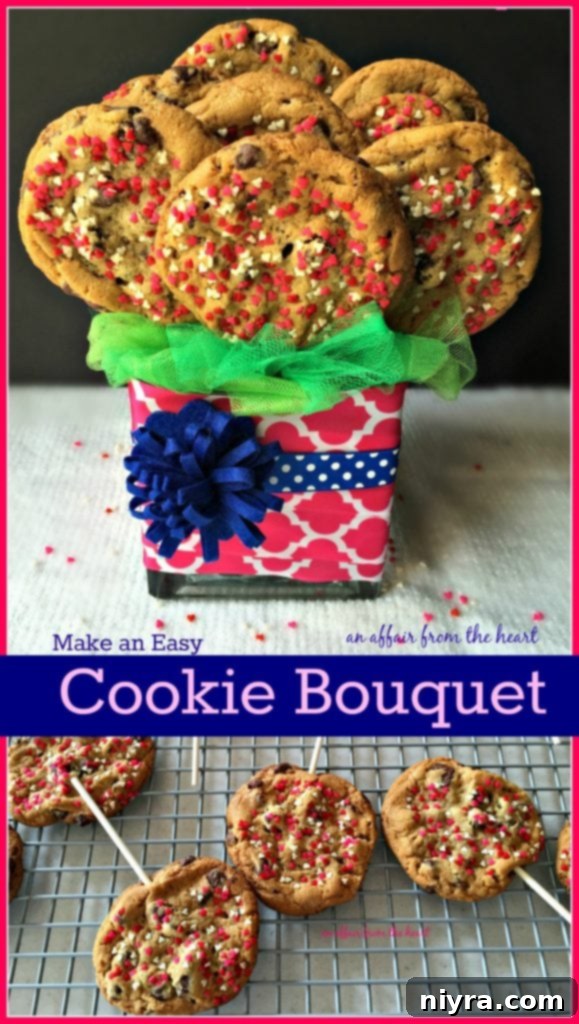
Essential Materials for Your Cookie Bouquet
Crafting a beautiful cookie bouquet doesn’t require an extensive list of specialized tools. In fact, many items you might already have on hand. Here’s what you’ll need to get started:
- Break-and-Bake Cookie Dough: For ultimate convenience, pre-made dough is a fantastic choice. Chocolate chip is a classic favorite, but feel free to experiment with sugar cookie, peanut butter, or oatmeal raisin dough. Alternatively, if you enjoy baking from scratch, use your favorite homemade cookie recipe.
- Lollipop Sticks: These are crucial for creating the “stems” of your cookie flowers. Opt for sturdy sticks that can comfortably support the weight of your cookies without bending. You can find these at craft stores or baking supply shops.
- Sprinkles or Edible Decorations: A vibrant assortment of sprinkles, sanding sugar, or even edible glitter will elevate the visual appeal of your cookies, turning them into festive blossoms. Choose colors that match the occasion or recipient’s preferences.
- A Vase or Container: Any sturdy vase, decorative pot, or even a clean glass jar can serve as the base for your bouquet. The size will depend on how many cookies you plan to include.
- Floral Foam: This indispensable item will secure your cookie sticks firmly in place within the vase, allowing for proper arrangement and stability. Ensure it fits snugly into your chosen container.
- Ribbon and Decorative Tulle: These elements add a polished and celebratory touch. Wide satin ribbon can wrap around your vase, while green tulle can be fluffed up to resemble leaves, enhancing the floral illusion.
- Cellophane Wrap: For presentation and freshness, a sheet of clear cellophane is ideal for wrapping your finished bouquet, making it gift-ready and protecting the cookies.
- Optional: Straight pins (for ribbon), scissors, and perhaps a small felt bow or other embellishments for the vase.
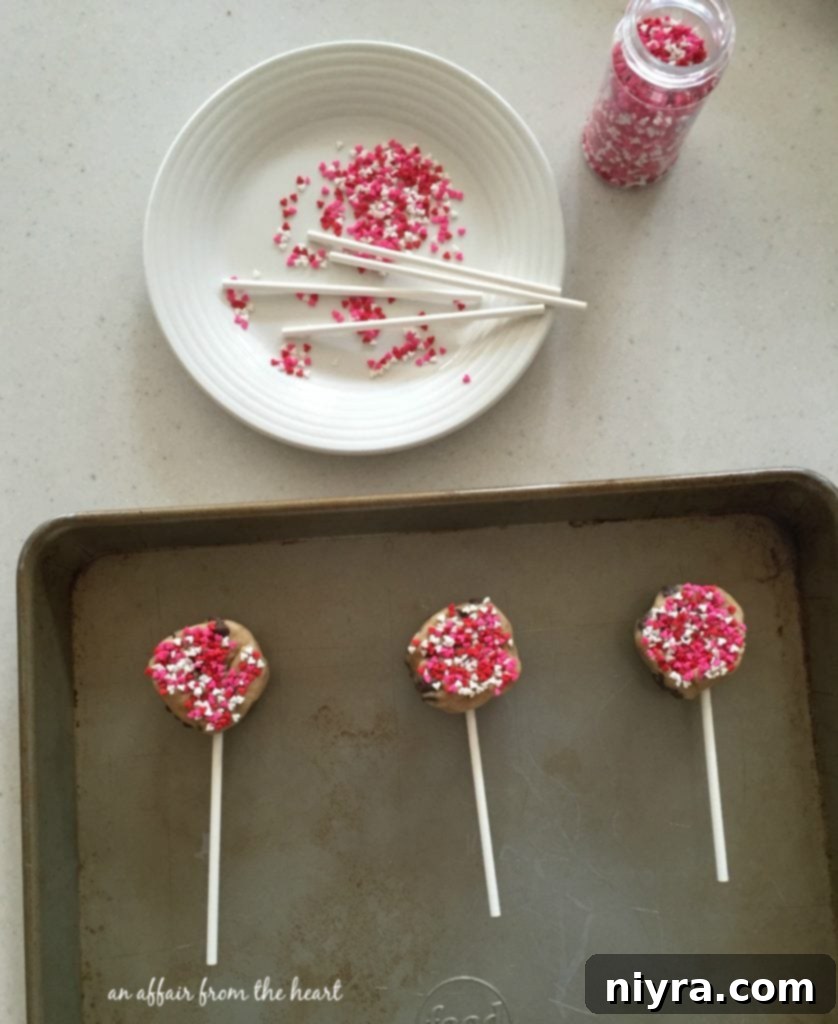
Baking Your Cookie Flowers
The foundation of your cookie bouquet begins with perfectly baked cookies. For the best results, I recommend using larger cookie dough portions rather than very small ones, as they will make a more impactful “flower” and provide ample surface area for the lollipop stick.
1. Shape the Dough: If using break-and-bake dough, gently reshape each portion into a smooth, circular form. If using homemade dough, scoop out generous portions and roll them into balls, then slightly flatten them. Uniformity in size will create a more aesthetically pleasing bouquet.
2. Insert Lollipop Sticks: This is a critical step. Carefully insert a lollipop stick into the bottom edge of each cookie dough portion, pushing it in about two-thirds of the way. Ensure the stick is centered and firmly embedded to prevent the cookie from spinning or falling off later. The warmth of the oven will help the dough “grip” the stick as it bakes.
3. Add Sprinkles: Before baking, gently press the top surface of each cookie into a plate filled with your chosen sprinkles or edible decorations. This creates a vibrant, festive coating that will adhere beautifully during baking. Arrange the prepared cookies on a baking sheet, ensuring adequate space between them to allow for spreading.
4. Bake According to Instructions: Follow the package instructions for your break-and-bake dough, or your recipe’s guidelines for homemade cookies. Keep an eye on them to achieve that perfect golden-brown finish without overbaking.

5. Cool Completely: Once baked, transfer the cookies on their sticks to a cooling rack. Allow them to cool down completely before attempting any further decoration or assembly. Warm cookies are fragile and prone to breaking, and any additional frosting or embellishments will melt or slide off.
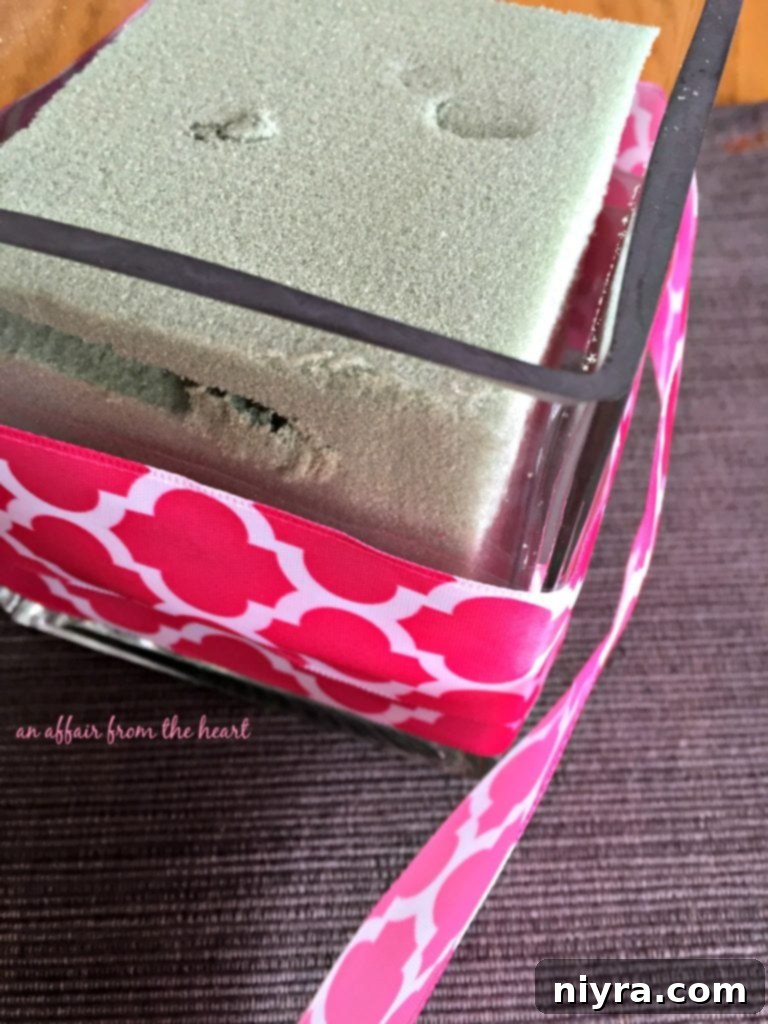
Assembling the Vase Base
While your cookies are cooling, you can prepare your vase to create a stable and attractive foundation for your bouquet.
1. Insert Floral Foam: Take your chosen vase (a 4-inch square vase works wonderfully for a standard bouquet) and firmly press the floral foam into the bottom. Ensure it fits snugly and fills the vase adequately, providing a secure anchor for the cookie sticks. If your foam block is too large, you can easily trim it to fit using a sharp knife.
2. Wrap with Ribbon: Select a wide satin ribbon that complements your cookie colors or the theme of your gift. Wrap the ribbon around the exterior of the vase, covering the floral foam and adding a touch of elegance. Secure the ribbon ends neatly with a straight pin or a dab of hot glue if you prefer a more permanent hold. This step instantly transforms a simple vase into a decorative element of your gift.
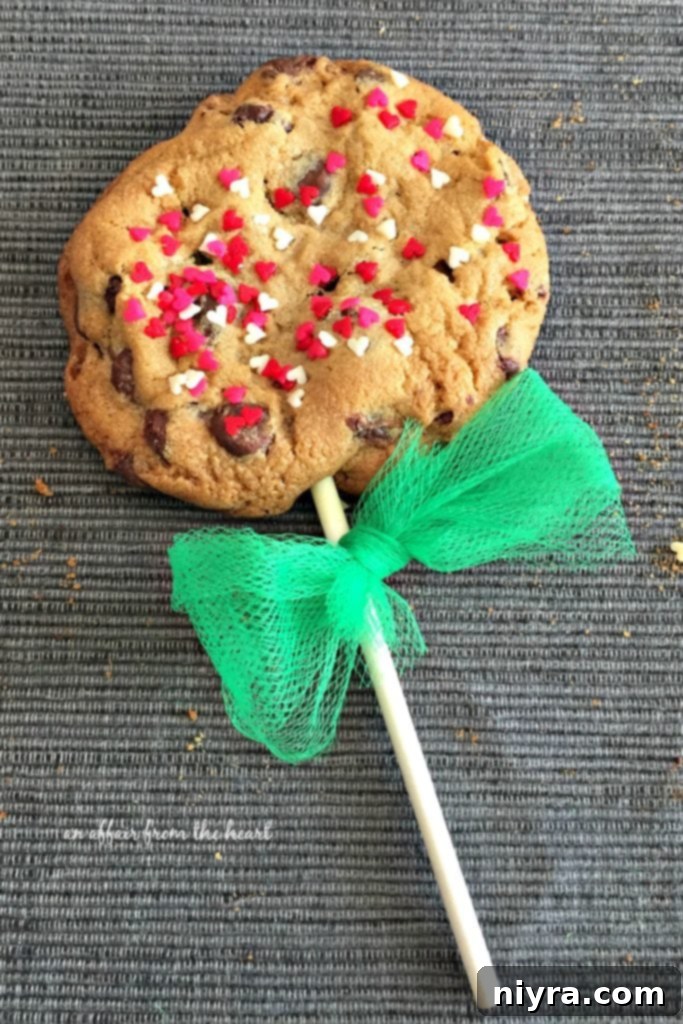
Arranging Your Cookie Bouquet
Now comes the fun part: transforming your cookies into a beautiful floral arrangement!
1. Add Tulle “Leaves”: For a charming touch that mimics natural foliage, cut strips of green tulle. Before inserting each cookie stick into the foam, tie a piece of tulle around the stick, just below the cookie. When tied, it forms a cute bow-like “leaf” that adds volume and color to your bouquet. You can experiment with different shades of green or even other colors to match your theme.
2. Insert Cookies into Foam: Begin arranging your cookie sticks into the floral foam. Start by placing a few cookies around the perimeter of the vase, then fill in the center. Vary the heights of the sticks slightly to create a more dynamic and natural-looking arrangement. Push the sticks firmly into the foam to ensure stability. Step back and observe your arrangement, adjusting as needed until you achieve a balanced and appealing display.
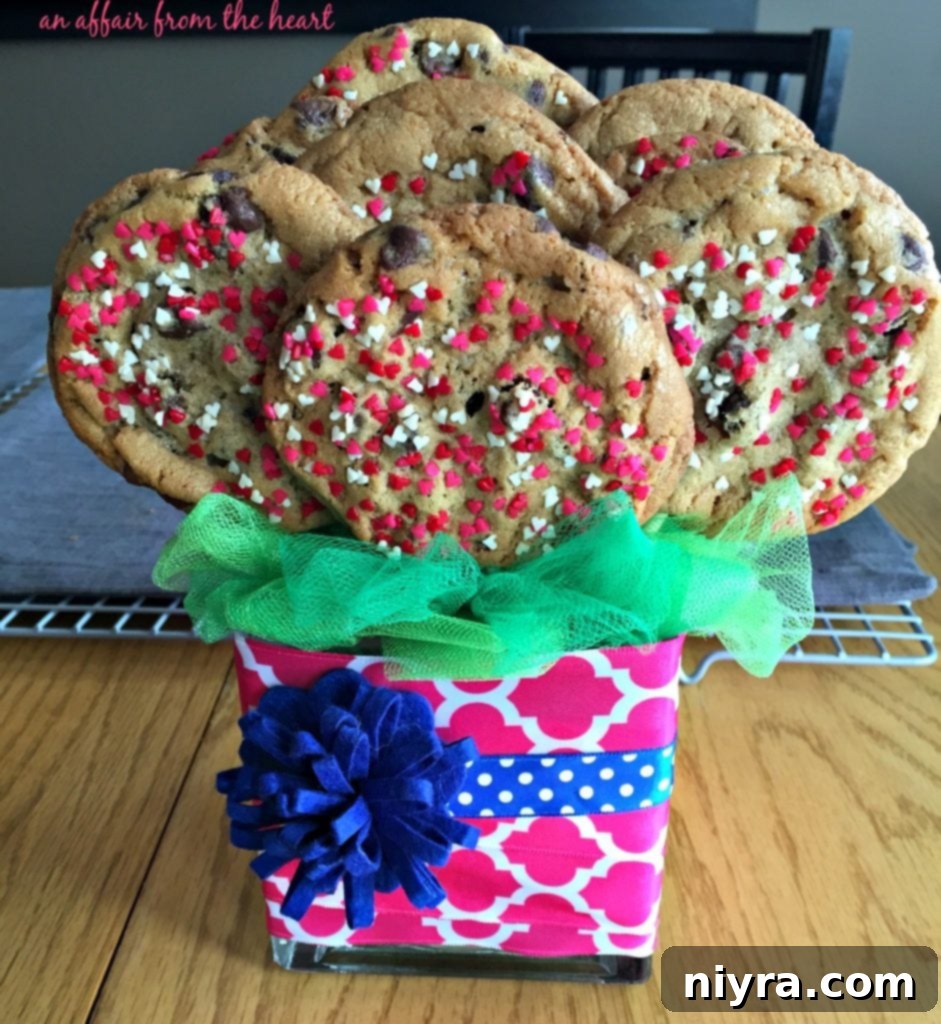
3. Fluff and Finish: Once all your cookie flowers are in place, gently fluff up the tulle pieces to resemble a lush bed of leaves surrounding your cookies. To further enhance the vase, you can tie a contrasting ribbon around the existing ribbon, or attach a small felt bow or another decorative embellishment to the front. These small details significantly elevate the overall presentation of your homemade cookie bouquet, making it look professionally crafted.
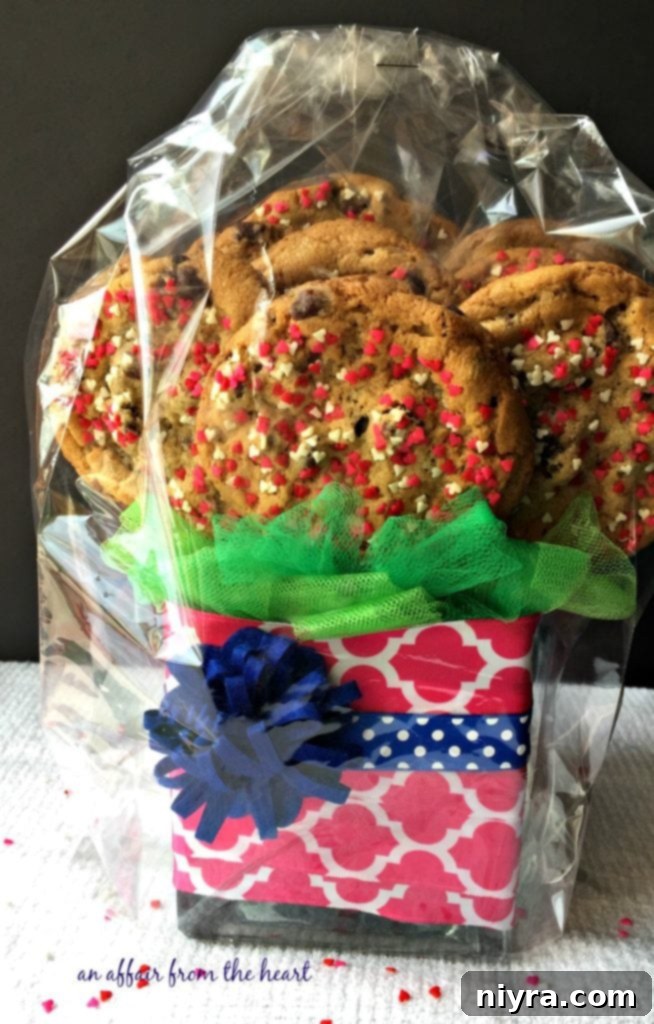
The Grand Finale: Wrapping for Presentation
To ensure your beautiful cookie bouquet remains fresh and visually stunning until it reaches its recipient, a final touch of cellophane wrapping is essential.
1. Wrap in Cellophane: Carefully place your assembled cookie bouquet onto a large sheet of clear cellophane. Gather the cellophane upwards around the entire bouquet, bringing the edges together above the tallest cookie. This creates a protective barrier that seals in freshness and adds to the gift’s elegance.
2. Secure the Wrap: Once the cellophane is gathered, secure it tightly with a festive ribbon, a twist tie, or even a piece of decorative twine. You can finish it with a beautiful bow. This not only holds the wrap in place but also adds another layer of decorative charm, making your cookie bouquet truly gift-ready.
Tips, Variations, and Creative Ideas
The beauty of a homemade cookie bouquet lies in its versatility. While this guide provides a solid foundation, don’t hesitate to unleash your creativity and customize your bouquet for any occasion or recipient:
- Cookie Flavor Variety: Beyond chocolate chip, consider sugar cookies (perfect for intricate icing designs), gingerbread for holidays, or even oatmeal raisin for a comforting touch. For those with dietary restrictions, gluten-free or vegan cookie dough options are also readily available.
- Decorating Beyond Sprinkles: Once your cookies are cooled, you can further decorate them with royal icing, buttercream frosting, or edible markers. Create intricate patterns, write personalized messages, or draw small themed designs. For example, use red and white icing for Valentine’s Day, pastels for Easter, or school colors for a graduation gift.
- Themed Bouquets: Tailor your bouquet to a specific theme. For a baby shower, use baby-themed cookie cutters (e.g., bottles, onesies) and soft pastel sprinkles. For a sports fan, bake cookies in team colors and shapes. Teacher appreciation bouquets could include apple or pencil-shaped cookies.
- Vase Alternatives: Get creative with your container! A colorful ceramic pot, a themed tin bucket, or even a personalized mug can serve as an unexpected and charming base for your cookie bouquet.
- Adding Non-Cookie Elements: Incorporate small, individually wrapped candies, chocolates, or even miniature notes of appreciation tucked between the cookies. Small silk flowers or greenery can also be added to the floral foam for extra visual appeal.
- Packaging Enhancements: Instead of just cellophane, consider placing the entire wrapped bouquet into a gift bag with tissue paper, or presenting it in a decorative box for a grand reveal. Don’t forget a personalized tag or card!
- Troubleshooting: If cookies tend to fall off the sticks, ensure the stick is pushed far enough into the raw dough. For added stability, you can apply a tiny dab of melted chocolate or royal icing around the stick-cookie joint after baking and cooling, letting it set completely. If your floral foam isn’t secure, use a bit of hot glue to affix it to the bottom of the vase.
These edible bouquets are truly perfect for anyone who adores cookies – and let’s be honest, who doesn’t? They make particularly darling teacher gifts, hostess gifts, get-well-soon gestures, or simply a way to brighten someone’s day. The effort and personal touch involved in creating a homemade cookie bouquet will undoubtedly be cherished.

