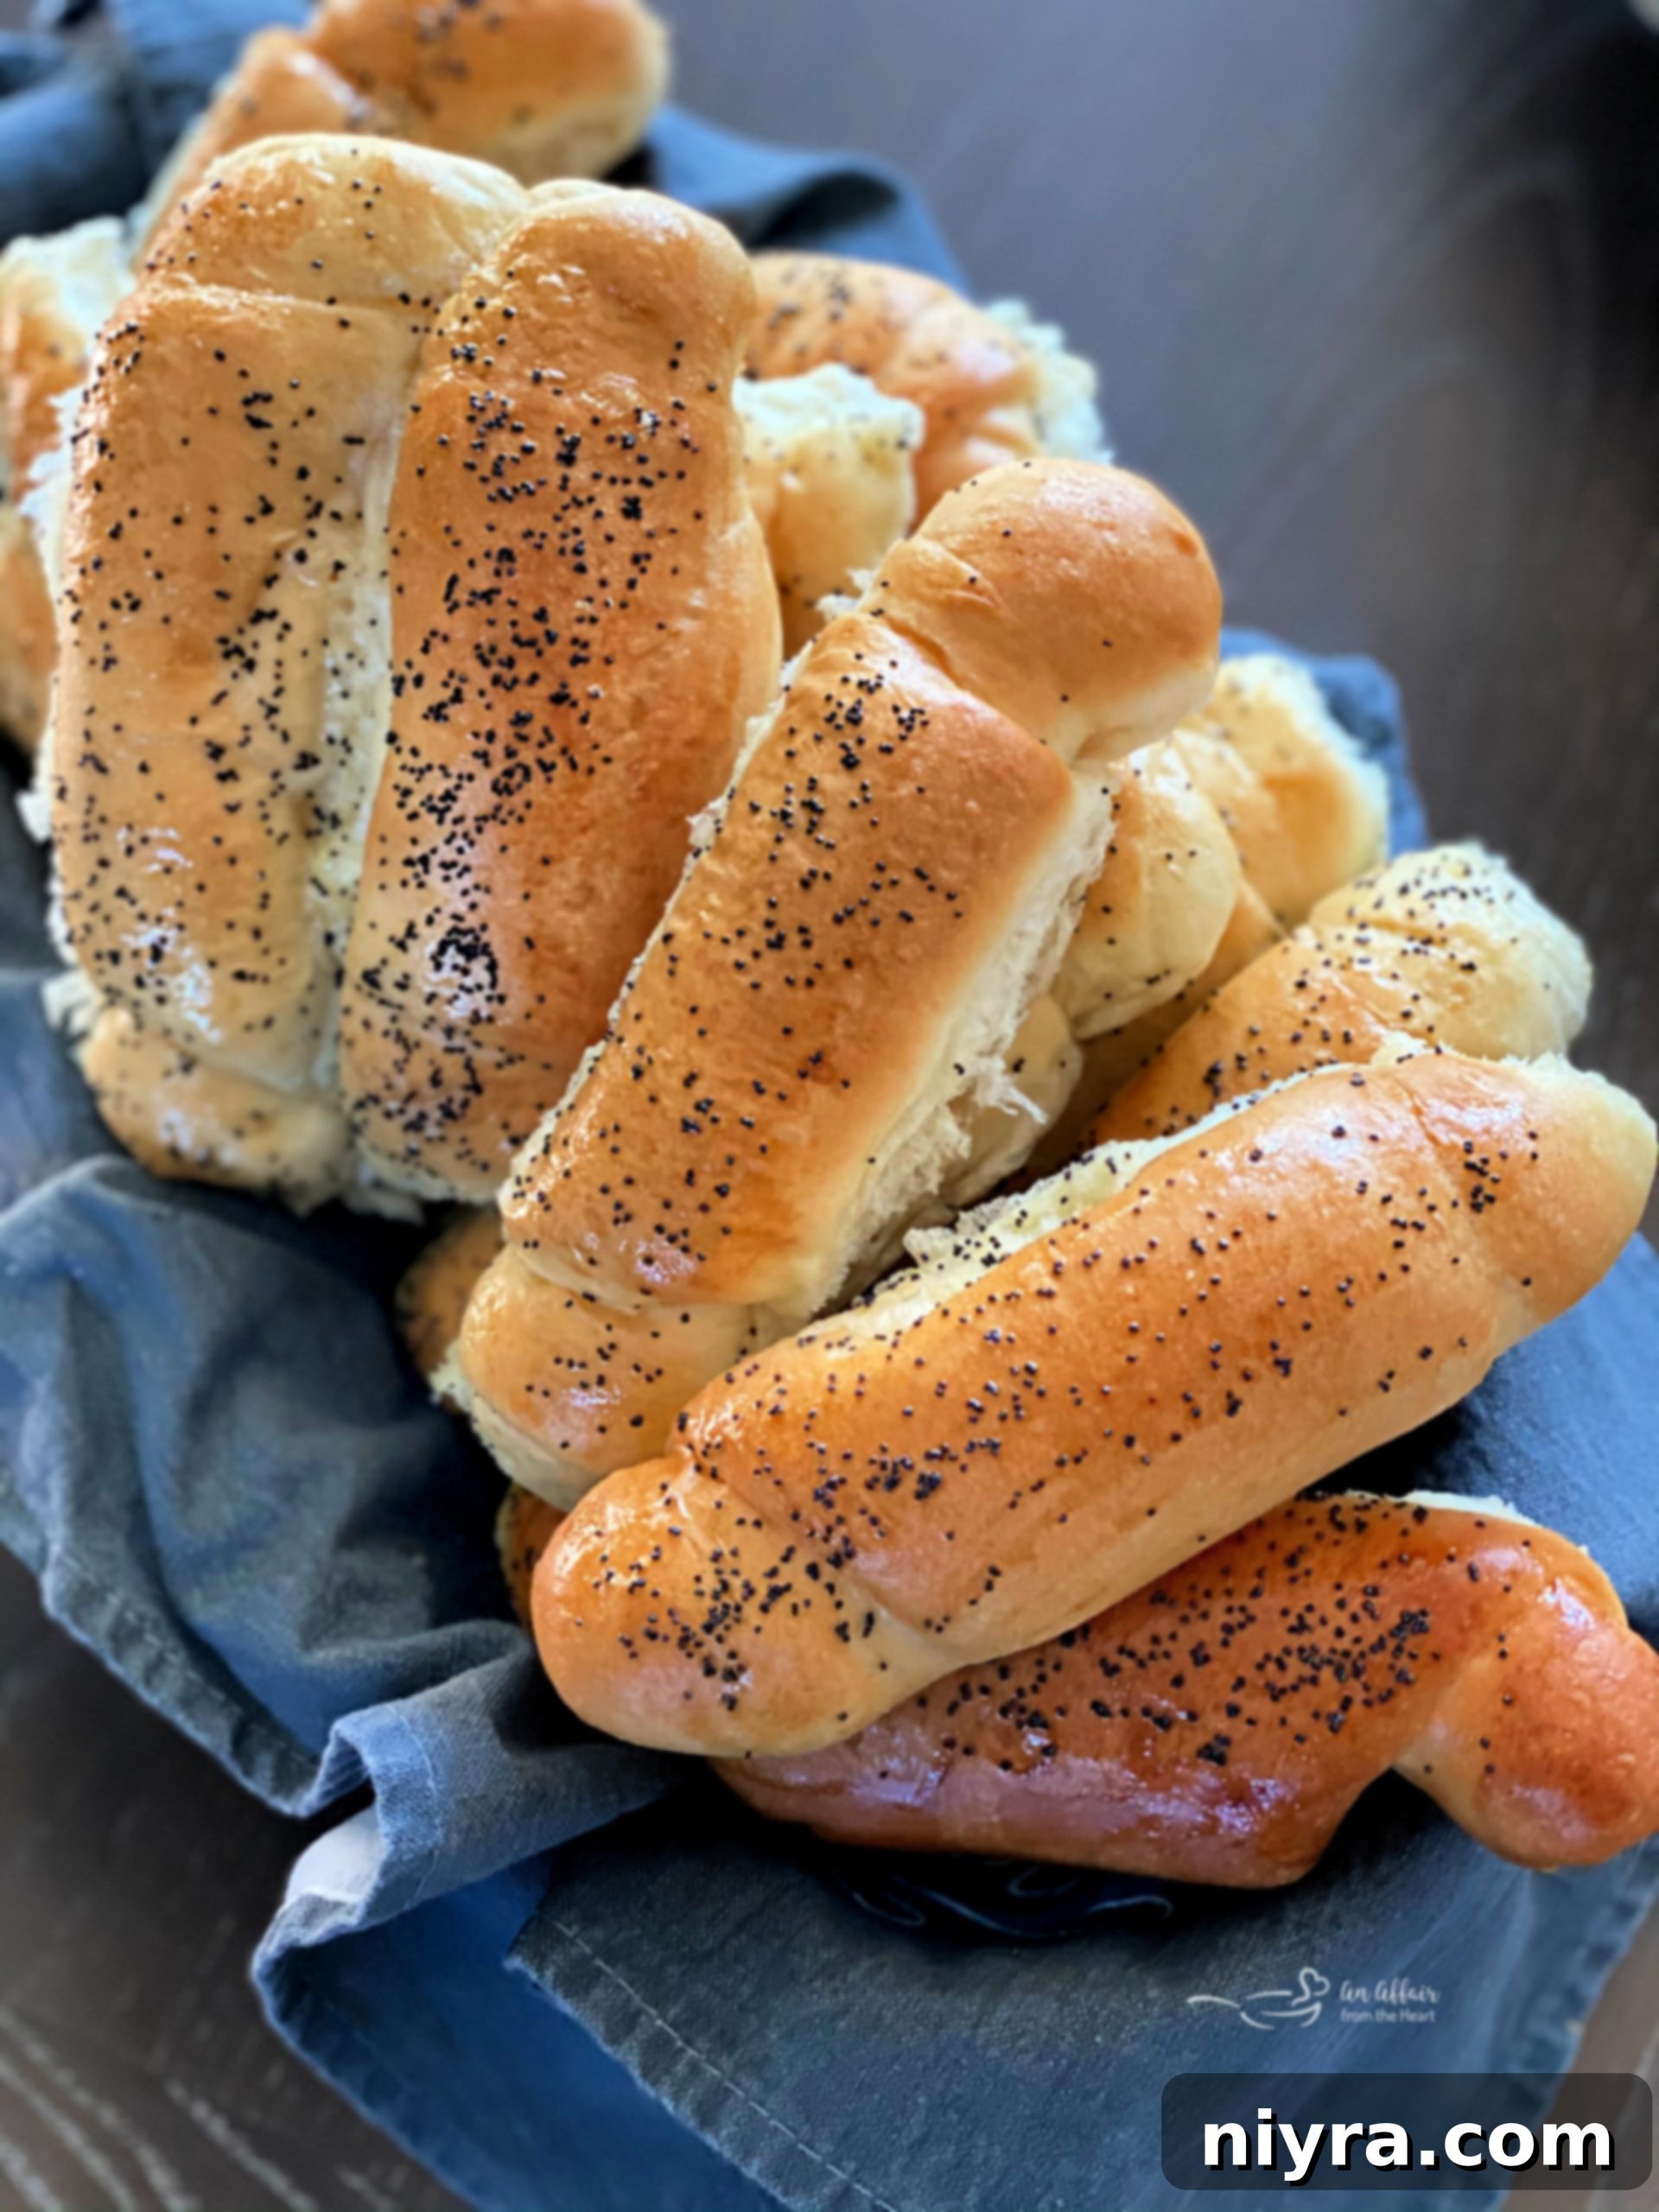
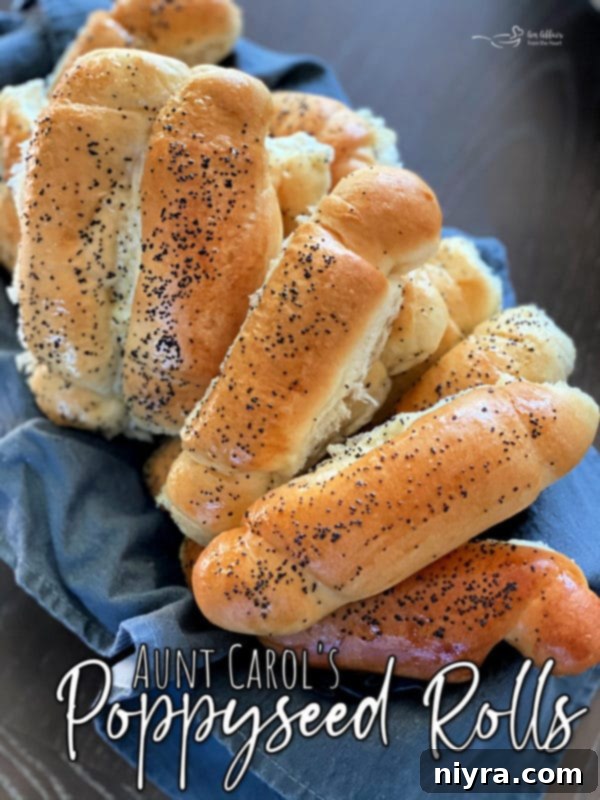
Discover the magic of Aunt Carol’s cherished Poppyseed Rolls – a beloved family tradition that graces our holiday tables year after year. These incredibly soft, wonderfully fluffy dinner rolls, generously adorned with nutty poppy seeds, vanish from the breadbasket almost as quickly as they appear! Don’t let their elegant appearance fool you; crafting these delightful rolls is far simpler than you might imagine, bringing warmth and comfort to any gathering.

Aunt Carol’s Easy Poppyseed Dinner Rolls: A Holiday Legacy
For generations, Aunt Carol’s Poppyseed Rolls have been an indispensable part of our family’s holiday celebrations. These aren’t just any dinner rolls; they are a flavorful testament to enduring tradition, passed down through the ages. My journey to mastering this recipe began recently when Aunt Carol herself, who learned the art from her own mother, graciously invited me into her kitchen to share her secrets. It was a truly special moment, connecting past and present through the simple act of baking.
Throughout my married life, the holidays have always brought with them a generously sized bag of these irresistible rolls to our home. My children, with an enthusiasm that suggests they’ve been fasting for weeks, eagerly dive into them, their faces lighting up with pure joy. For years, I harbored a deep desire to learn how to recreate this magic. Though intentions were good, life often intervened. But this year, despite all the challenges, the stars aligned, and the tradition was finally passed on. It truly proves that even in the most unusual times, some good things can still happen!
The Charm of “Semi-Homemade” Dinner Rolls for Modern Bakers
For as long as I can remember, these rolls were affectionately referred to as “Aunt Carol’s homemade rolls.” The term “homemade” carried a certain reverence, implying hours of dedicated labor. However, a memorable Christmas conversation unveiled a delightful family secret. My cousin, with a playful roll of her eyes and a chuckle, quipped, “Homemade my butt!” I was genuinely surprised. She then revealed the ingenious shortcut: the rolls begin their journey with frozen dinner roll bread dough.
Upon learning this, I realized it didn’t diminish their appeal one bit. Aunt Carol confirmed that while they once made their dough from scratch, transitioning to frozen dough offered an equally delicious result with significantly less effort. In today’s busy world, who wouldn’t welcome a touch of culinary simplicity? Perhaps “handmade” might be a more fitting description, but in our family, we’ve affectionately dubbed them “homemade my butt rolls” – a name that brings a smile and a shared giggle every time.
Crafting the BEST Poppyseed Rolls: A Step-by-Step Guide
Creating these truly gorgeous poppyseed dinner rolls requires just a few basic ingredients: a package of Rhodes frozen dinner rolls, non-stick cooking spray, vegetable oil, an egg, and a generous sprinkling of poppy seeds. The beauty lies in the simplicity and the clever use of quality ingredients to achieve an exceptional result.
Usually, I meticulously stage my food photos to ensure every process shot is picture-perfect. But on the day Aunt Carol taught me, I chose to fully immerse myself in the moment, savoring her presence in my kitchen. I did, however, manage to capture photos of each crucial step for you, with my favorites being those that feature her skilled hands guiding the process. Now, let me walk you through exactly how it’s done, ensuring your rolls turn out just as perfect as hers!
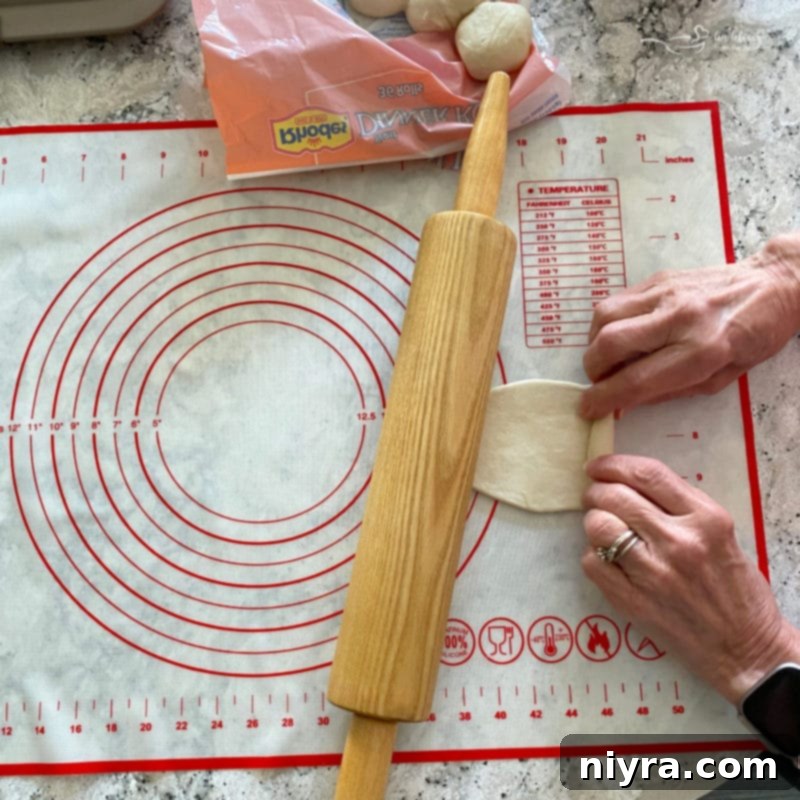
Begin by taking a single frozen roll and gently flattening it into an oval shape using a rolling pin. Position the rolling pin at the edge farthest away from you, preparing for the next crucial step.
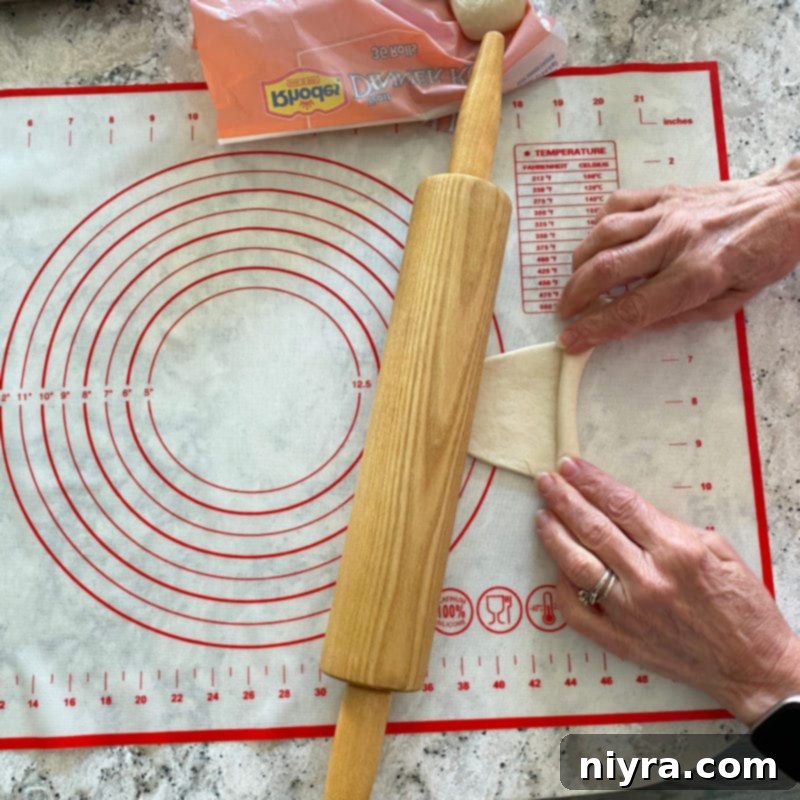
With the rolling pin firmly in place, start rolling the dough away from your body. This motion helps to create the characteristic shape and texture of the poppyseed rolls.
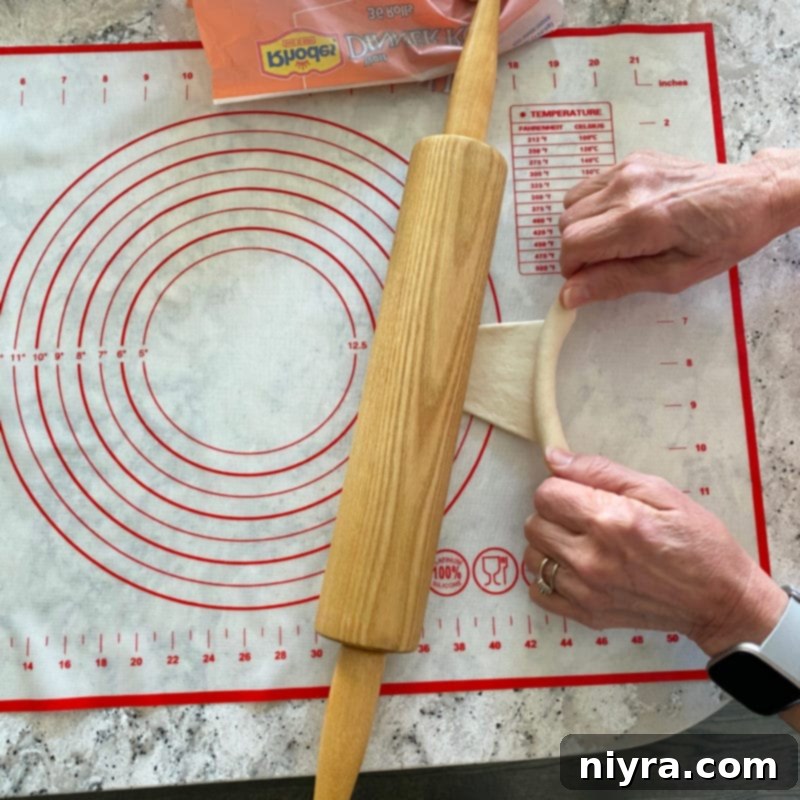
As you continue rolling, gently tug the dough outward and slightly towards you. This technique helps to stretch the dough a bit, contributing to the final light and airy texture of the rolls.
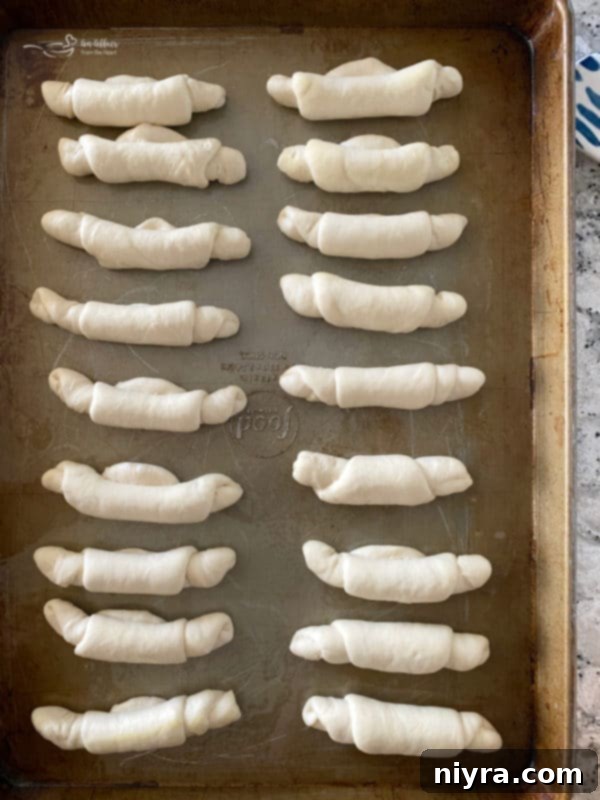
Once shaped, carefully place the rolls onto a prepared cookie sheet, ensuring the seam side is down and all rolls face the same direction. Remember to leave ample space between each roll to allow them “room to grow” during the rising process. We typically fit 18 rolls per standard cookie sheet.
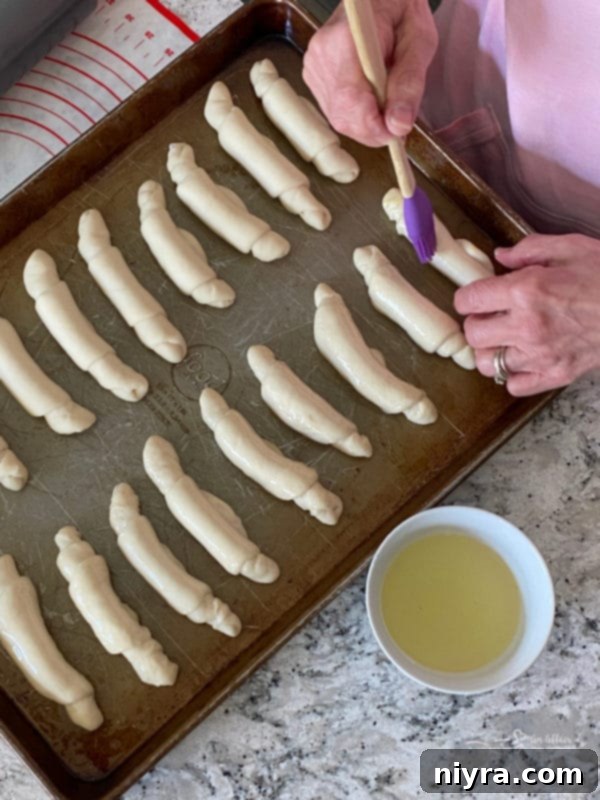
Using a pastry brush, gently coat the top of each roll with a thin layer of vegetable oil. This step helps keep the dough moist and aids in the rising process, preventing a dry crust from forming.
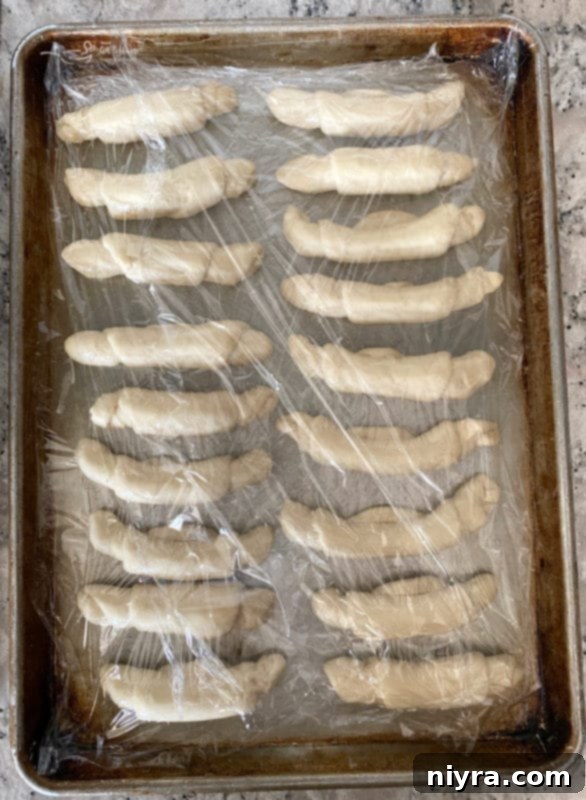
Loosely cover the entire cookie sheet with plastic wrap. This creates a humid environment essential for the yeast to activate and the rolls to rise beautifully.

Allow the rolls to rise for approximately 2 to 3 hours, or until they have visibly expanded to about one and a half to two times their original size. The ambient temperature of your kitchen plays a significant role in how quickly they rise; a warmer environment will accelerate the process. For instance, on the day I learned, I was simultaneously preparing a large pot of my grandma’s comforting hamburger noodle soup, and the warmth in my kitchen ensured a speedy and successful rise.
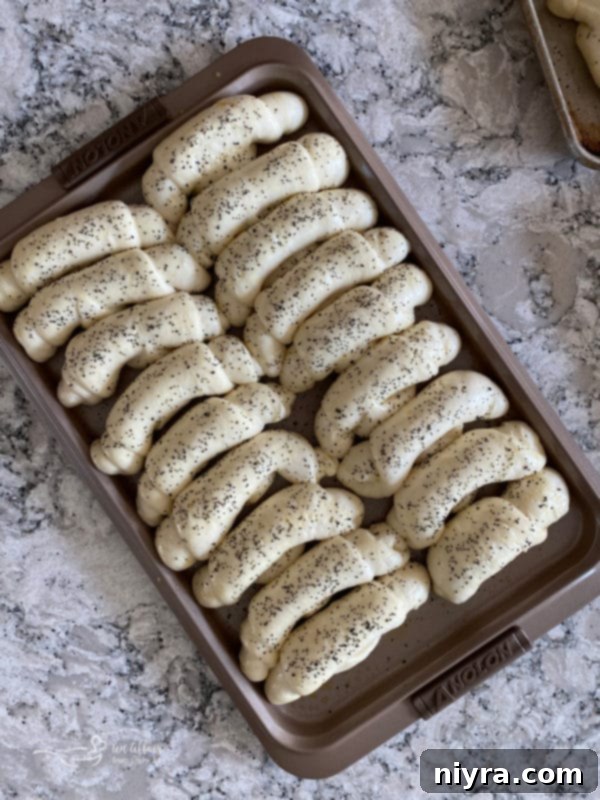
Prepare an egg wash by whisking an egg with a splash of water. Gently brush the tops of the now beautifully risen rolls with this mixture, then generously sprinkle them with poppy seeds. This egg wash creates a golden, shiny crust, while the poppy seeds add a delightful texture and classic flavor. Once prepared, these rolls are ready for the oven.
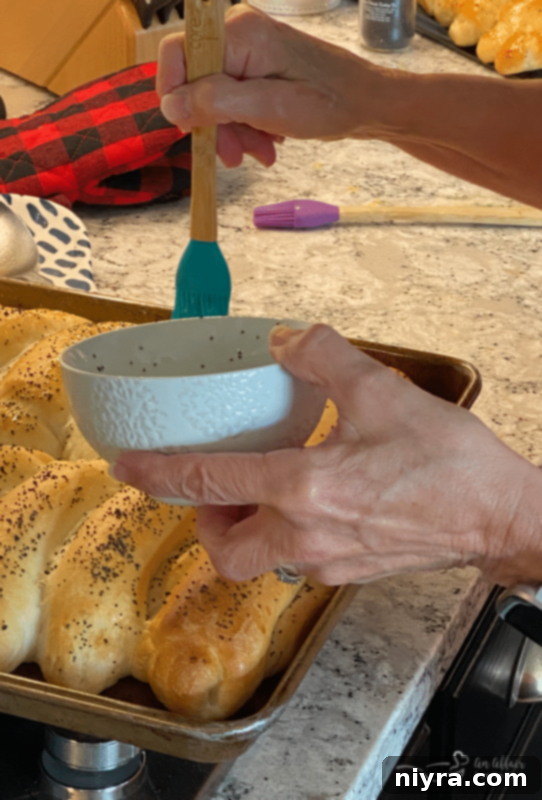
Immediately after removing the golden-brown rolls from the oven, brush their tops with a little more vegetable oil. Aunt Carol swears by this step, explaining that it imparts a beautiful shine and ensures the rolls remain wonderfully soft and tender.
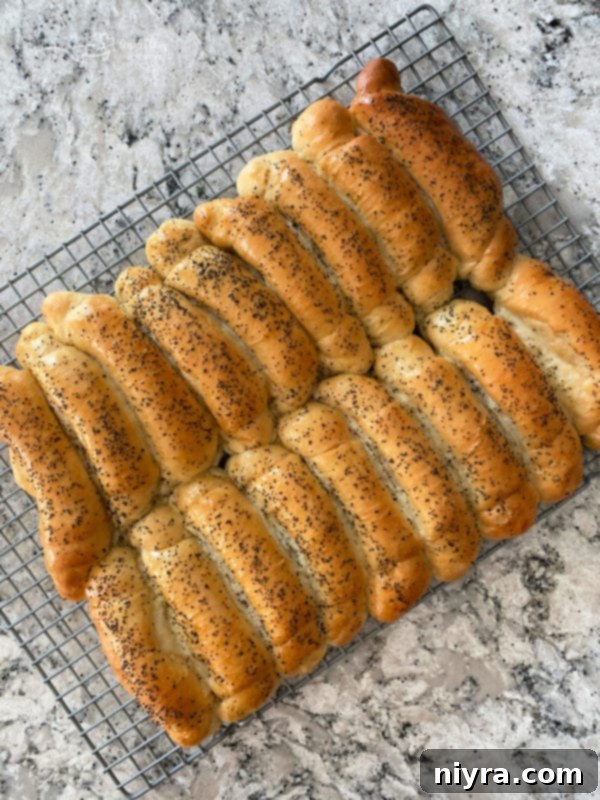
Carefully transfer the baked rolls to cooling racks, allowing them to cool completely. This prevents condensation and keeps them from becoming soggy. The full, printable recipe card with exact measurements and detailed steps can be found at the conclusion of this article.
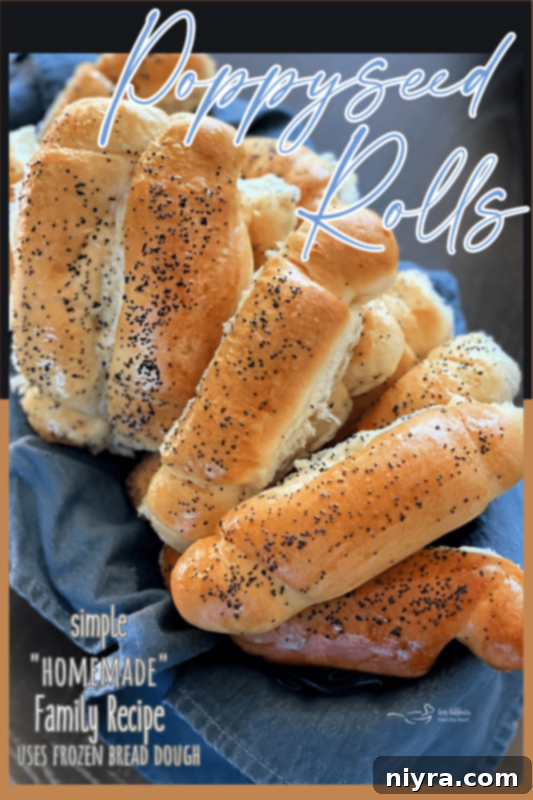
Preserve Your Recipe: Pin These Poppyseed Rolls!
If these tempting Poppyseed Dinner Rolls have already captured your imagination, don’t let this incredible recipe slip away! Be sure to pin it to your favorite Pinterest recipe board. This way, it will be ready and waiting whenever you’re prepared to bake a batch of these unforgettable rolls for your family and friends.
Expert Tips for Freezing and Defrosting Poppyseed Dinner Rolls
During our baking session, Aunt Carol wisely suggested we use three packages of Rhodes frozen dinner rolls, yielding an impressive 108 rolls. While this might sound like a grand undertaking, these rolls freeze exceptionally well when prepared and stored correctly. This makes them perfect for holiday meal prep or having a stash of delicious bread ready for any occasion.
Once the rolls had completely cooled to room temperature, we carefully transferred them into 2.5-gallon freezer bags. To prevent crowding and maintain their delicate structure, it’s generally best to avoid placing too many in a single layer. We found that 24 rolls fit perfectly into each bag by carefully stacking two layers of 12. Remember, these rolls are incredibly soft, so handle them with utmost care to prevent them from being squashed. For optimal results, place the bags in the freezer without stacking them initially, allowing them to freeze solid. Once frozen, you can stack them safely, but always avoid placing heavy items like a gallon of ice cream on top! Stored properly, these delightful rolls will maintain their freshness and flavor in the freezer for 3 to 4 months.
Effortless Defrosting for Fresh-Tasting Rolls
The beauty of freezing these rolls individually (or in small stacks) is the flexibility it offers. You don’t have to defrost an entire bag of 24 rolls if you only need a few. Simply remove the desired quantity from the freezer bag, reseal the bag after wiping out any internal condensation with a paper towel, and return it to the freezer. If you do choose to defrost the whole bag, be sure to wipe away any condensation from the inside of the bag immediately after thawing. This crucial step helps to prevent excess moisture from making your soft rolls soggy, ensuring they retain their perfect texture and taste every time.
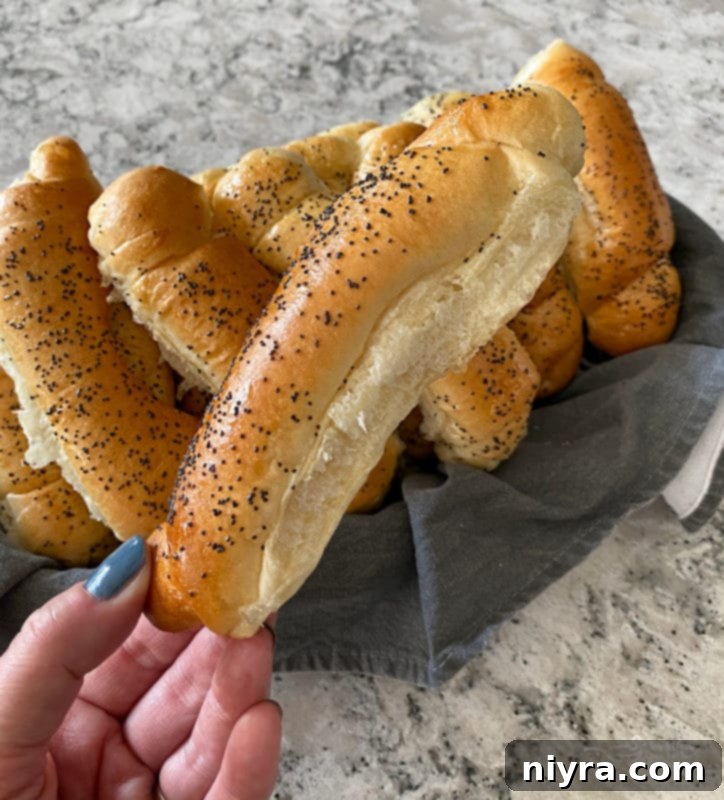
Soft Poppyseed Buns: Perfect for Sandwiches & Sliders
This versatile roll recipe produces beautifully soft buns that are not only ideal as a dinner accompaniment but also shine as the base for various sandwiches and sliders. Their size and shape are remarkably similar to a classic hot dog bun, making them an excellent choice for a wide array of fillings. They pair magnificently with holiday leftovers – think succulent turkey or ham – creating a match truly made in culinary heaven.
For those who adore those irresistible overnight slider recipes, traditionally made with Hawaiian rolls (such as these crowd-pleasing Ham & Cheese Sliders), prepare to be amazed. Swapping out the Hawaiian rolls for these tender poppyseed buns elevates the flavor profile and adds an extra layer of sophisticated deliciousness that you’ll absolutely love!
Indeed, why not elevate your Baked Roast Beef Slider recipe by using these handcrafted poppyseed rolls instead of the traditional Hawaiian sweet rolls? The subtle nutty flavor and tender texture will add an exciting new dimension to your favorite slider creations, making them even more memorable.

Just take a moment to admire the sheer perfection of these soft, pull-apart poppy seed rolls! Their inviting texture and subtle flavor promise a delightful culinary experience, whether served with dinner or as the star of a slider spread.
Celebrating Culinary Heritage: Tried & True Family Recipes
Aunt Carol’s exquisite Poppyseed Rolls are destined to become the newest jewel in my treasured collection of family recipes. They join other culinary gems, such as her delightfully retro Cherry Pie Jell-O Salad, alongside countless other cherished dishes meticulously passed down through generations. These recipes, inherited from my mother, grandmothers, and other beloved family members, represent more than just food; they embody the stories, laughter, and love shared around the family table.
This extensive collection of family recipes is a testament to the enduring tradition of good food and the invaluable joy of communal dining. Each recipe carries with it a legacy, a piece of our history, and a promise of deliciousness. I wholeheartedly assure you, you simply cannot go wrong with any of these time-tested and truly beloved family recipes – they are guaranteed to bring warmth and flavor to your home.
Explore More Irresistible Bread Recipes to Bake and Savor
My passion for baking bread manifests in countless delightful forms. From effortlessly simple Quick Bread Recipes to the satisfying complexity of Yeast Breads, and from wholesome Muffins to rustic Biscuits and versatile Rolls, few culinary endeavors offer such profound comfort. The unparalleled aroma of freshly baked bread filling your kitchen is truly one of life’s most heavenly sensory experiences, promising warmth and deliciousness in every bite.
I warmly invite you to explore my extensive collection of Bread Recipes, as well as delve into my specific category dedicated to Biscuits, Rolls, and Muffins before you depart. You’re sure to find something to inspire your next baking adventure and fill your home with irresistible scents.
Now that we’ve covered all the wonderful aspects of these rolls, let’s get straight to the full recipe for these incredible “homemade” Poppyseed Rolls! 
LIKE THIS RECIPE?
Don’t forget to give it a ⭐️⭐️⭐️⭐️⭐️ star rating and
leave a comment below the recipe!

Print Recipe
The BEST Poppyseed Rolls
Ingredients
- 1 package 36 count Rhodes Frozen Dinner Rolls
- Vegetable Oil
- 1 egg
- poppy seeds
Instructions
- Spray a large cookie sheet with non-stick cooking spray. Set aside.
- Take one roll and flatten it into an oval with a rolling pin. Leave the rolling pin on the edge furthest away from you.
- Begin rolling the dough away from you, tugging outward and towards you as you go to stretch it a bit.
- Lay them, seam side down, facing the same way, with “room to grow” on the cookie sheet. We fit 18 to each cookie sheet.
- Brush each roll gently with vegetable oil. Cover the cookie sheets loosely with plastic wrap.
- Let rise for 2-3 hours, or until rolls are about one and one half to two times their size.
- Preheat oven to 350 degrees F (175 degrees C).
- Mix an egg white with 1-2 teaspoons of water to make an egg wash. Brush the tops of the risen rolls with egg wash, and sprinkle them with poppy seeds.
- Bake for 10 minutes and turn the pan 180 degrees. Bake for about 8 minutes more, watching them closely to prevent over-browning.
- Remove them from the oven, and brush the tops with vegetable oil for a nice shine and extra softness.
- Transfer them to cooling racks to cool completely, ensuring they maintain their perfect texture.
- Store in large (2.5 gallon) zippered bags once completely cool, or follow freezing instructions below.
Notes
These rolls are incredibly soft, so handle them gently to avoid crushing. To maintain their shape, place the bags in the freezer without stacking them until the rolls are fully frozen solid. After they are frozen, you can safely stack the bags. Just be mindful not to place anything heavy on top that could flatten them. Stored correctly, these rolls will stay fresh in the freezer for 3-4 months.
DEFROSTING ROLLS – You don’t need to defrost the entire bag of 24 rolls at once. Simply remove the desired quantity, and for the remaining rolls, wipe out any condensation from inside the bag with a paper towel, then re-seal and return to the freezer. If defrosting the entire bag, it’s crucial to wipe out all condensation from the bag once thawed. This step helps prevent excess moisture from making the rolls soggy, ensuring they remain perfectly soft and delicious.
