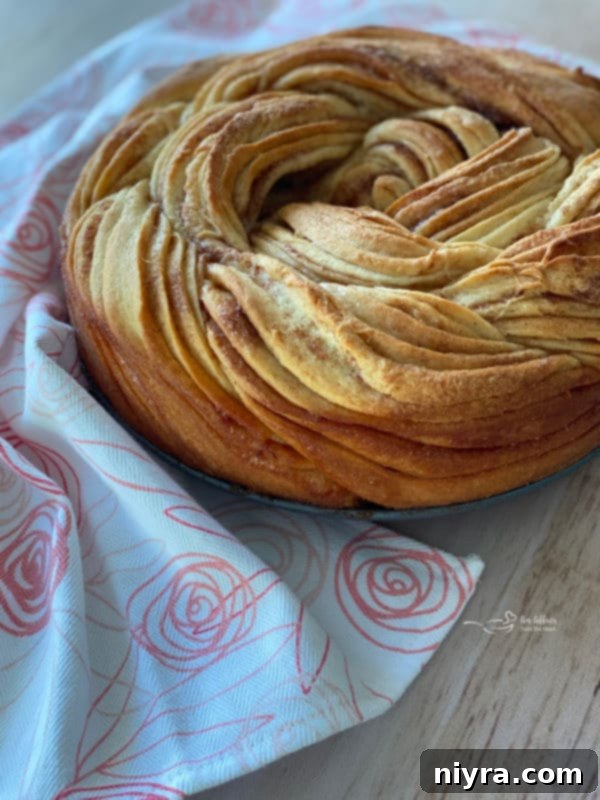
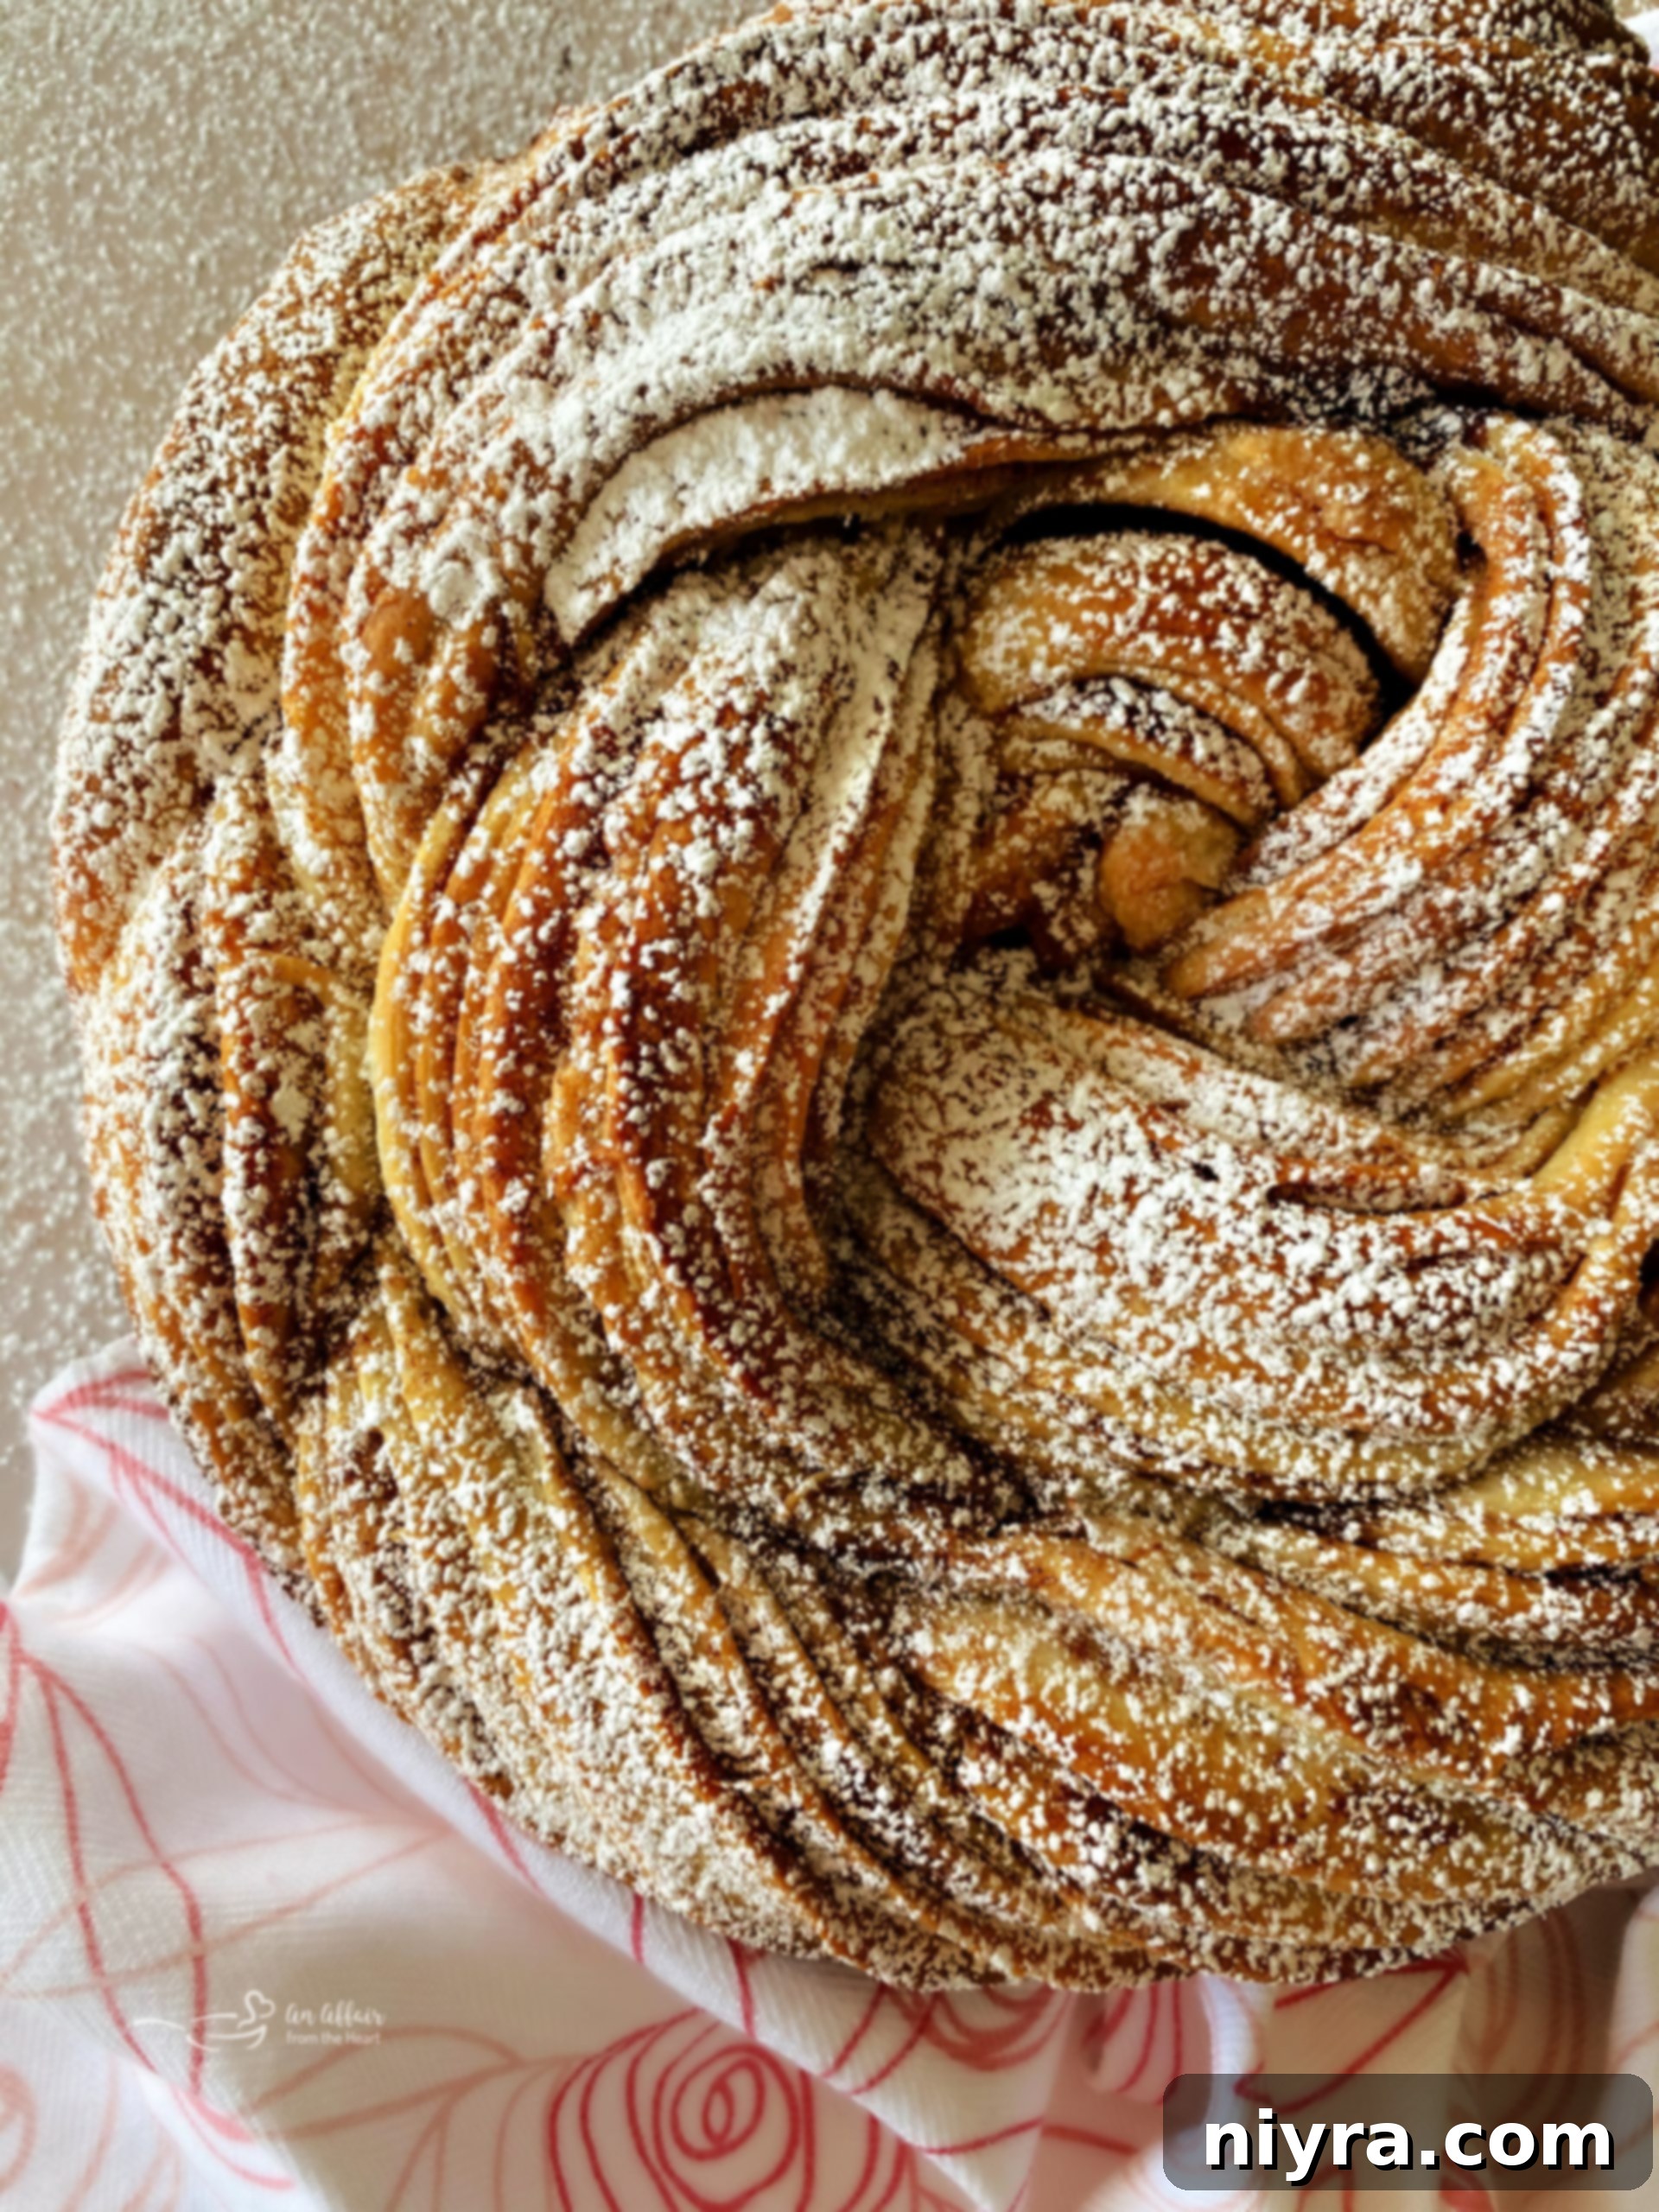
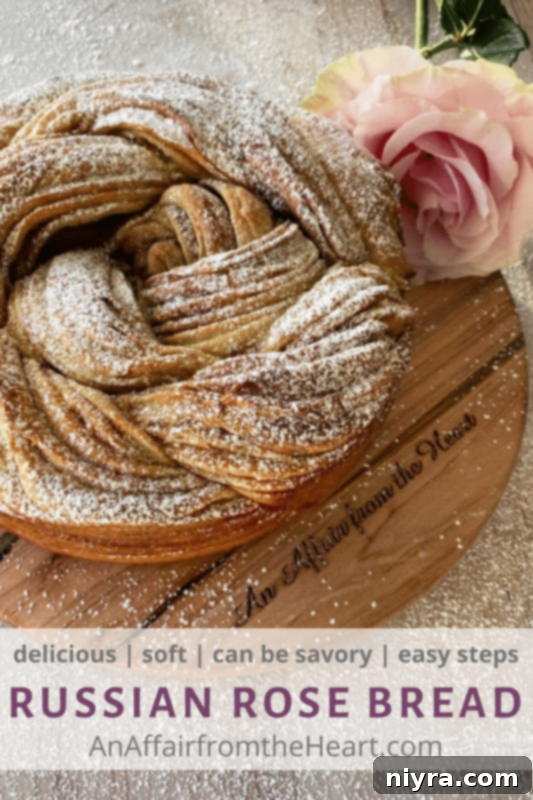
Discover the joy of baking with this delightful Russian Rose Bread, a beautifully braided cinnamon wreath baked to golden perfection. Infused with the comforting flavors of warm cinnamon, rich butter, and a subtly sweetened, tender dough, this rose bread recipe is an exquisite treat. It’s truly ideal for any festive occasion, from a special holiday dessert to an elegant brunch or a comforting breakfast indulgence. This unique bread isn’t just a feast for the taste buds; its stunning visual appeal makes it a centerpiece on any table.
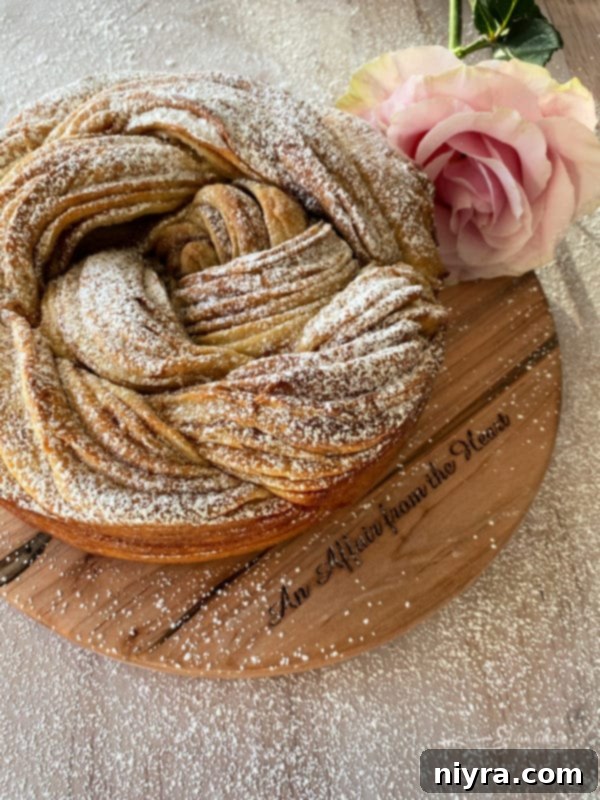
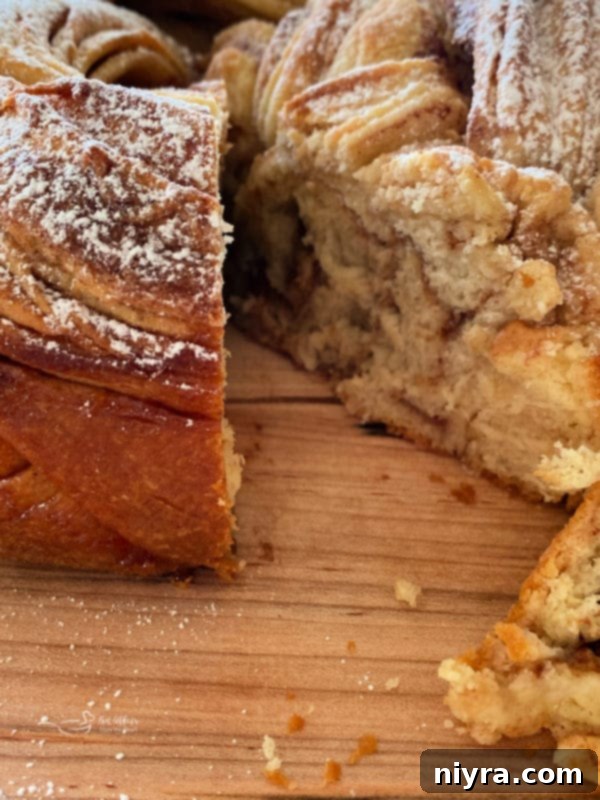
If you’re a connoisseur of sweet baked goods, especially those featuring soft, irresistible cinnamon centers, then prepare to fall in love with this remarkably soft and flaky Russian braided bread. Beyond its delicious taste, one of the most rewarding aspects of making this rose bread is the sheer enjoyment of the baking process itself! With a few straightforward steps, you can create a truly beautiful loaf that will impress both family and friends, making it a perfect homemade bread experience.
There’s an undeniable satisfaction that comes from engaging your creativity in the kitchen, particularly when it involves crafting something as wonderful as bread. This traditional Russian recipe offers a fantastic opportunity to feel accomplished with a creation that is as visually stunning as it is delicious. The intricate braiding gives it an elegant, artisanal look that is truly a joy to behold. Should you be searching for more engaging and fun baking projects, you might also adore my quick crescent knots, which are wonderfully versatile, and my decadent cinnamon banana streusel bread, a classic comfort food with a twist.
Unveiling the Beauty of Russian Rose Bread
Russian Rose Bread, affectionately named for the captivating floral design achieved through its unique braiding technique, is a delectable yeast-based dough. While often associated with festive holiday baking, its delightful flavors and appealing presentation make it a wonderful choice for any time of the year you desire a truly special loaf. A truly remarkable characteristic of this versatile bread recipe is its adaptability; it can be prepared with either sweet or savory fillings, opening up a world of culinary possibilities. The sweet version, with its buttery cinnamon swirls, is a favorite for breakfast or dessert, while a savory twist can transform it into an impressive appetizer or a unique side dish.
Delightful Rose Bread Rolls: A Mini Indulgence
For those seeking an extra touch of festivity or simply wishing to experiment with a novel presentation, consider transforming this versatile dough into charming, individual mini Russian rose bread rolls. These bite-sized delights are absolutely perfect for sharing during holiday gatherings, serving at a special brunch, or even packaging as thoughtful homemade gifts. To create these individualized portions, simply divide the prepared dough into smaller, equal sections before beginning the braiding process, ensuring each roll achieves that ideal, personalized size and beautiful rose-like appearance.
The Art and Purpose Behind Braided Bread
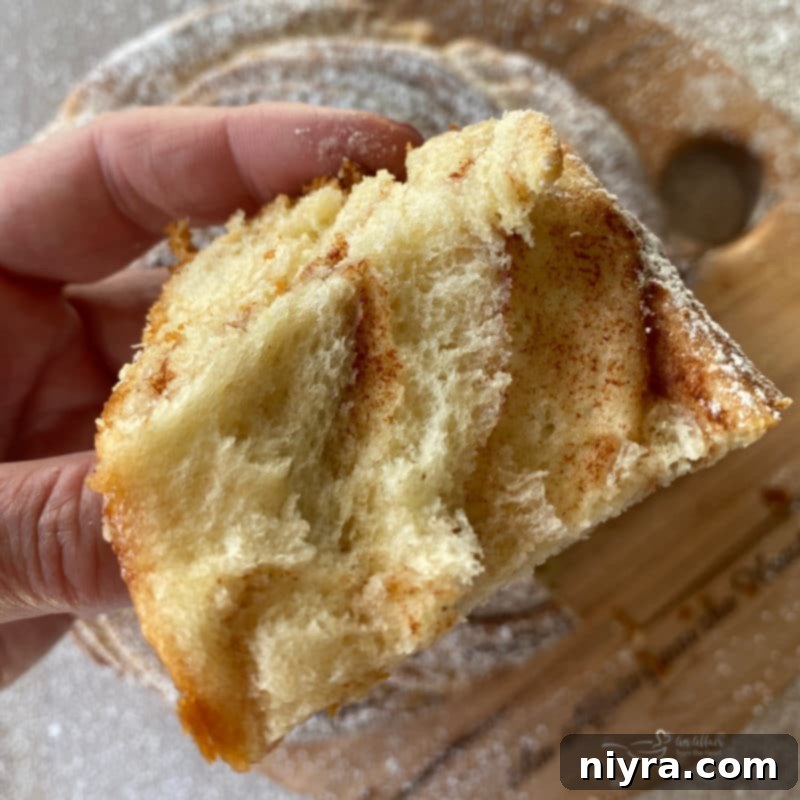
The tradition of braiding bread, especially for recipes like this cinnamon-infused Russian Rose Bread, serves dual purposes: it creates an absolutely **astonishing and appetizing** visual masterpiece, and it enhances the bread’s texture and flavor profile. The intricate weaving of the dough strands gives the bread an overall elegant, floral look, which is precisely why it earned its beautiful moniker, “Russian Rose.” This aesthetic appeal elevates a simple loaf into a truly special creation, perfect for celebrations or simply making an everyday meal feel more luxurious.
Beyond its captivating appearance, another crucial reason for braiding bread lies in its ability to truly allow the various flavors to meld and intertwine within the bread. As the dough twists and turns, the layers of filling (like our sweet cinnamon butter) are distributed throughout, ensuring that every bite delivers a harmonious burst of taste and a wonderfully soft, moist texture. This layering creates pockets of flavor and a tender crumb that is simply unmatched by unbraided loaves.
Essential Ingredients for Authentic Russian Rose Bread
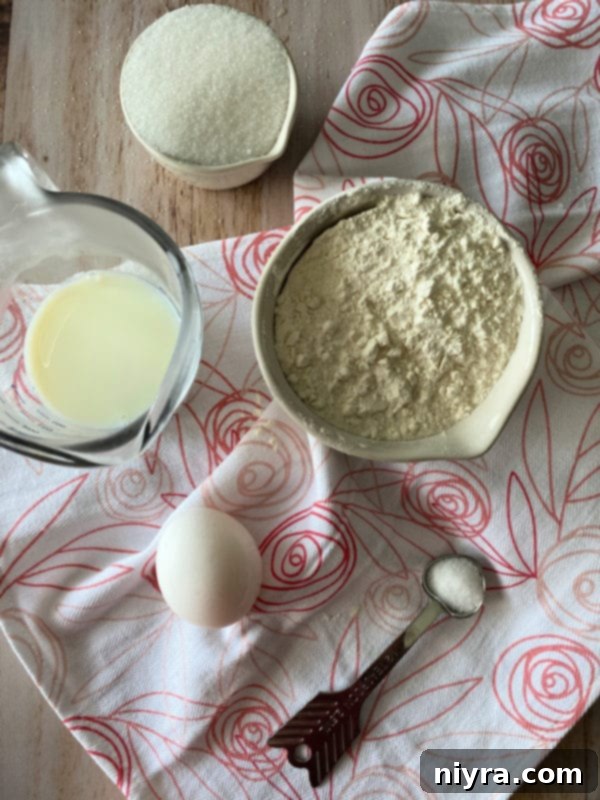
Crafting this magnificent Russian Rose Bread relies on a precise combination of high-quality ingredients, each playing a vital role in achieving its signature soft texture and rich flavor. Understanding the function of each component will help ensure your baking success:
Active Dry Yeast: This is the heart of any good yeast bread. You will need active dry yeast to provide the essential leavening agent, allowing the dough to beautifully rise and achieve its light, airy texture. Ensuring your yeast is fresh and properly activated is key to a successful bake.
Milk: Milk is crucial for two reasons: it helps activate the yeast and contributes to the bread’s tender crumb and rich flavor. It’s absolutely vital to ensure your milk is heated to a specific temperature, ideally between 105° and 115° Fahrenheit. If the milk is too hot, it can kill the yeast, preventing the dough from rising. If it’s too cold, the yeast won’t activate properly, leading to a dense loaf. A kitchen thermometer is your best friend here!
Water: Warm water plays a crucial role in dissolving the dry yeast and jump-starting its activity. Just like with milk, temperature control is paramount; ensure the water is precisely 110°F to create the perfect environment for yeast proliferation without causing harm.
Butter: Butter is a star ingredient, enriching both the dough and the luxurious filling, contributing a wonderful depth of flavor and a soft, moist texture. Make sure you have softened butter for both mixing into the dough and spreading smoothly for the filling – this ensures even distribution and a truly decadent taste.
Granulated Sugar: For this classic sweet Russian Rose Bread, sugar is essential for both flavor and for helping the dough achieve a beautiful golden crust. If you opt for a savory variation, you can significantly reduce the amount to just a couple of tablespoons, enough to feed the yeast without imparting sweetness.
Salt: A small amount of salt is indispensable for balancing the flavors in the bread, enhancing the sweetness and bringing out the nuanced notes of the other ingredients. Any common type of salt, such as table salt or fine sea salt, will work perfectly.
Egg: A lightly beaten egg acts as a binder, lending richness and contributing to the dough’s tender, fluffy structure. It also adds a lovely golden hue to the baked bread.
All-Purpose Flour: The foundation of our dough, all-purpose flour provides the necessary structure and elasticity. While you might experiment with bread flour for a chewier texture, all-purpose flour yields a wonderfully soft and tender bread suitable for this recipe.
Ground Cinnamon: The star of our sweet filling, ground cinnamon is mixed with softened butter and sugar to create that irresistible, aromatic swirl that defines this rose bread. Its warm, comforting spice is truly what makes this recipe sing.
Powdered Sugar: An optional but highly recommended finishing touch, powdered sugar is perfect for dusting over the cooled bread, adding an extra layer of sweetness and a beautiful, delicate appearance.
To Dust or Not to Dust: The Powdered Sugar Debate
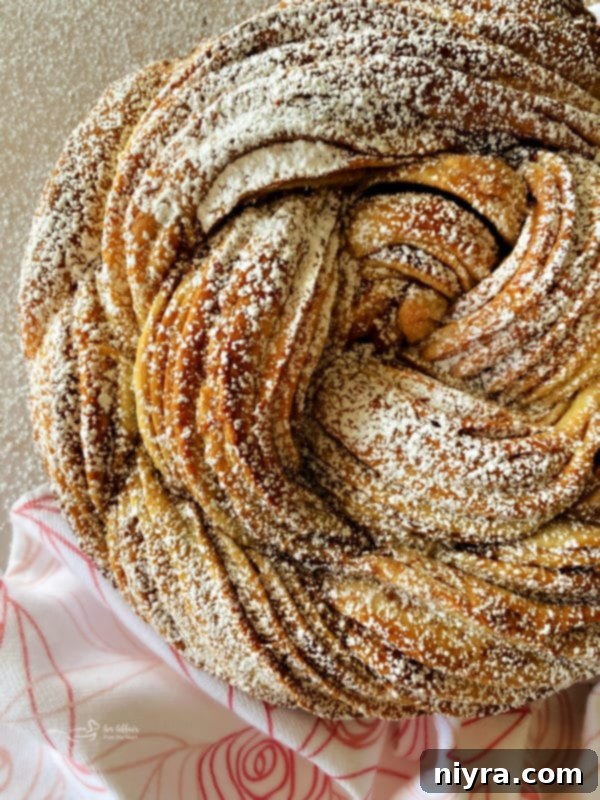
The decision to dust your freshly baked Russian Rose Bread with powdered sugar is entirely a matter of personal preference, offering a simple way to customize its sweetness and presentation. If you’re aiming for an extra layer of sugary delight and a classic, elegant finish, then a generous dusting of powdered sugar is definitely the way to go! It adds a touch of visual charm and a delicate sweetness that perfectly complements the cinnamon filling.
However, the powdered sugar is completely optional. If you prefer to keep things a bit lighter, or simply don’t have any on hand, feel free to omit it. The bread is wonderfully delicious on its own, showcasing the rich flavors of cinnamon and butter without additional adornment. Both presentations are equally beautiful and delicious, so choose what best suits your taste and occasion.
Creative Savory Options for Russian Braided Bread
While famously delicious as a sweet treat, the versatile dough of Russian braided bread lends itself beautifully to savory interpretations. For a truly unique and flavorful twist, consider replacing the traditional cinnamon and sugar filling with a medley of savory ingredients. The possibilities are virtually endless, allowing you to create a bread that perfectly suits your palate or complements any meal. Imagine a vibrant **pesto** spread, perhaps combined with sun-dried **tomatoes** and a sprinkle of Parmesan cheese. You could also incorporate various **proteins** like shredded chicken or crumbled sausage for a more substantial loaf. Get creative with additions such as sharp **cheddar** cheese, diced **ham or turkey**, or even finely chopped **broccoli** for a delightful vegetable-filled bread. For an inspiring starting point, you might want to explore this fantastic pesto recipe, which can easily be adapted as a savory filling for your braided masterpiece.
Mastering the Art of Braiding Bread
The thought of braiding bread might seem a little intimidating at first glance, conjuring images of intricate culinary artistry. However, I assure you that it’s actually quite simple to achieve a stunning braided effect with just a little practice and patience! The process is far more forgiving than you might imagine, and the results are incredibly rewarding. Below, I’ve provided some clear, step-by-step photos to help guide you through each stage of this exciting process, making it easy to follow along. If you find yourself needing an even more visual demonstration, there are many excellent video tutorials available online that showcase different techniques for braiding bread, ensuring you can confidently create your own beautiful Russian Rose Bread.
Step-by-Step Guide: How to Make Russian Rose Bread
Embark on your journey to bake this exquisite Russian Rose Bread with these detailed instructions. Precision in temperature and technique will ensure a perfect, fluffy loaf every time.
Begin by gently **heating the milk in a saucepan over low to medium heat.** Your goal is to **scald the milk** until a thin, delicate skin forms on its surface, reaching a temperature of precisely **170°F**. It is crucial not to let the milk boil. Once scalded, remove the saucepan from the heat and allow the milk to cool gradually to a lukewarm temperature, which should be between **105°-110°F**. This specific temperature is vital for the yeast to activate correctly without being destroyed.
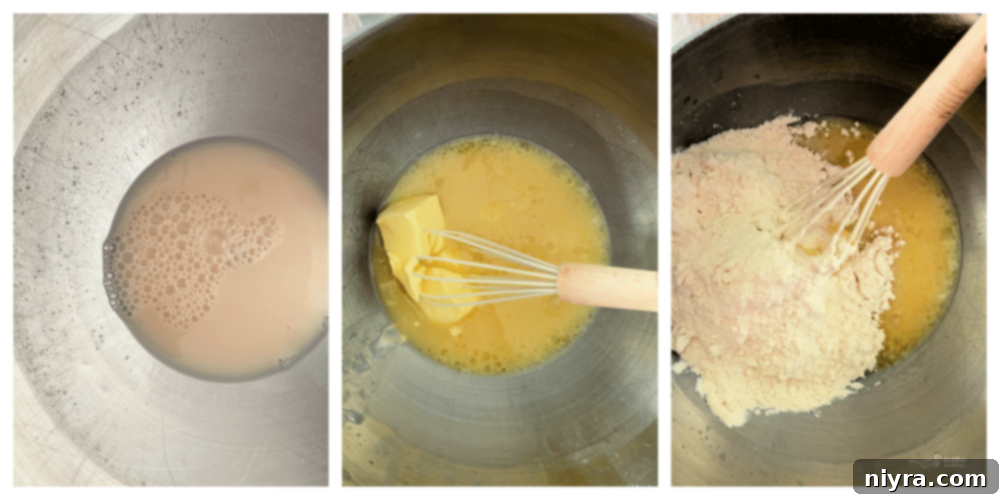
Next, in a spacious large bowl, **dissolve the active dry yeast in warm water, ensuring the water is exactly 105°F.** Whisk the yeast and water together until they are fully combined. Then, allow this mixture to **proof for a minimum of 5 minutes**. You’ll know the yeast is active and healthy when a creamy, foamy layer appears on the surface, indicating it’s ready to work its magic.
Subsequently, **incorporate the granulated sugar, salt, softened butter, the cooled warm milk, and the lightly beaten egg** into the yeast mixture. Begin to mix in **two cups of all-purpose flour**, continuing to mix until the batter becomes smooth and free of lumps.
After that, gradually mix in the **remaining 2 cups of flour** until the dough comes together, becoming cohesive and easy to handle. This process can be done manually, kneading by hand, or by utilizing the dough hook attachment of your stand mixer, which is often a more efficient method. For me, using the stand mixer took approximately 5 minutes to achieve the desired consistency.
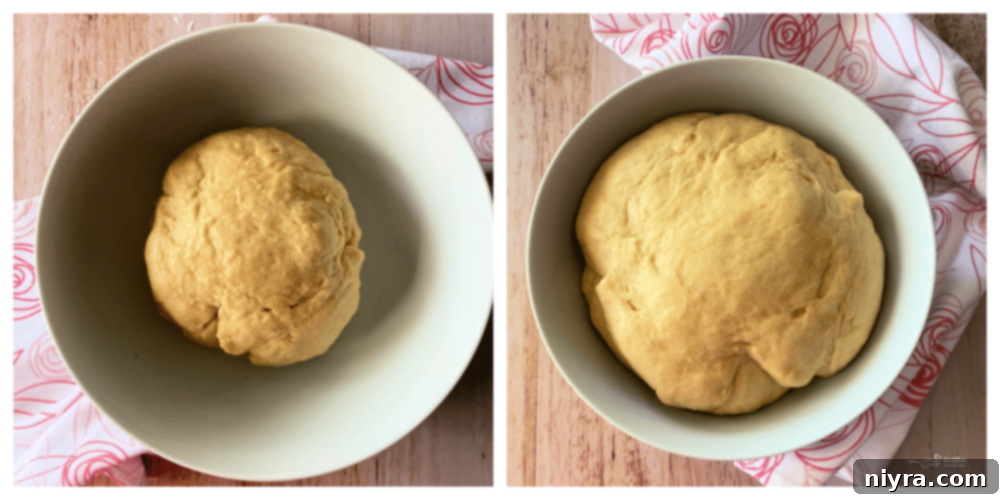
Once adequately kneaded, the dough should present as **smooth and beautifully elastic**. Lightly coat a large clean bowl with a small amount of oil. Place the prepared dough ball into the oiled bowl, turning it over a few times to ensure it is evenly coated in the oil. This prevents sticking and promotes a good rise.
Generously cover the bowl with plastic wrap or a clean kitchen towel and allow the **dough to rise in a warm, draft-free place** until it has visibly doubled in size. This crucial first rise will typically take around 90 minutes, depending on the warmth of your environment.
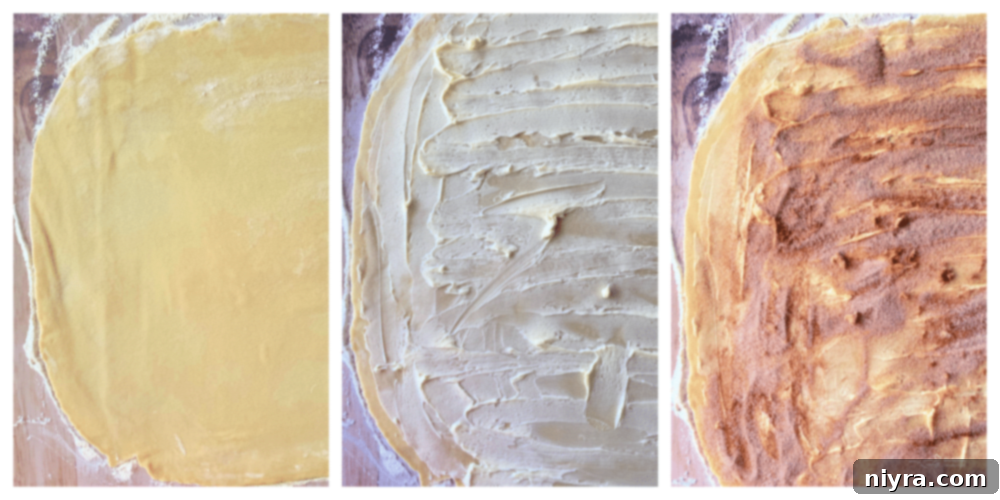
Next, transfer the risen dough to a large, clean **surface generously dusted with flour**. Using a rolling pin, **roll the dough ball into a large, even rectangle**. Aim for a consistent thickness to ensure even baking.
With a rubber spatula, **spread the softened butter evenly over the entire surface of the dough rectangle**, extending almost to the edges. In a separate small bowl, mix the **granulated sugar and ground cinnamon together**. Then, generously **dust this fragrant cinnamon-sugar mixture over the top of the butter**, ensuring full coverage.
Starting from one of the longest sides of the rectangle, carefully **roll the dough tightly, pinwheel style, into one long, uniform tube**. Ensure the roll is snug to create beautiful swirls in the finished bread.
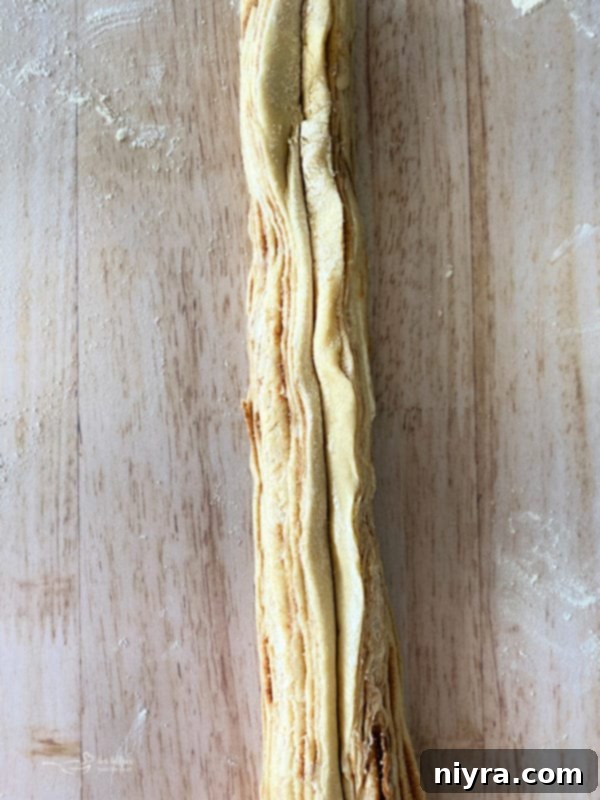
Next, using a very sharp knife or a pizza cutter, carefully **slice the dough “tube” lengthwise, all the way through, down the center**. This action will expose the beautiful cinnamon-sugar layers inside. Gently turn the cut edges outwards, fanning out the layers to prepare for braiding. You are essentially creating two long, filled strips from your single rolled tube.
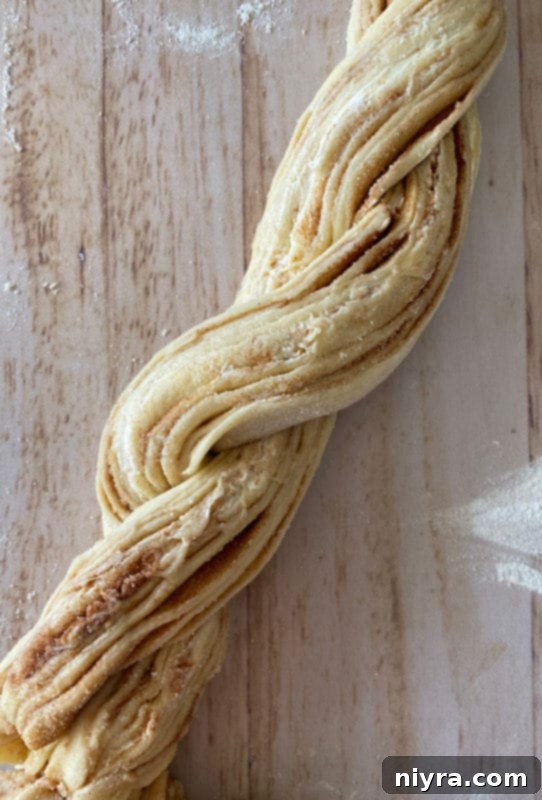
Then, **firmly pinch the bottom ends of the two dough strips together** to secure them. Carefully begin crossing the two exposed, cut sides over one another, one at a time, to create a beautiful, continuous twist. Work gently to maintain the integrity of the layers.
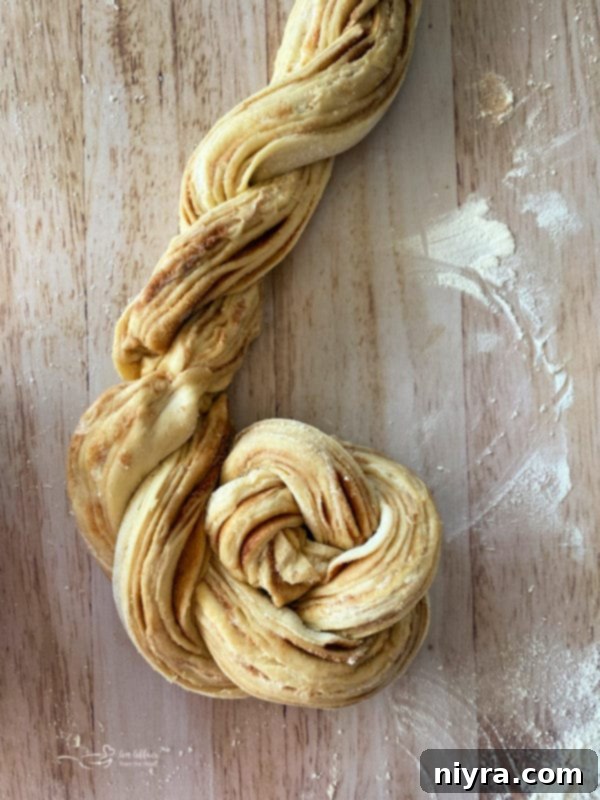
Once twisted, carefully **coil the entire twisted dough strand into a neat circle**, tucking the end underneath to form a seamless wreath shape. This circular form is what gives the “rose” effect.
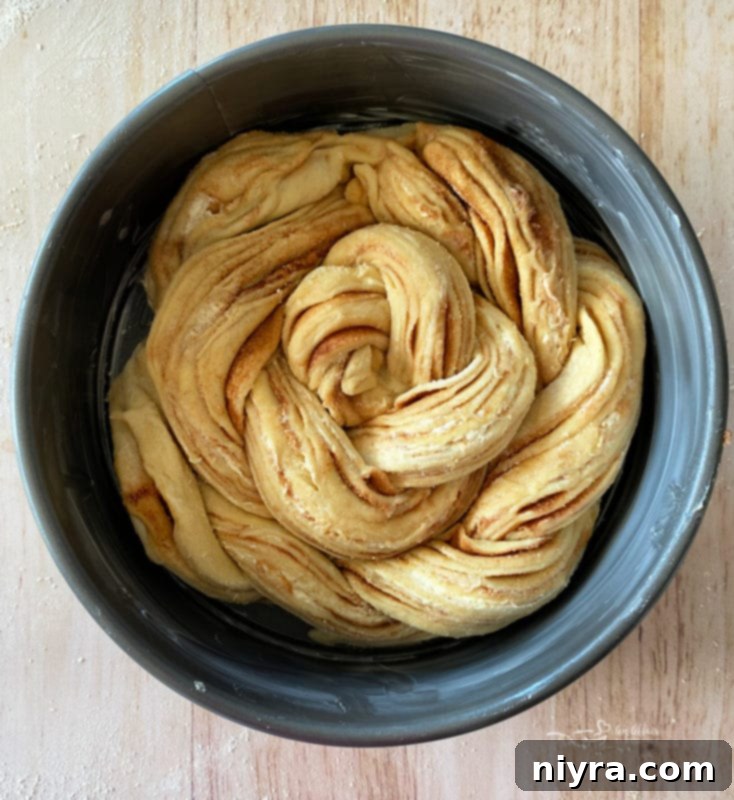
In the meantime, prepare your baking vessel by **greasing both the bottom and the sides of a springform pan** thoroughly to prevent sticking. This ensures easy release of your beautiful bread once baked.
Next, with care, **place the coiled, shaped bread into the prepared springform pan**. Here’s a helpful tip: For easier handling, you can remove the sides of the springform pan, gently “slide” the bottom plate underneath the delicate dough coil, and then replace and secure the sides. This method is often much simpler than attempting to lift and transfer the entire dough wreath, which could distort its shape.
Once the bread is nestled in the pan, **cover it loosely with a slightly dampened towel** and allow it to undergo a second rise for another 30 minutes or so. This final proofing will ensure an even lighter and fluffier texture.
As the bread completes its second rise, **preheat your oven to 375° Fahrenheit** so it’s ready for baking.
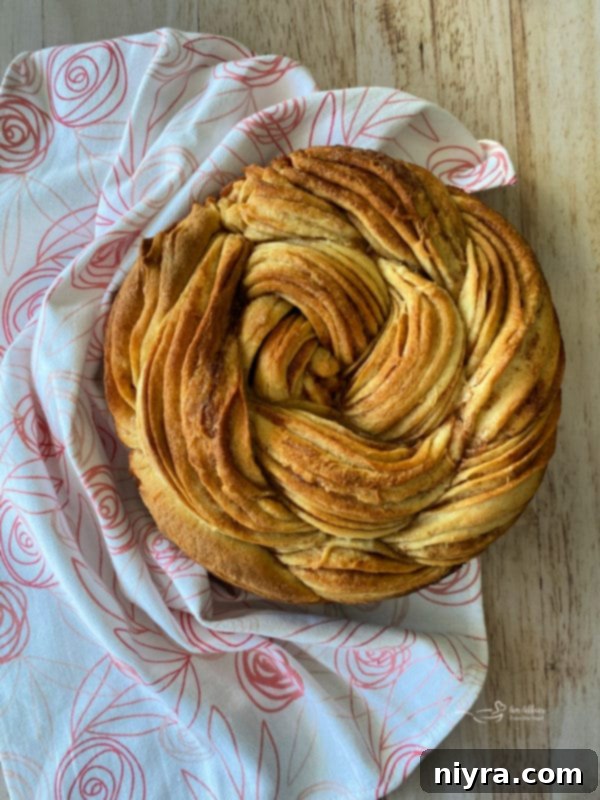
Carefully place the pan into the preheated oven and **bake the bread for approximately 25-30 minutes**. You’ll know it’s perfectly baked when the center is cooked through and the top has achieved a beautiful, rich golden-brown hue, indicating a delicious, caramelized crust.
Finally, once baked, remove the bread from the oven and allow it to **cool completely on a wire baking rack**. This allows air circulation, preventing the bottom from becoming soggy. If desired, give it a beautiful **dusting with powdered sugar** just before serving, adding that extra touch of sweetness and visual appeal.
Expert Notes and Essential Tips for Baking Perfect Cinnamon Bread
Achieving a truly perfect Russian Rose Bread, with its tender crumb and rich cinnamon swirls, is easily within reach with these crucial tips:
- **Precision in Temperature is Paramount:** One of the most critical factors for successful yeast bread is maintaining precise temperatures for your liquids. It’s absolutely essential that the **lukewarm milk remains between 105°F and 115°F**, and the **warm water for yeast activation is exactly 105°F**. Investing in a reliable kitchen thermometer is highly recommended, as these specific temperatures are key to ensuring the yeast is active and thriving, allowing your dough to rise beautifully. Too hot, and the yeast dies; too cold, and it won’t activate.
- **The Importance of Scalded Milk:** For the best possible texture and crumb in your bread, always **scald your milk on the stovetop** as the recipe directs. Scalding helps to denature proteins in the milk that can inhibit gluten development, resulting in a softer, more tender finished product. After scalding, remember to cool it down to the specified lukewarm temperature before adding it to the yeast.
- **Confirm Yeast Activation:** You can confidently proceed with your recipe once you observe that the **yeast is fully proofed**. This is indicated by the formation of a creamy, foamy layer on the surface of your yeast and warm water mixture. If you don’t see this foam after 5-10 minutes, your yeast may be old or the water temperature was off, and it’s best to start with a fresh batch.
- **Optimal Storage for Freshness:** To maintain the delectable freshness of your baked Russian Rose Bread, ensure it is **stored in an airtight container** once completely cooled. It will keep well at room temperature for a day or two, but for extended freshness, it’s best to store it in the refrigerator. If you don’t plan on enjoying the entire loaf within a few days, this bread freezes exceptionally well! Simply wrap it tightly in plastic wrap and then foil, and it can be stored in the freezer for up to 2-3 months. Thaw at room temperature and warm gently before serving for that fresh-baked taste.
LOVE IT? PIN IT!
Don’t want to forget this incredible recipe? Make sure to pin this Russian Rose Bread to your favorite Pinterest board to save it for later! It’s the perfect way to keep your go-to baking inspiration organized and easily accessible for your next culinary adventure.
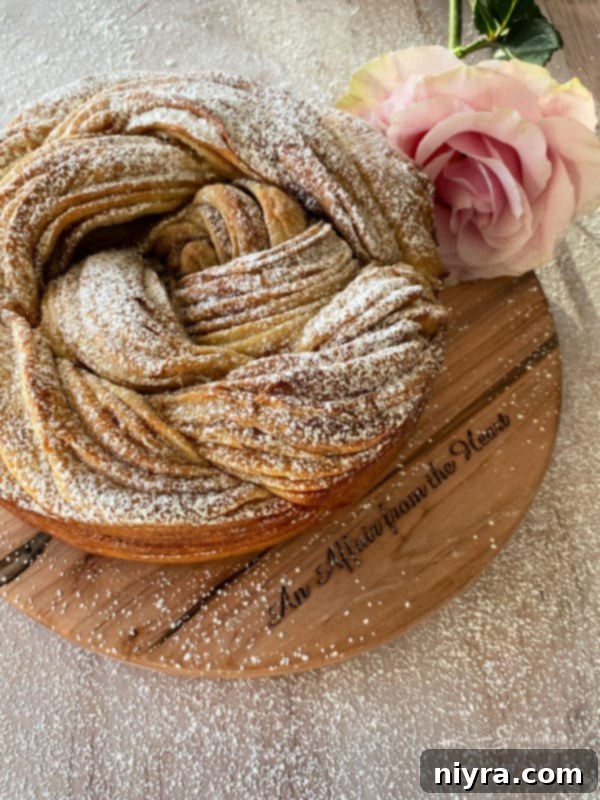
This charming presentation board, on which my delicious Russian Rose Bread often makes its debut, was a thoughtful and cherished gift from my dear friend, Julie, over at Hostess at Heart! It perfectly complements the rustic beauty of homemade bread.
 Celebrating a Decade: 10th Anniversary Giveaway!
This delightful recipe for Russian Rose Bread is proudly featured as part of my special recipes to honor my 10th Anniversary celebration! This particular rose bread recipe was chosen specifically because it allowed me to share another one of my true loves: fresh flowers. There’s just something inherently joyful about them!
During the challenging times of the Covid lockdown last year, like many, I found myself navigating through some quite intense feelings of depression. While I’m certain I wasn’t alone in this experience, I discovered a simple yet profound solace. On my weekly grocery trips, I started buying myself a small bouquet of flowers from the store, ensuring I always had fresh blooms gracing my kitchen counter. As these beautiful arrangements eventually dried out, I would carefully separate them, saving the best parts to repurpose into charming little vases scattered throughout my home, each adding a much-needed touch of cheer and vibrancy. It’s a practice of self-care and finding beauty that I’ve lovingly maintained for almost a year now.
Exquisite Floral Delivery for Every Occasion
When it comes to sending flowers to loved ones, my absolute go-to is always Bouqs. From the very first time I received one of their stunning bouquets, I was completely captivated. Their flowers are renowned for being freshly cut and are delivered directly to your door via FedEx, ensuring maximum freshness and longevity. I particularly appreciate the thoughtful inclusion of a small card that shares details about the farmer who cultivated them, offering a wonderful connection to their origin. Knowing where my flowers come from adds another layer of appreciation. Given my deep affection for fresh flowers, I knew that for this anniversary giveaway, I absolutely wanted to share this joy with one fortunate winner.
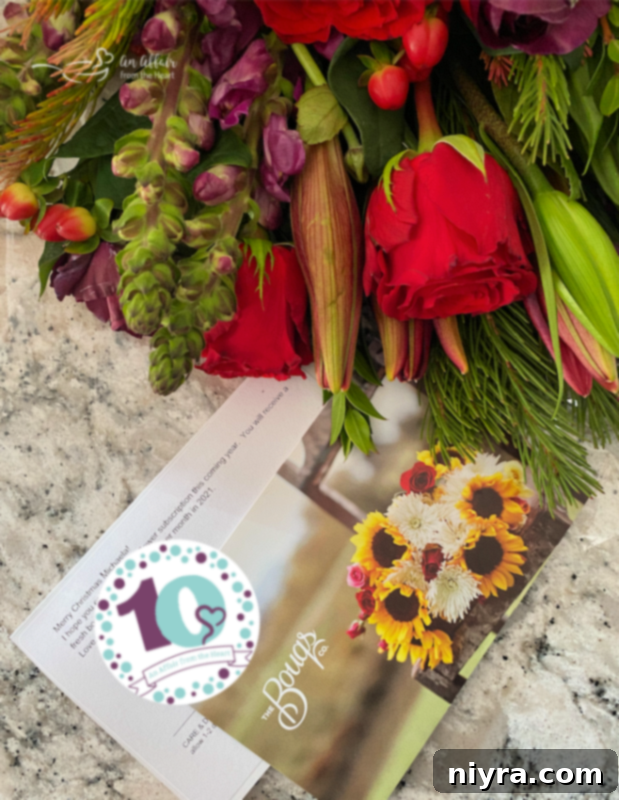
The fortunate winner of this special anniversary prize will receive a magnificent Bouqs bouquet of fresh flowers, shipped directly to their doorstep from me. These vibrant blooms are guaranteed to brighten their home and surroundings, spreading a little bit of happiness. (Please note that the specific flowers included will differ from those pictured above, but they will be equally as breathtakingly pretty and fresh!).
In addition to the beautiful floral arrangement, the winner will also proudly receive one of my limited edition anniversary t-shirts! This grand celebration features a total of 11 amazing gifts, with an astonishing combined value of over $1500, including a coveted KitchenAid mixer! You can delve into all the exciting details about the array of gifts and easily enter for your chance to win right here on this blog post, or simply use the entry form below!
ENTER TO WIN ALL of the PRIZES HERE

a Rafflecopter giveaway
Other Irresistible Baked Recipes You’ll Love
If you’ve enjoyed the process of baking and the delicious results of this Russian Rose Bread, you’re in for a treat with these other fantastic baked goods from my kitchen. Each recipe offers a unique flavor profile and a satisfying baking experience:
- **Lemon Sweet Rolls** (pictured above): Brighten your day with these zesty, soft rolls, a perfect balance of sweet and tangy.
- **Polish Donuts (Pączki)**: Indulge in these traditional, rich, and often fruit-filled Polish donuts, a true holiday favorite.
- **Cheesy Bacon Pull-Apart Bread**: A savory delight that’s perfect for sharing, packed with cheesy, bacony goodness.
- **Cinnamon Pull-Apart Bread**: Another fantastic cinnamon-spiced loaf, designed for easy sharing and maximum flavor.
- **No-Knead Crusty Dutch Oven Bread**: Experience the simplicity of artisan bread making with this unbelievably easy, yet incredibly delicious, crusty loaf.
I can almost smell the warm cinnamon and sweet dough emanating from your kitchen! Let’s get baking some exquisite Russian Rose Bread, and create a truly memorable treat. 
LIKE THIS RECIPE?
Don’t forget to give it a ⭐️⭐️⭐️⭐️⭐️ star rating and
leave a comment below the recipe!

Print Recipe
Russian Rose Bread
Equipment
- Glass Batter Bowl
- Nordic Ware Leakproof Springform Pan, 10 Cup, 9 Inch
- Rubber Spatulas
- Kitchenaid Stand Mixer
Ingredients
- FOR THE DOUGH
- 1 package 1.4 ounce dry active yeast
- 1/2 cup lukewarm milk between 105 and 115 degrees F ** SEE Notes
- 1/2 cup warm water 110 degrees F
- 1/3 cup butter softened
- 1/3 cup sugar
- 1/2 teaspoon salt
- 1 egg room temperature, slightly beaten
- 4 cups flour divided
- powdered sugar for dusting if desired
- FOR THE FILLING
- 1 stick 1/2 cup butter, softened
- 1/2 cup sugar
- 1 Tablespoon cinnamon
Instructions
- Heat milk in a saucepan. Scald the milk, don’t burn. Remove from heat and cool until lukewarm.
- Dissolve the yeast in warm water in a large bowl. Whisk to combine, and let proof for at least 5 minutes.
- Add in sugar, salt, butter warm milk and egg. Mix in 2 cups of the flour, mixing until smooth.
- Mix in the remaining 2 cups of flour, until dough is combined and easy to handle. (you can do this by hand or use the dough hook attachment of your mixer, which is what I did. It took about 5 minutes)
- The Dough will be smooth and elastic-like. Coat the bowl with a bit of oil, Place the dough ball in the bowl, turning it over a few times to makes sure it’s coated in oil.
- Cover the bowl and let the dough rise in a warm place until it’s doubled in size. (about 90 minutes)
- On a large surface, dusted with flour, roll the dough into a large rectangle.
- Using a rubber spatula, spread the butter over the top of the entire rectangle. Mix sugar and cinnamon together and dust over the top of the butter.
- Starting at one of the long sides of the rectangle, roll the dough, pinwheel style into one long tube.
- Using a sharp knife, slice the “tube” lengthwise all of the way through, and turn the cut edges outward, exposing the layers inside.
- Pinch the bottom ends together and carefully begin crossing the sides over one another to create the twist.
- Coil the twist into a circle.
- Grease the bottom and the sides of a springform pan.
- Place bread into the springform pan. (tip: remove the sides of the pan and “slide” the bottom under the dough, then replace the sides. It’s so much easier than trying to lift it.)
- Cover the pan with a slightly damp towel and let it rise for another 30 minutes or so.
- Preheat oven to 375 degrees.
- Bake for about 25-30 minutes, or until the center is baked and the top is golden brown.
- Cool on a baking rack. Dust with powdered sugar before serving, if desired.
Notes
Nutrition
 Celebrating a Decade: 10th Anniversary Giveaway!
